

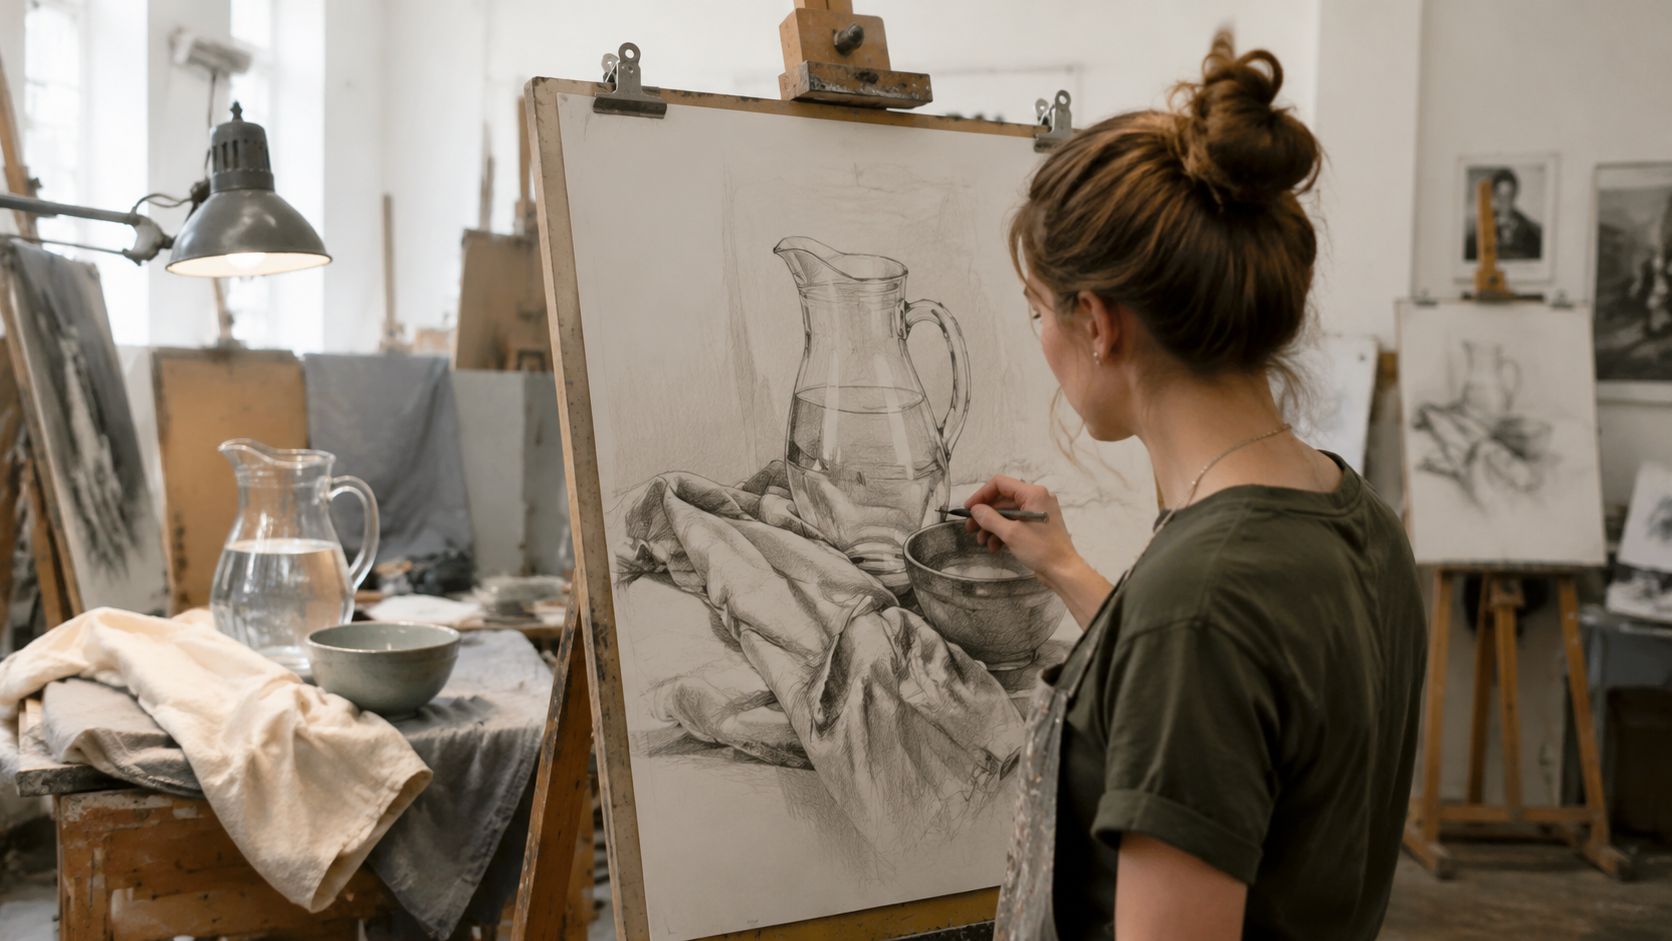
You're in the studio with a sketchbook open, a lamp switched on, and a still life in front of you that looks promising until you put pencil to paper. The jug, cloth, and bowl have outlines, the shading is there, but the drawing still feels oddly flat. That's usually the point where shadow stops being a side detail and becomes the thing that makes the whole image work.
If you've ever stared at a shaded object and thought, “I've drawn the shape, so why doesn't it look real yet?”, you're already asking the right question. The answer is usually light direction, cast shadow, and form shadow, because drawing is never just about the object itself, it's about how light hits it, wraps around it, and lands on the surface around it.
For a simple starting point, it helps to look at how photographers arrange light before a shoot, because the same logic applies to drawing objects from life. A useful reference is ecommerce lighting tips, since it reminds you that light placement changes shape, mood, and clarity before you make a single mark. If you want a matching beginner task, this learning to see lesson demo is a useful companion for observing what is in front of you, not what you assume is there.
Table of Contents
- Setting the Scene With Light
- What It Really Means to Cast a Shadow
- How Light Direction Shapes a Drawing
- The Four Shadow Types Every Student Should Know
- Shadows in Practice Across Traditional and Digital Art
- Building Shadow Studies Into a University Ready Portfolio
- Common Shadow Mistakes and How to Fix Them
- Using Shadow Work to Strengthen Your Creative Progression
Setting the Scene With Light
You're in a college studio, and the lamp is doing more work than the pencil. The student in front of the still-life arrangement has already blocked in the jug, the folded cloth, and the ceramic bowl, but the drawing still reads as a set of symbols instead of solid objects. That happens when light is treated as decoration, not as the force that reveals volume, surface, and space.
Before any mark-making begins, ask one question, where is the light coming from? A glass jug and a ceramic bowl can look completely different under the same outline if the lamp sits to the left, above, or behind them. The drawing is built from the conversation between light source, object, and the space around it, not from contour alone.
Practical rule: decide the light source first, then draw the shadows that logically follow from it.
That simple habit changes the way students work. It also makes the drawing more convincing, because the viewer can read where the object sits, how it turns, and what surface it rests on. If you want to practise this with one object and one lamp, start with a single mug on plain paper, then add the shadow rather than guessing it later.
For students aiming at portfolio work, this stage matters because it shows control of observation, not just tidy lines. It's also where a simple study starts to look like evidence of thought, which is exactly the kind of visual discipline assessors notice in Level 3 work. Shadow is the missing layer that turns a flat outline into something that occupies space.
What It Really Means to Cast a Shadow
A cast shadow is the shape an object throws onto another surface when it blocks light. If you hold your hand up beside a lamp in a dark room, the dark shape on the wall is the cast shadow. A form shadow, by contrast, sits on the object itself, usually on the side that turns away from the light, like the darker curve on a sphere or the shaded plane on a folded box.
Two kinds of darkness, two different jobs
The easiest way to separate them is to imagine a torch in a dark room. The torch hits a chair, the chair blocks the beam, and the shape on the floor is the cast shadow. The chair itself still has a darker side, and that's the form shadow, which tells you the chair has volume rather than being a cut-out.
The two work together. The cast shadow anchors the object to the surface, while the form shadow shows how the object turns in space. If you only shade the object and ignore the shadow on the ground, it can look like it's floating. If you only draw the shadow shape and ignore the surface of the object, it can feel like a stencil.
A good habit is to mark both lightly in pencil before you refine anything. That gives you a structure to check against, and it keeps you from overworking the drawing too soon. In a Level 3 portfolio, that kind of distinction shows observational maturity, because the student is no longer just copying an outline, they're reading how light behaves.
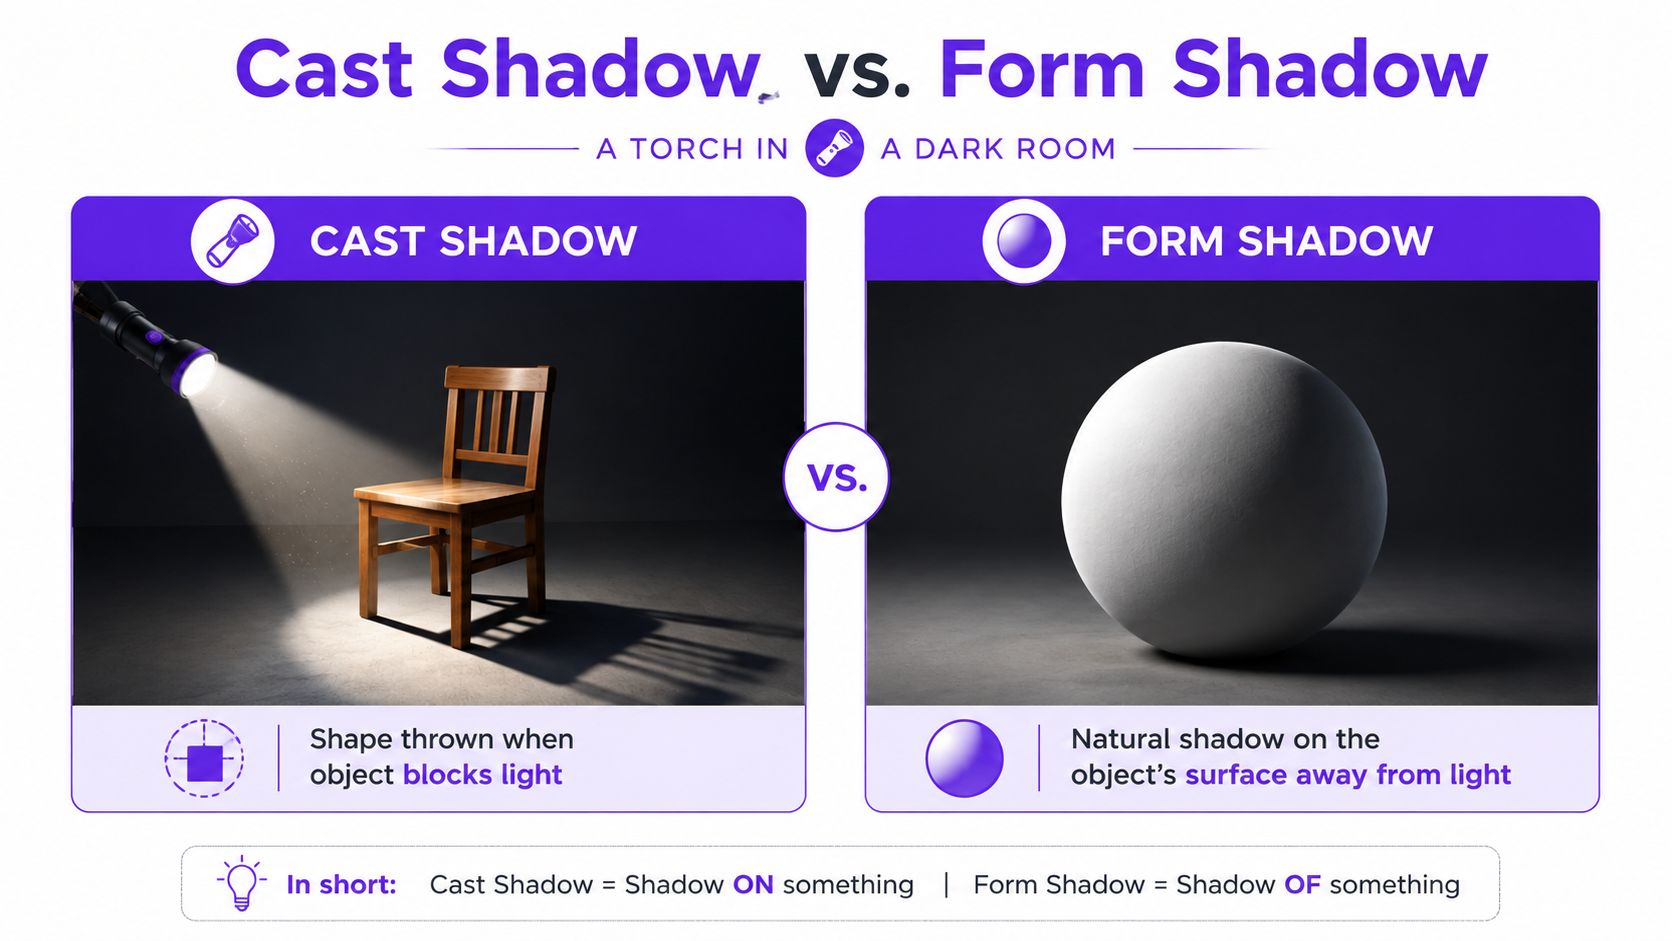
A shadow is not one thing. The object can have a shadow on its surface, and the surface beside it can have another shadow shaped by the same light.
How Light Direction Shapes a Drawing
Light direction changes the whole reading of a drawing, even when the object stays the same. Put an apple on paper and move the lamp, and you'll see the shadow change from a shallow shape to a dramatic wedge. That's why choosing light direction is a compositional decision, not a random one.
Four directions that tell different stories
Front lighting sits near the viewer's line of sight, so the apple looks flatter and the cast shadow gets weaker. Side lighting is more revealing, because it creates a clear turn across the form and a longer cast shadow that pulls across the page. Top lighting drops the shadow directly underneath, which can feel strong and compact, while back lighting turns the object into a silhouette with a rim of light around it.
The important thing is consistency. If the apple's highlight says the lamp is on the right, but the cast shadow falls as if the lamp is on the left, the drawing breaks. Assessors notice that kind of mismatch quickly, because it shows the student hasn't yet connected observation with structure.
A simple test helps. Draw the apple four times, once for each light position, and note how the shadow edge changes from sharp to soft, long to short, obvious to barely visible. That exercise teaches you that shadow isn't filler, it's evidence of how the object sits in light.
For a digital drawing reference that shows how observation and timed rendering can support accuracy, this graphite eye time lapse is a useful example of controlled mark-making in action.
The Four Shadow Types Every Student Should Know
A mug on a tabletop can show you most of what you need to know. The mug throws a cast shadow onto the table, its curved side holds a form shadow, the darkest band where the curve turns away from the lamp becomes the core shadow, and a second shadow can overlap where another object blocks the light again. That layered reading is what makes a study feel observed rather than guessed.
The names matter because they help you see
Cast shadow is the distinct shape thrown onto nearby surfaces. Core shadow is the darkest part of the form's turning edge, where light stops reaching directly. Form shadow sits on the object itself, on the side away from light, and reflected light is the softer light bounced back into that darker area from the table or wall.
The term cast-on-cast shadow is useful when one cast shadow falls across another, because it explains why the tone can become more complex on a crowded tabletop. A mug beside a spoon, for example, can produce a shadow that overlaps another shadow, which changes the reading of depth. That's the kind of detail that helps a sketch look studied rather than decorative.
Here's the easiest way to train your eye. Label the shadow types on your own sketch before you refine the shading, even if the labels are temporary. That turns observation into active analysis, and it helps Level 2 and Level 3 students show that they understand what they're looking at, not just what they've copied.
Useful habit: squint at the subject, then map the darkest areas first. It's faster to correct a simple shadow structure than to rescue an overworked drawing later.
Shadows in Practice Across Traditional and Digital Art
In a classical still life, the shadow often does half the storytelling. Think of a single window light falling across a bottle, a pear, and a folded cloth, the kind of setup you see in seventeenth-century Dutch painting. The cast shadows stretch across the table, the forms turn gently into darkness, and the whole arrangement feels grounded because the light logic is steady from object to object.
A digital illustrator uses the same logic, just with different tools. In Photoshop or Procreate, the shadow under a character's boots might sit on a separate layer, adjusted with blend modes until it feels like it belongs to the ground plane. The software changes the workflow, but not the visual rule, the object still needs a believable relationship to the light source.
A quick urban sketching page works the same way. A student drawing a bicycle on wet pavement with a fountain pen and grey wash can make the shadow into the strongest shape on the page, especially when the ground reflects just enough light to soften the darkest areas. The result depends on looking carefully, not on having expensive materials.
That transfer across media matters for portfolio work. Tutors want to see that you can observe light consistently whether you're using graphite, ink, paint, or a tablet. If your eye understands where the shadow belongs, the tool becomes a choice rather than a limitation.
Building Shadow Studies Into a University Ready Portfolio
Shadow studies become useful to admissions tutors when they show process, not just a finished result. A strong portfolio page can include a tonal value scale, a small diagram of the light source, and a timed observational study that shows how your thinking developed from first mark to final refinement. That balance between raw observation and edited presentation matters in UK art and design applications, where process pages often sit beside finished pieces.
What to include on the page
| Portfolio Page Structure for Shadow Studies | Suggested Count |
|---|---|
| Tonal scale | 1 |
| Light source diagram | 1 |
| Timed observational study | 1 |
| Annotated process page | 1 |
| Comparative study with two light sources | 1 |
The point is not to upload everything. A portfolio with too many near-identical pages can hide the strongest work, while a smaller selection can show a clearer line of development. If you're unsure how to organise digital pages, this guide to making an online art portfolio is a practical starting point for structuring images and reflection.
University guidance also gives you a clear clue about what matters. One major university advises applicants to submit a concise digital portfolio with initial research, exploratory work, finished pieces, and short reflective text, while another recommends around 15–20 pages/images and asks for sketchbook pages, ideas sheets, and samples that show how ideas developed from initial research to final work, University of Edinburgh portfolio guidance and Bath Spa portfolio advice. That makes shadow studies useful, because they show technical control and the ability to explain decisions.
For students looking at wider support and practice ideas, A Level art practice and resources can help frame how shadow studies sit within ongoing course work. Keep your pages clean, photograph them under even diffused light, and write short notes about why you placed the shadow where you did.
Common Shadow Mistakes and How to Fix Them
Most shadow problems come from seeing too little, not caring too little. A drawing can look flat because the student shaded everything the same, drew outlines where tonal edges should be, or forgot the reflected light that stops a dark area from becoming a hole. These are useful mistakes, because each one shows you exactly what the eye still needs to learn.
Typical errors and practical fixes
- Uniform shading across the form: This flattens the object, so squint and separate the light side, mid-tone, and dark side before you blend anything.
- Outlines used as shadows: This makes the object look cut out, so replace the line with a softer tonal edge where the form turns.
- Missing reflected light: This makes the shadow side too heavy, so lift a little tone with a putty eraser and keep the darkest dark only where it belongs.
- Ignoring the cast shadow shape: This breaks the object's connection to the surface, so block in a simple geometric shape first, then refine the edge.
- Over-darkening without core shadow structure: This wipes out the turning form, so vary pencil pressure instead of pressing harder everywhere.
A desk lamp and three simple objects can solve most of this. Try a cube, a mug, and a spoon, then draw the shadows twice, once quickly and once with annotations that name the dark areas. That kind of remediation exercise gives you evidence of reflection as well as drawing ability.
Assessment focus: tutors can see improvement more clearly when you show the mistake, the correction, and the note explaining what changed.
For Level 2 and Level 3 work, that matters because it turns a problem into proof of progress. You're not hiding the weak page, you're showing that you can diagnose it and improve it. That is exactly the kind of independent thinking creative courses want to see.
Using Shadow Work to Strengthen Your Creative Progression
Strong shadow handling supports every step of creative progression, from A Level Art and Design to BTEC Extended Diploma, Foundation Diploma, and direct entry to BA Hons programmes. The reason is simple, if you can observe light properly, you can draw, paint, photograph, or design with more control. Shadow studies also show that you can build an idea gradually, which is useful in any course that values process as much as outcome.
Three things admissions tutors notice
First, reliable observational drawing. Second, evidence of iterative process, because your pages show change, not just one polished finish. Third, the ability to communicate mood or narrative through value, which is a key part of visual communication.
A small shadow sketchbook helps make that progression visible across terms. Keep it beside your main portfolio pages, then write a sentence or two about the light source you chose, the edge quality you noticed, or the way one object changed when the lamp moved. That running record gives you material for reflective commentary later.
If you carry the same habits into digital work, life drawing, and personal projects, shadow stops being a narrow exercise and becomes part of your whole practice. It helps you judge proportion, structure, atmosphere, and emphasis with more confidence. For students preparing university applications, that confidence often shows up in the portfolio before it shows up in conversation.
If you want structured support with drawing, portfolio pages, and progression into UK creative study, The Online College of Art & Design offers tutor-led courses that build these skills step by step, including guided work on shadow, observation, and presentation. Visit The Online College of Art & Design (OCAD) to see how its flexible courses can help you turn shadow studies into stronger portfolio evidence.