

You've covered a sheet with coloured bubbles, artist names, media ideas and ambitious words such as “identity” or “transformation”. It looks lively, but you're not sure what to do next. Your tutor asks which experiment came from the research, why you selected a particular material and how the final piece will answer your starting point. The map doesn't show those decisions.
That situation is common. A coursework-ready A Level Art mind map isn't judged by how crowded or decorative it looks. It should help someone follow the movement from an initial question, through research and practical testing, to a personal outcome. The same structure can support a classroom project, independent study, university portfolio preparation or a flexible route around limited time and equipment.
Table of Contents
- Why Most A Level Art Mind Maps Fail Coursework
- Anchoring the Map to Assessment Objectives
- Building the Map from a Central Question
- Three Worked Examples Across Common Themes
- From Coursework Map to University-Ready Portfolio
- Adapting the Map for Home, Adult and SEND Learners
- Audit, Refine and Export Your Final Map
Why Most A Level Art Mind Maps Fail Coursework
The most common failure is a pretty mind map with no assessable evidence. Students often create a colour-coded web of artists, styles, emotions and techniques, then leave it unchanged while the actual project develops elsewhere in a sketchbook. The result may show enthusiasm, but it doesn't show what you decided, what you tested or how one decision led to the next.
A broad artist list creates the same problem. Naming an artist isn't enough. You need to show what you noticed in that artist's work, which feature influenced your project and how you tested that influence in your own practical work. “I researched texture” is weak on its own. “I studied the compressed surfaces in this artist's work, then tested dry brush and layered tissue to create a similarly fractured surface” begins to show development.
Practical rule: Every major branch should answer at least one of three questions: what did I investigate, what did I do, and what changed because of it?
The UK subject content treats Art and Design as an integrated study of critical, practical and theoretical work. Students are expected to understand materials, processes and technologies, how images and artefacts communicate meaning, how art relates to historical, social and cultural contexts, and how genres, styles and traditions change over time. That means the map should connect those areas rather than isolate “research” from “making”.
Warning signs in an ornamental map
Look closely at your current map. These signs suggest that it needs rebuilding:
- Artist names without decisions: You've listed several practitioners but haven't written what you'll borrow, question or reject.
- Technique labels without tests: “Collage”, “print”, or “photography” appears with no dated visual trial attached.
- Commentary without artefacts: Your written reflections sit on a separate page and don't point to a photograph, drawing or material experiment.
- Branches with no next action: A thought ends with a keyword instead of leading to a specific investigation.
- No outcome: The map expands sideways but never narrows towards a resolved composition, object, image or installation.
A decorative brainstorm can still have a useful place at the beginning. It gives you permission to generate possibilities before judging them. Coursework evidence begins when you turn those possibilities into a visible chain of research, experimentation, review, refinement and presentation.
If you're uncertain whether the subject itself will suit your working habits, this guide to whether A Level Art is hard can help you distinguish the workload from the kind of thinking the course demands. The important point is that a mind map is not a poster about your project. It's a working record of how your project becomes more focused.
Anchoring the Map to Assessment Objectives
A strong map uses the four UK A Level Art and Design assessment objectives as its underlying structure. Each objective contributes 20–30% of the final qualification, so none should be treated as an optional extra. The Department for Education subject content and AQA's specification at a glance describe the objectives in closely related terms, although you should always check the specification for your own awarding body.
Put a central question or visual theme in the middle, then use AO1 to AO4 as four large branches. You can add practical sub-branches such as Context, Ideas, Materials, Processes, Recording, Evaluation and Outcome, but each should connect back to an objective.
How each assessment objective maps to a mind-map branch
| Assessment objective | Weighting | Expected evidence | Branch label |
|---|---|---|---|
| AO1 Develop ideas through sustained investigations, informed by contextual and other sources | 20–30% | Artist and cultural research, primary starting points, annotations and links to your own intentions | Context and ideas |
| AO2 Explore and refine resources, media, materials, techniques and processes | 20–30% | Practical tests, selections, comparisons, failures, changes and improved trials | Materials and processes |
| AO3 Record ideas, observations and insights and reflect critically on progress | 20–30% | Drawings, photographs, notes, voice recordings, dates and honest evaluation | Recording and review |
| AO4 Present a personal and meaningful response that realises your intentions | 20–30% | Final outcome, presentation decisions and explanation of how the work answers the investigation | Outcome and resolution |
The weighting doesn't mean you should make four separate mini-projects. The objectives work together. Research should influence making, making should produce observations, observations should lead to evaluation, and evaluation should shape the final response.
The best branch is not the longest branch. It's the one that makes your decision trail easiest to follow.
Write AO language in small labels beside your branches if that helps you audit the work later. You're not trying to decorate the sheet with assessment terminology. You're making it difficult for important evidence to disappear.
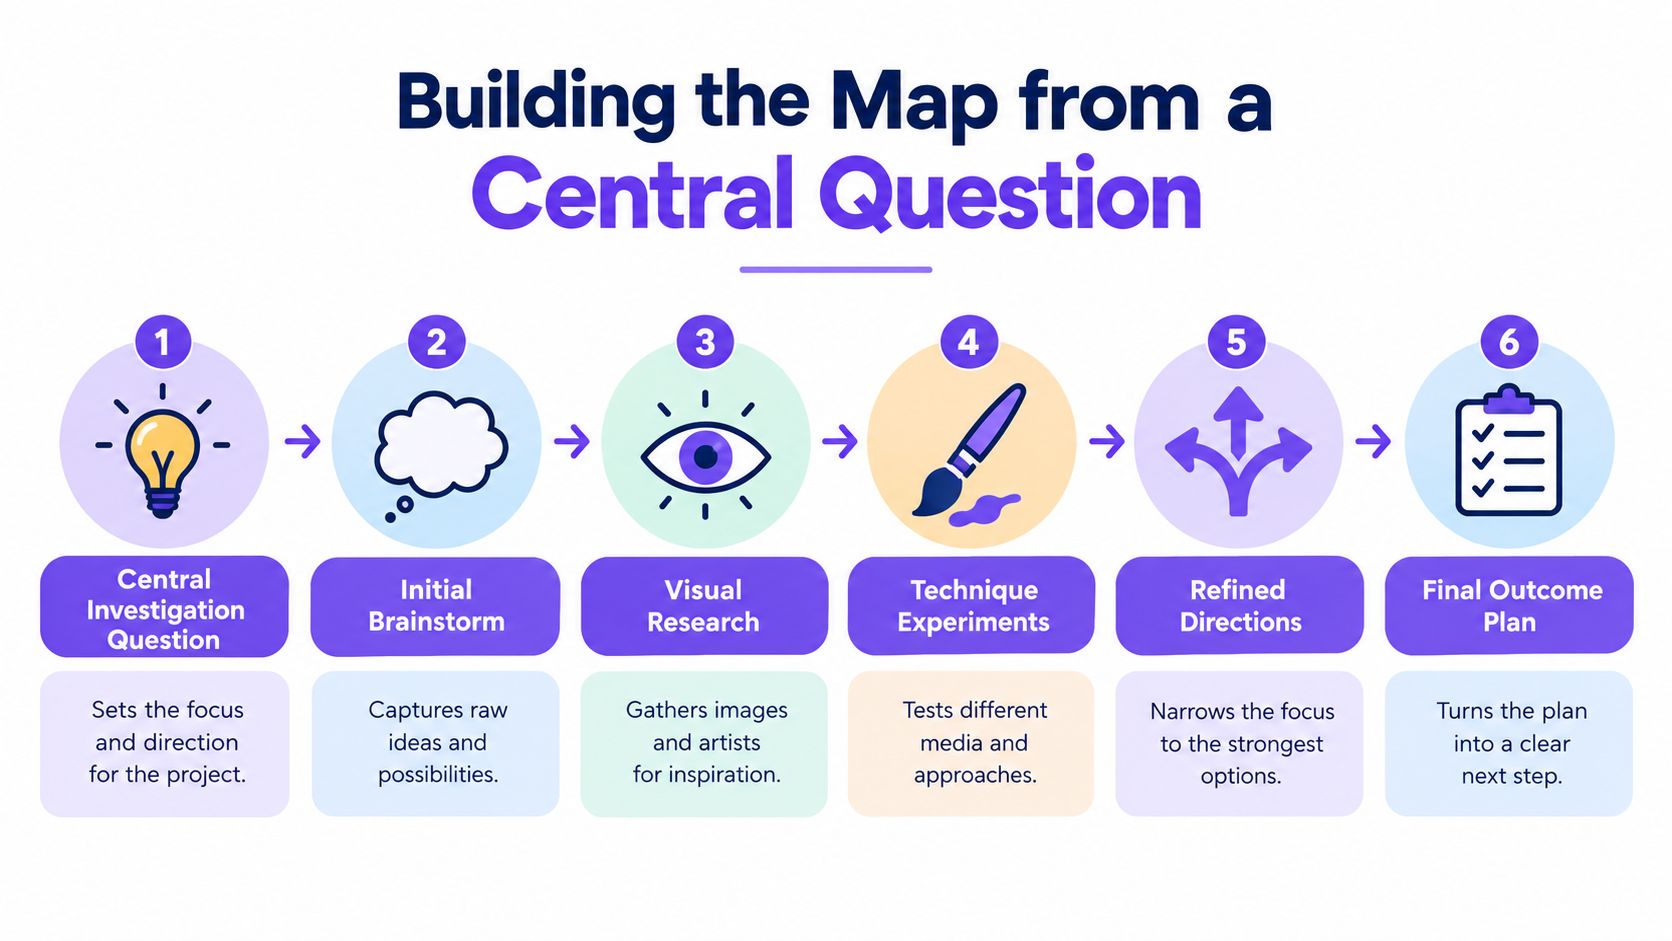
Building the Map from a Central Question
Start with one question that can generate practical decisions. “Nature” is a topic, but “How can fragile natural forms communicate the effects of neglect?” gives you something to investigate. “Identity” is broad, while “How can repeated family objects suggest identity without showing a face?” points towards subjects, compositions and possible materials.
Write the question in the centre, then let the first branches capture what you need to find out. A context branch might contain artists, historical references, local places, personal objects or social themes. Don't stop at names. Beside each source, write a short note such as “interested in repeated marks”, “questions the boundary between private and public”, or “uses scale to make ordinary objects feel threatening”.
The primary observation branch should bring the project back to your own experience. Add photographs you've taken, drawings from direct observation, collected textures, recorded conversations where appropriate, or notes about a place. Primary work helps prevent the project from becoming a collection of borrowed visual styles.
Next, develop materials and processes as linked experiments. For each test, attach a date, an image and a short annotation:
- Attempt: What did you try?
- Observation: What happened visually or physically?
- Decision: What will you keep, change or abandon?
- Next action: What will you test in response?
A failed experiment belongs on the map when it produces a useful decision. “The ink spread too evenly, so it lost the cracked texture I wanted. I'll reduce the water and print from a rougher surface” is more valuable than a photograph labelled “failed”.
Make the connections visible
Use arrows or coloured lines to show cause and effect. An artist's use of layered fragments might lead to a torn-paper test. That test might reveal an unwanted flatness, which leads to photographing shadows or introducing stitched elements. The result can then influence the planned composition.
Keep commentary beside the evidence it explains. AQA describes written and practical work as an integrated whole, so don't make the assessor search through unrelated pages to discover why a test matters. A photograph, annotation and next decision should operate as one small unit.
Finish with an outcome branch. Add likely scale, format, composition, materials, display method and intended meaning, but keep the plan open enough to change after further testing. A map should guide the work without pretending that discovery has already finished.
Three Worked Examples Across Common Themes
The same AO-aligned structure looks very different when the starting point changes. These examples are models of reasoning, not templates to copy.
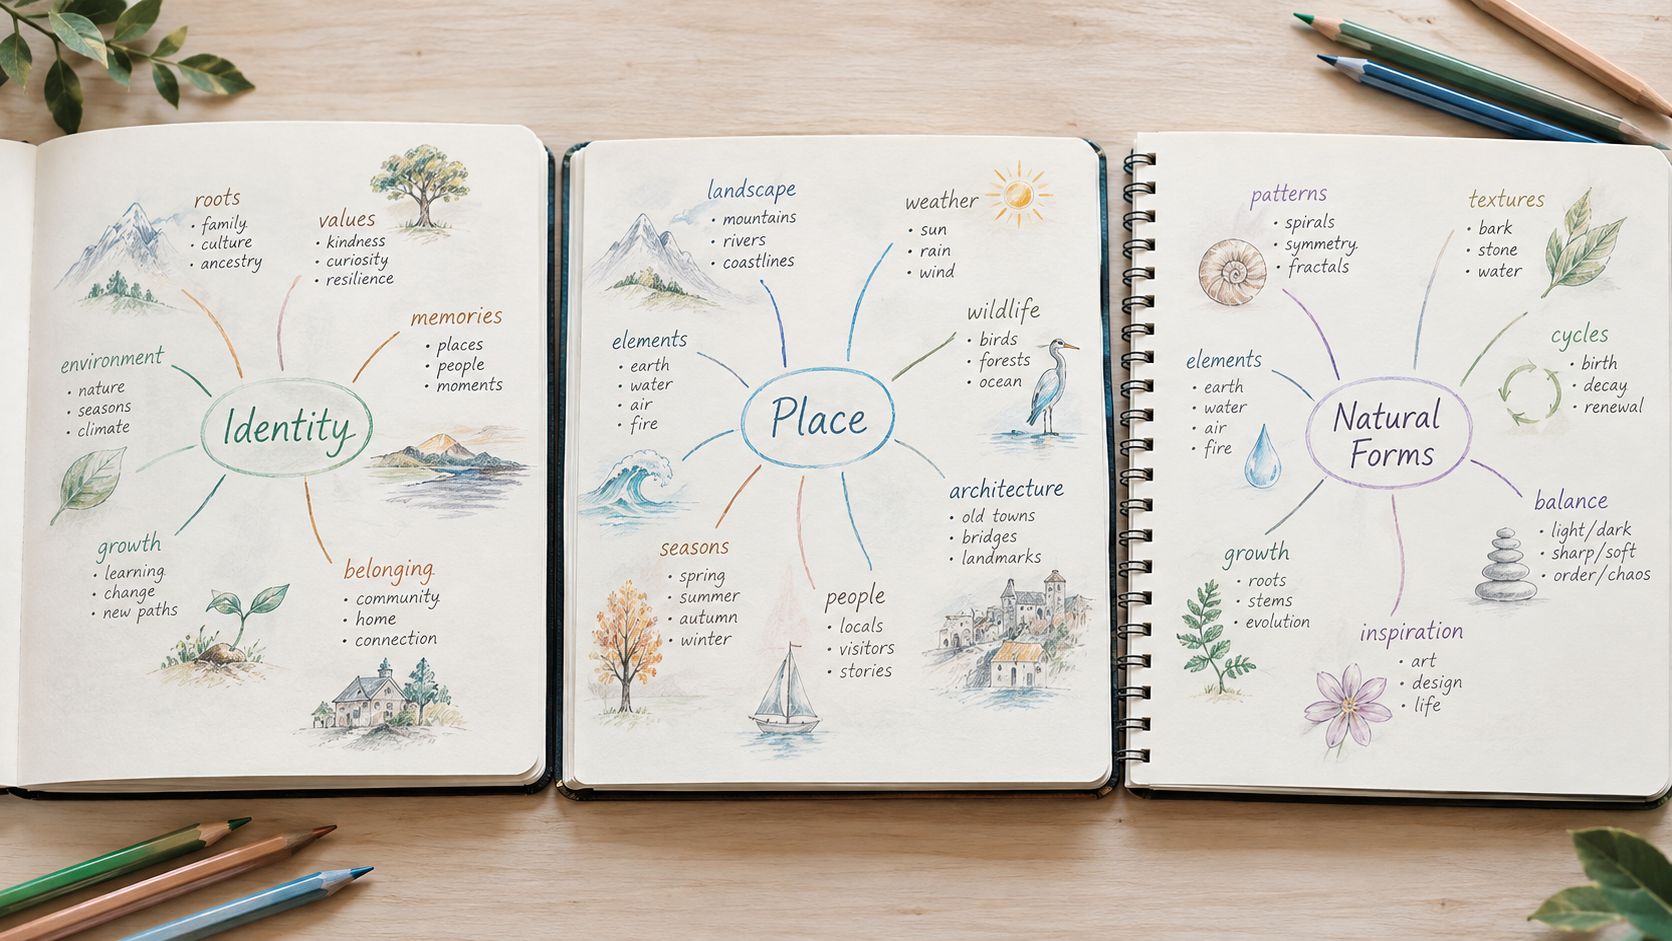
Identity
A useful central question might be, “How can personal identity be shown through objects rather than portraiture?” Contextual research could connect portrait artists with still-life traditions, family archives and contemporary work about memory. The practical branch might test photographing worn shoes, handwriting, jewellery or a repeated household object, then combine the images with tracing paper, transfer processes or drawn marks.
The development trail should show a narrowing decision. Perhaps the student discovers that direct photographs feel too descriptive, while cropped images and translucent layers suggest memory more effectively. The next experiment would then test scale, transparency and arrangement, not introduce another unrelated technique.
Place
For a project about place, the central question could be, “How can a familiar street be made to feel unstable?” Primary observation might include photographs taken at different times, quick drawings of signage and notes about sound, movement or neglected surfaces. Contextual research could lead towards artists who alter perspective, fragment architecture or use repeated marks to communicate atmosphere.
A failed test might involve a carefully drawn street scene that looks accurate but emotionally empty. That result can become a meaningful turning point. The student might crop the image, distort the perspective, layer acetate or print over found textures, then explain why the change better communicates uncertainty.
Natural forms
“Can delicate structures communicate strength?” offers a more focused route into natural forms. The student could study shells, seed heads, leaves or skeletal structures from direct observation, then test graphite, monoprint, wire, paper construction and close-up photography.
The research should affect the making. If a source artist uses repetition to create rhythm, the student might test repeated vein patterns rather than just reproduce the artist's subject. If a material collapses under its own weight, that physical failure can lead to a stronger outcome involving suspended forms or an altered scale.
In each example, the map becomes smaller and more selective as the project develops. A broad first branch is useful, but the final version should make the chosen direction, rejected options and reasons for refinement easy to see.
From Coursework Map to University-Ready Portfolio
A development map can become a portfolio-planning tool long before you submit a UCAS application. Universities often want evidence of visual research, idea development, selection, resolution and contextual awareness, not only a sequence of polished final images.
The University of Edinburgh asks applicants for one digital PDF portfolio of up to 20 pages and no larger than 50MB. Its published criteria include visual research and enquiry, idea development, selection and resolution, and contextual awareness. The guidance asks for initial research, investigative work, developing ideas, finished pieces and short explanatory text showing process, critical thinking and reflection. It also allows personal projects alongside school work. See the university's portfolio preparation and requirements guide before preparing your file.
Birmingham City University takes a different approach. Applicants submit a digital portfolio within 28 days of receiving an invitation, and the portfolio can include GCSE work, previous-year work, work in progress, sketches and photographs of physical work. Its guidance accepts PDF, PowerPoint or Word documents, with a stated 10MB file limit, and allows links to video, animation or moving-image work. Loughborough recommends approximately three projects, shown in detail, with around 20 individual pieces, sketchbooks and a recommended maximum file size of 20MB. These requirements are set out in the universities' portfolio guidance, so check each course rather than assuming one format applies everywhere.
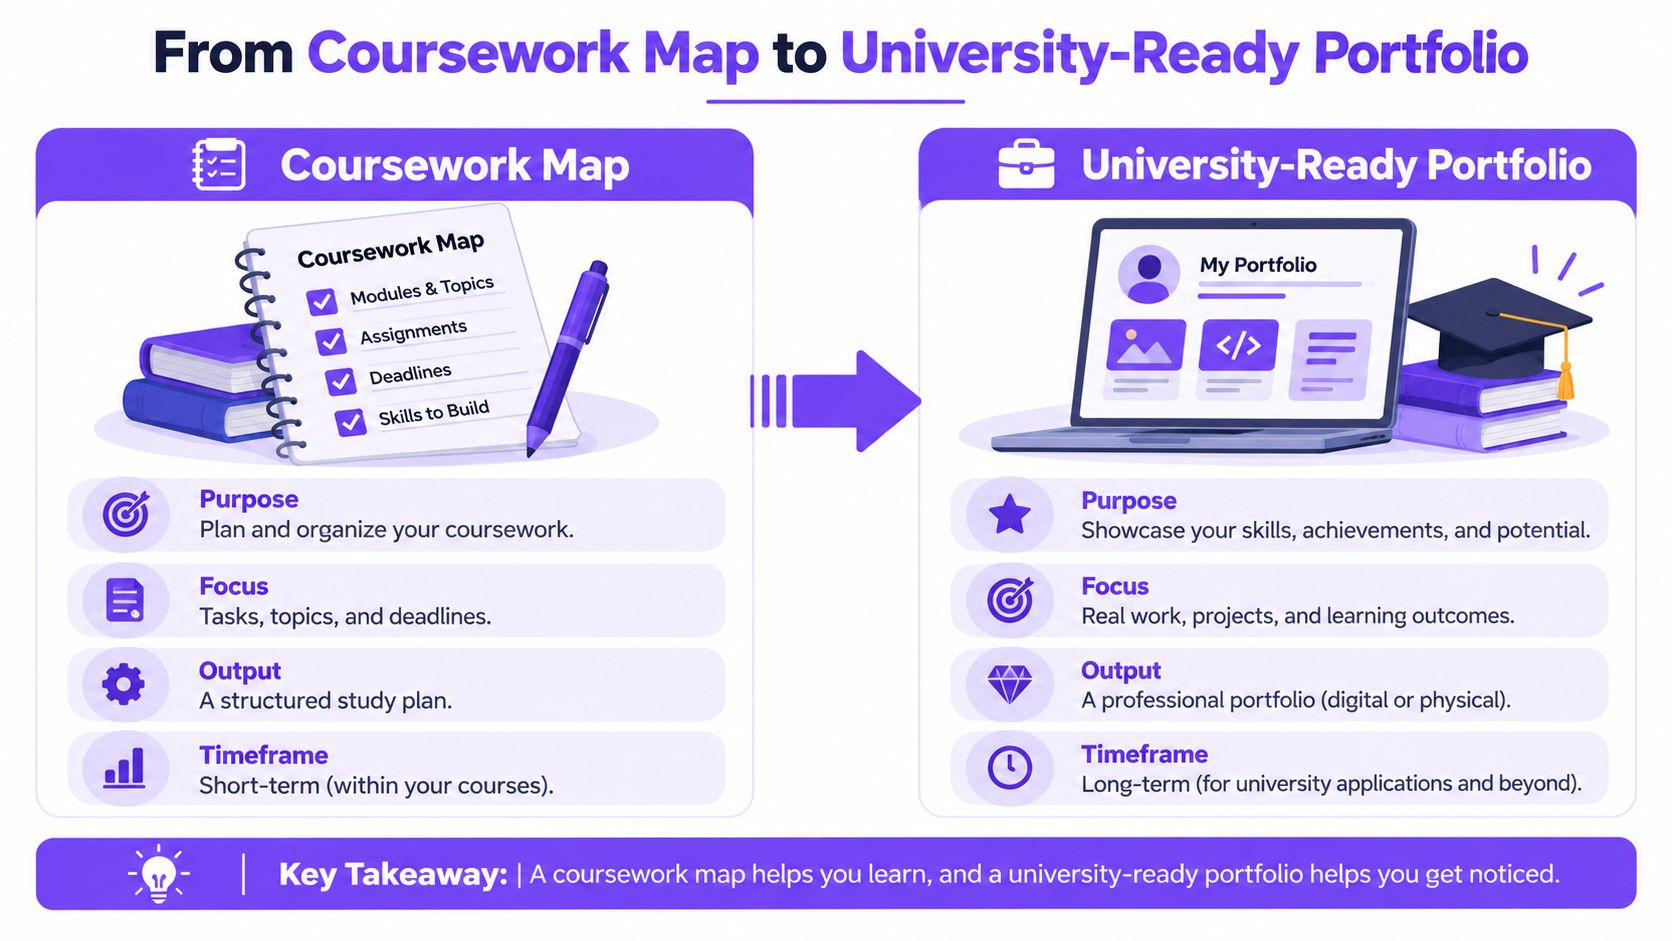
Your map should help you select evidence for different applications. Keep high-quality photographs of sketchbook pages, material tests, unfinished work and final outcomes. If physical work needs reproducing, High Quality Art Printing from The Print Warehouse Ltd. may help you produce clear presentation prints for review or documentation. You can also use this guide on making an online art portfolio to plan how your evidence will be presented digitally.
Adapting the Map for Home, Adult and SEND Learners
Most mind-map advice assumes a classroom, regular studio access and specialist equipment. Those assumptions exclude many capable artists. A home-educated student may work at a kitchen table, an adult may have short study sessions around employment or family commitments, and a SEND learner may need a map that reduces visual overload without reducing the ambition of the project.
Use the same evidence chain, but adapt the method. Phone photography can replace access to a darkroom. Paper, cardboard, recycled packaging, thread, found surfaces and household light sources can support serious experimentation when the annotations explain the choices. Voice notes can record evaluation when extended writing creates a barrier, provided they're dated, stored safely and connected to the relevant images or pages.
Design for access, not appearance
A simplified map may use one colour for research, one for making, one for recording and one for decisions. You might use larger text, fewer words per node, symbols, audio links or separate sheets instead of one crowded web. A tutor can agree review points so the learner knows when to pause, photograph work and choose the next experiment.
A smaller map with clear decisions can be stronger than a large map that overwhelms the project.
Adults often benefit from a decision-led map. Instead of adding endless possibilities, set a manageable sequence such as primary observation, contextual comparison, material test, review and refinement. The precise amount of work will depend on the qualification and individual circumstances, but every selected test should have a reason and a recorded response.
Document adjustments professionally. Explain that voice annotation, enlarged layouts, adapted tools or a slower working rhythm are part of the working process. Don't present access needs as an apology, and don't imply that every learner must use identical materials or produce evidence in an identical format. The SEND support packages available through specialist art education can help learners and tutors think about appropriate adaptations while preserving creative choice.
The map should also record constraints that affect decisions. Limited space may lead to smaller modular work. Limited drying time may favour photography or digital layering. Reduced tutor contact may make dated check-ins and clear next actions especially important. These aren't excuses added after the event. They're part of the context in which the work was made.
Audit, Refine and Export Your Final Map
Before submission, inspect every major branch against AO1, AO2, AO3 and AO4. Check that research connects to your own work, practical tests include selection and refinement, observations and reflections are dated, and the outcome demonstrates a personal response.
Use this quick audit:
- Evidence: Can you point to an image, page, object or recording for each major claim?
- Decisions: Does each important test say what changed and why?
- Connections: Are arrows or notes showing how research influenced materials, composition or meaning?
- Progression: Can another person follow the route from starting question to resolved outcome?
- Presentation: Have you recorded the final work clearly, including relevant scale, format and display choices?
Keep a large paper map for the studio if seeing the whole project helps you work. An A3 working version can be easier to update, while a digital board can hold photographs, recordings and links. Export a clean PDF archive at key points, but don't flatten the evidence so thoroughly that the development trail disappears.
If a branch has no evidence, either add the missing experiment or remove the claim. If commentary has drifted away from practical work, place the note beside the relevant image. If the map is still an artist-research tree, add a specific material test and an outcome decision. Run this audit throughout the project, not only on the final evening.
The Online College of Art & Design (OCAD) offers flexible, tutor-led Level 2, Level 3 and A Level courses in art and design, with portfolio-centred coursework, online studio resources and guidance towards degree applications. If you need structured support to turn an A Level Art mind map into assessed development, visit The Online College of Art & Design (OCAD) and explore the available study pathways.