

You've got the same problem a lot of art students hit at the desk. The portrait looks right in the face, but the hands go stiff, undersized, or strangely symbolic, and the whole drawing stops feeling alive. The fix isn't to copy one polished hand after another, it's to build the hand in stages so you can see what's there.
Drawing skills are foundational, not optional. Ofsted's review found that broad drawing skills were central to progression, and that traditional drawing skills underpinned much of the strongest work observed in Key Stages 1 and 2, while weaker craft and design knowledge often left spatial understanding and tactile qualities underdeveloped (Ofsted review). Hands are a perfect subject for that kind of study because they combine gesture, proportion, articulated form, texture and tone in one compact drawing.
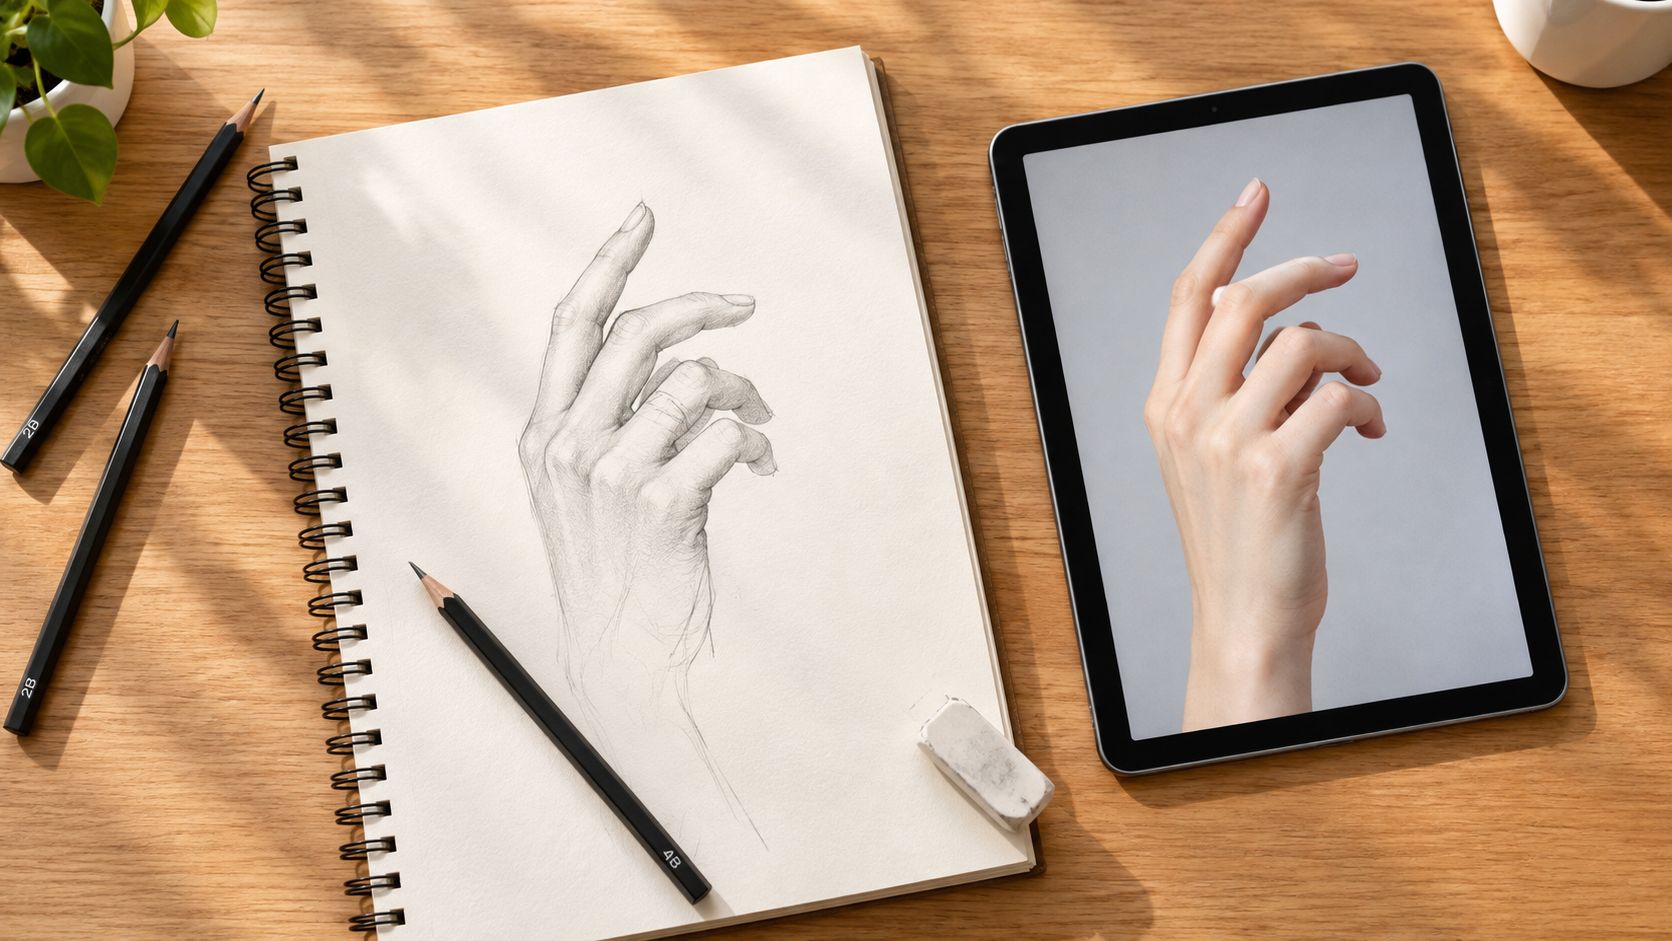
Table of Contents
- Why Hands Are Worth the Struggle
- The Core Construction Workflow
- Shading and Tonal Structure
- Difficult Poses and Foreshortening
- Common Mistakes and How to Fix Them
- Building Portfolio and Coursework Evidence
- Your Two-Week Hand-Drawing Practice Plan
Why Hands Are Worth the Struggle
A student opens a sketchbook, sets a tablet beside it, and redraws the same hand three times. The first version looks flat. The second turns the fingers into sausages. The third has cleaner line control, but the thumb still feels pasted on. That is a normal studio problem, and it usually starts when the learner chases the finished look before understanding the structure underneath.
A step-by-step method breaks that problem into manageable parts. Movement, shape, proportion and surface each get their own pass, so the drawing still holds together when the pose becomes more demanding. For portfolio work, that matters because a hand study can show observation, correction, refinement and tonal control in one sequence, instead of hiding all the thinking inside a single final outline.
Why a structured method works better
Hands are not just small faces with fingers attached. They change shape constantly, and they are one of the clearest places to practise spatial reasoning because the palm, joints, knuckles and fingertips sit in different planes. Strong school work often shows that kind of thinking, not just neatness. Ofsted's review noted that successful pupils used sketchbooks from the beginning of Key Stage 3 to record research, develop ideas and respond to artists' work, while drawing through observation, imagination and experimentation.
Start with the action, then build the form. If the underlying movement is wrong, no amount of fingernail detail will rescue the drawing. If the structure is sound, the hand begins to read convincingly before tone is added. That is why the strongest studies often keep dated stages that show the shift from block-in to resolved observation, rather than relying on one polished outcome.
Hands also reveal how well a student can handle difficult poses. A relaxed open hand is useful practice, but coursework and portfolio evidence usually improve faster when the studies move on to fists, foreshortening, overlapping fingers and gesturing hands. Those positions force the artist to judge proportion under pressure, which is where shallow habits show up quickly.
Practical rule: if the hand looks wrong, go back to the gesture and proportions before redrawing the outline.
The Core Construction Workflow
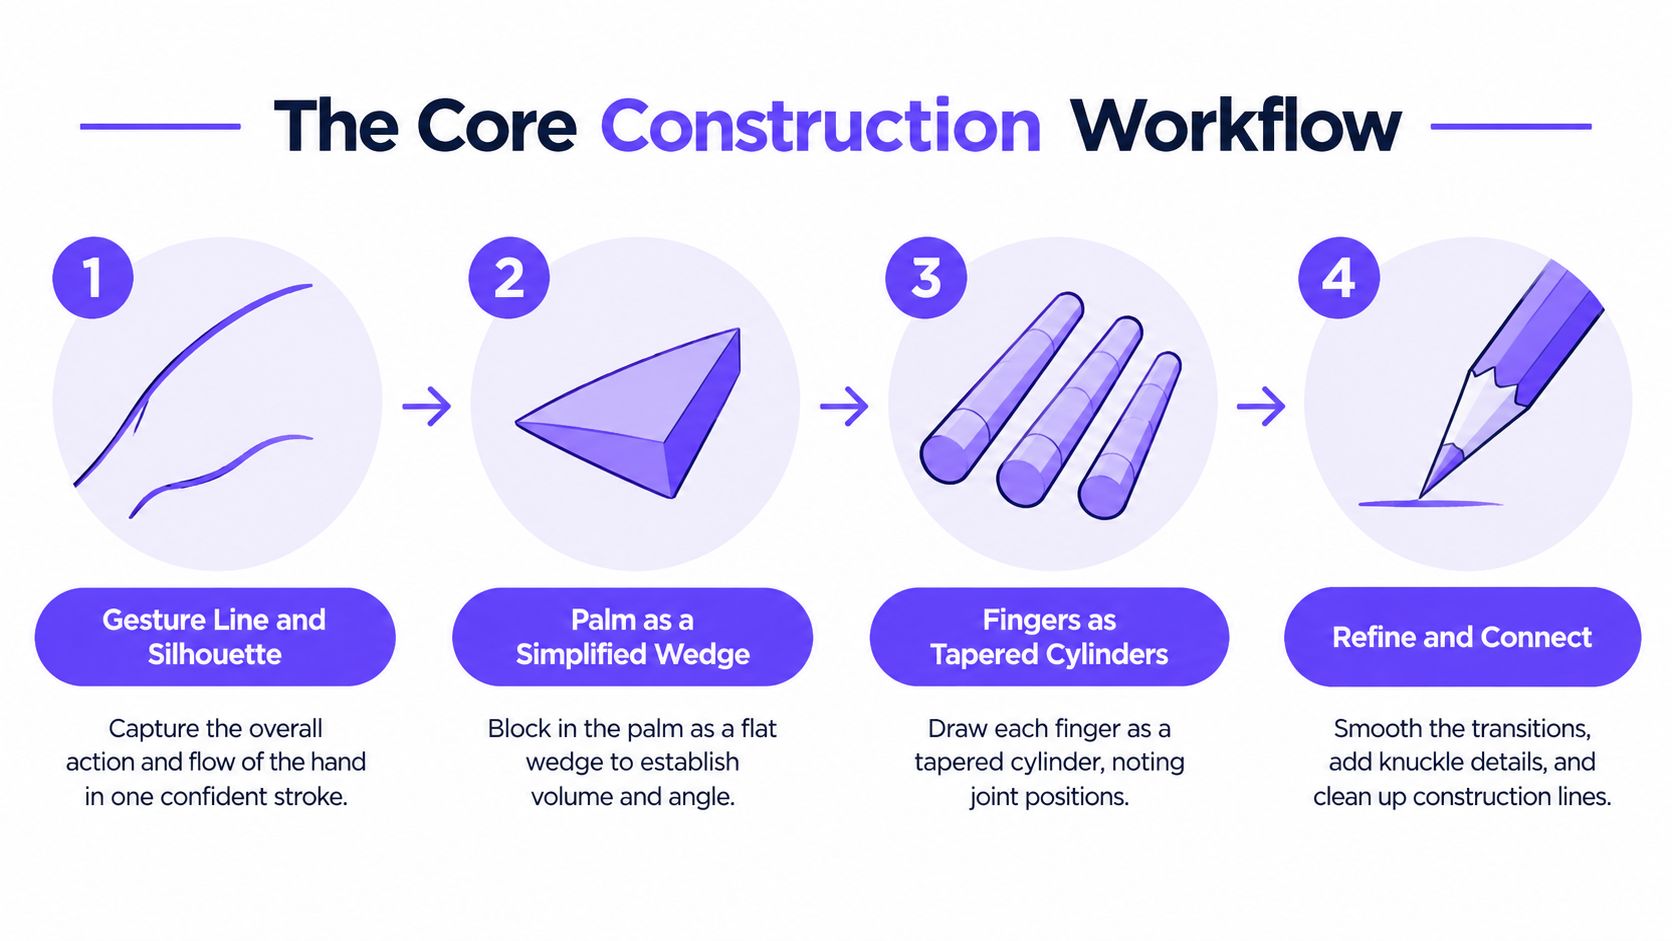
A hand drawing gets easier when you build it in stages. Each pass has a clear job, so the page stays organised and the corrections stay readable. That approach also fits the construction method used in drawing in construction, where the artist separates movement, mass and detail instead of trying to finish everything at once.
Pass one, gesture and silhouette
Start with one light line that sets the action of the hand. A reaching hand, a resting hand and a curling hand all need a different flow. Then sketch the outer shape lightly and keep the marks loose enough to change. This first pass records direction; anatomy comes later.
Pass two, the palm block
Build the palm as a simple wedge or box, then attach the wrist as a short cylinder. That gives the hand weight and angle before any finger detail appears. Check the palm width against the palm length, because a narrow block or an overlong one throws the whole study off. If the block feels wrong, pause there and adjust it before adding anything else.
Pass three, the fingers
Set the fingers with joint landmarks. Place the knuckles in a shallow arc, then shape each finger as a tapering cylinder rather than a straight tube. Compare the fingertips with the wrist axis to test the proportion quickly. The hand will read more convincingly when those relationships are sound than when the artist relies on memorised anatomy alone.
Pass four, refine and connect
Now tighten the contours, add overlaps, nails, tendons and the small angle changes around the knuckles. The drawing starts to feel like a real hand because the earlier structure still supports it. Keep the earlier marks visible in the sketchbook for a while, since they show how the form was built and give clear evidence of decision-making.
Keep the early lines visible until the structure feels stable. If they vanish too soon, it becomes harder to see what improved and what still needs work.
A tutor usually looks for three things at this point, a clear silhouette, a believable finger rhythm and joints in the right places. If one of those fails, return to the earlier pass and fix the structure. That same discipline of seeing action before outline also helps artists capture animal movement in art, where the first task is to catch the living movement before details take over.
Shading and Tonal Structure
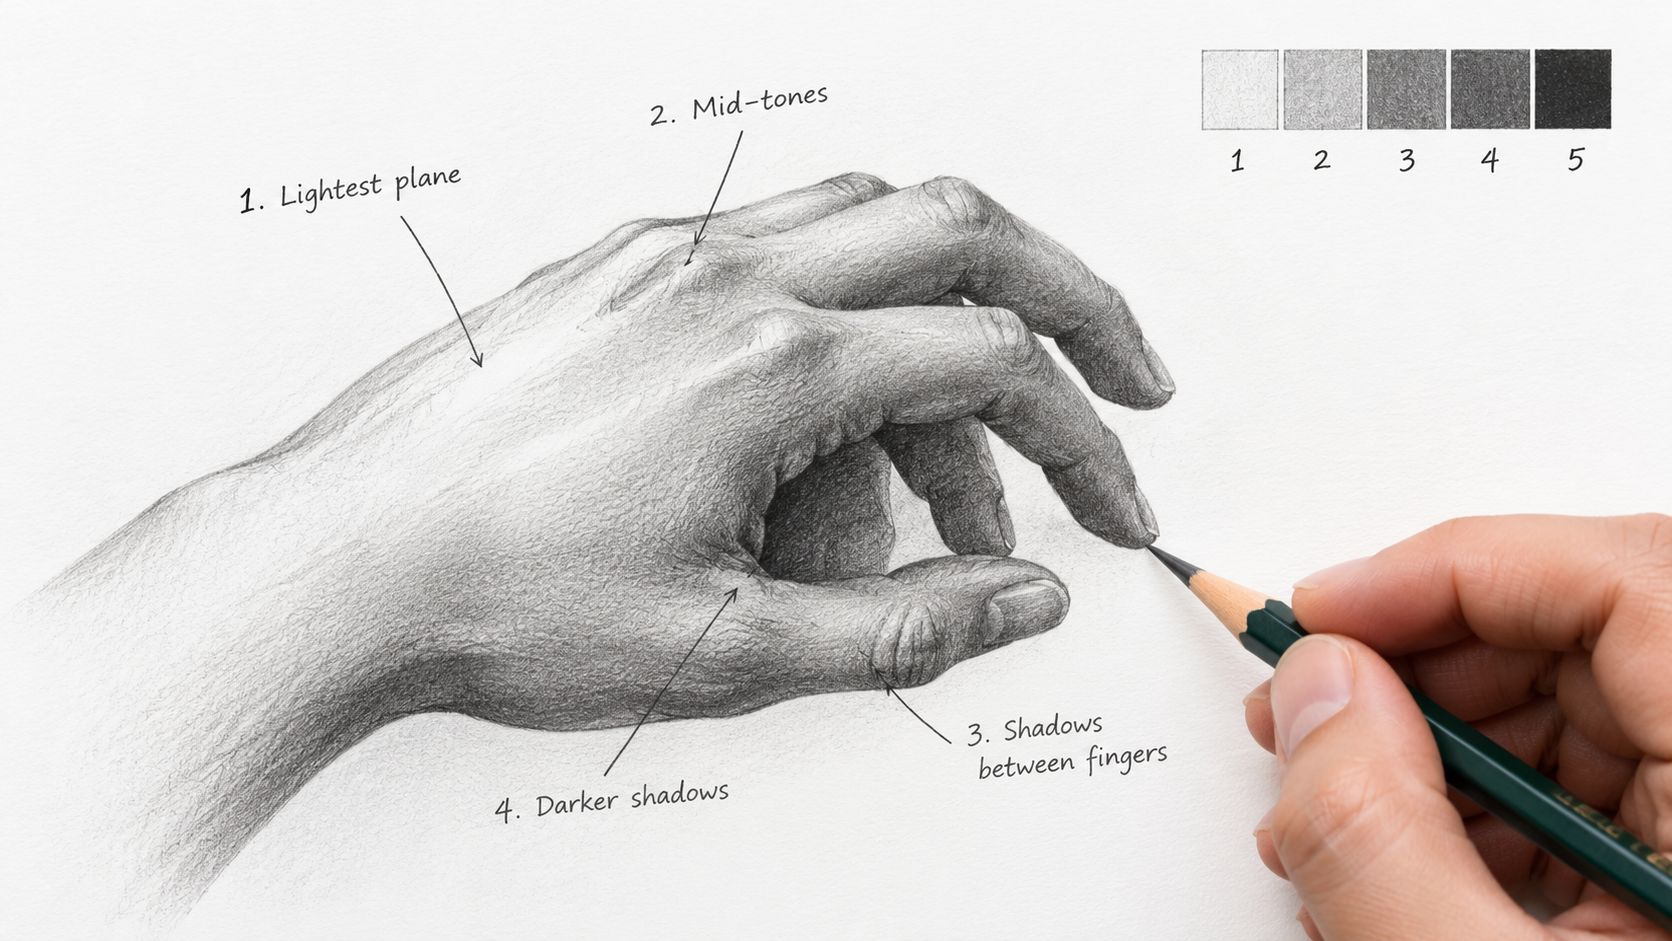
Once the structure is in place, tone gives the hand its weight. A line drawing can describe shape, but value tells the eye which plane turns toward the light and which parts fold back into shadow. That's what stops the hand looking cut out.
Use a five-step value map. Begin with the lightest plane, then add mid-tones across the form, core shadows along turning edges, reflected light inside the shadow mass, and the deepest darks only where surfaces touch or overlap. Don't chase every crease in the skin. Group the shadows first, then let a few sharper accents do the work.
Reading the light correctly
Before you shade, decide where the imaginary lamp sits. If the light is coming from above left, the tops of the fingers and the upper plane of the palm will stay lighter, while the underside of the fingers, the spaces between overlapping forms and the contact points at the wrist will darken. If the light comes from the opposite side, the whole read changes, even if the line drawing stays the same.
That's why light direction matters more than fancy blending. Use hatching or a soft graphite gradation that follows the form, not random smudging. A clean tonal structure makes the hand feel rounded because the viewer can see which planes catch light and which ones turn away.
You can also use a video demonstration alongside your own studies. Watching another artist work helps if you're trying to understand where shadows should group and where they should stop.
A good self-check is simple. If the hand looks flat, the issue is usually not “more shading”, it's that the shadow shapes haven't been grouped into clear planes. Once you see the hand as a set of surfaces, the tone starts doing proper structural work instead of decoration.
Difficult Poses and Foreshortening
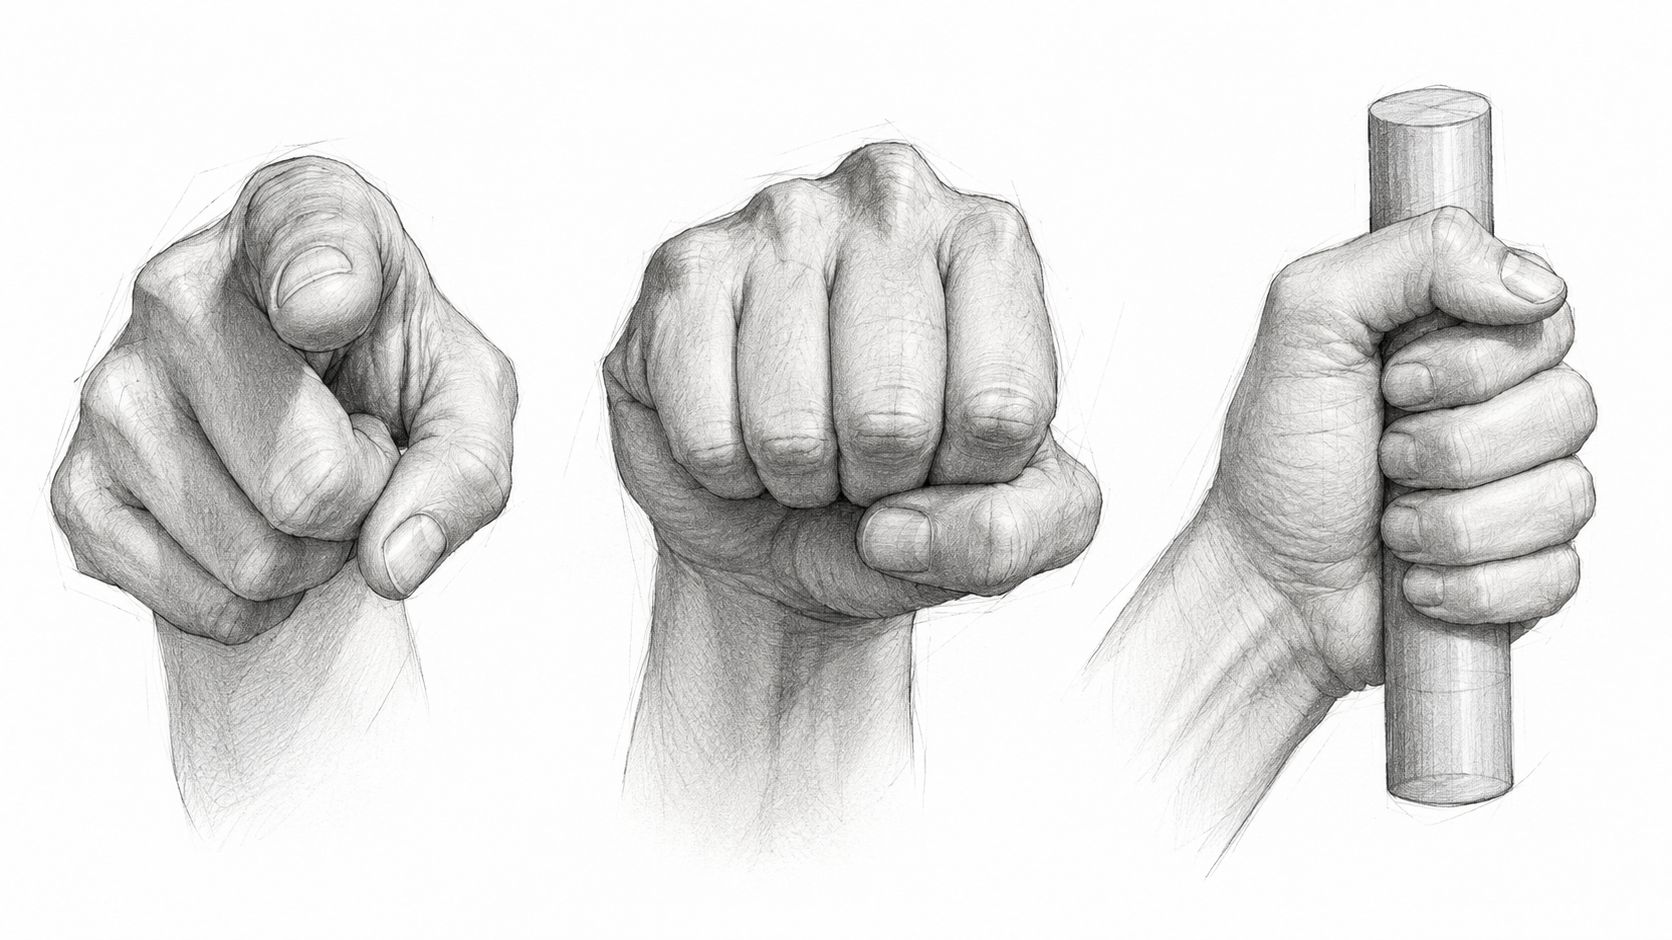
Most tutorials stay with a relaxed open hand because it's easier to explain. Portfolio work usually isn't that forgiving. You need to handle fists, pointing hands, gripping hands and poses where the fingers aim towards the viewer, because those are the drawings that reveal whether you really understand form.
What changes in foreshortening
Foreshortening doesn't just make a finger smaller. It compresses the visible length, shifts overlaps and changes which edges you can see. If a finger points forward, the near knuckle may dominate the shape while the fingertip barely reads as a separate point. If you draw every finger at full length anyway, the hand looks stiff and theatrical.
A silhouette check helps here. Before you add details, step back and look only at the outer edge of the shape. Ask which contour is visible, which one disappears behind the palm, and which form is compressed into the background. That decision makes the pose believable long before you shade it.
For a broader body-based comparison, the proportion logic in drawing proportions of the body helps when the hand needs to sit convincingly next to the wrist, forearm or a held object.
A small pose library to practise in order
Start with these poses in sequence, easy to harder.
- Relaxed open hand: use this to test the block-in and finger spacing.
- Hand resting on a surface: useful for checking overlap and contact shadows.
- Pointing hand: good practice for selective contour, because not every finger reads equally.
- Fist: tests compression, knuckle grouping and hidden finger structure.
- Gripping hand or hand in a pocket: forces you to draw only the forms that can be seen.
The point isn't to memorise a perfect template. It's to make decisions. If the hand turns toward the viewer, shorten what recedes and strengthen the front plane. If fingers overlap, let the front contour win and simplify the hidden structure. That's the difference between a diagram and a gesture drawing.
Useful test: if the pose looks rigid, the spacing is probably too even and the overlaps are too timid.
Common Mistakes and How to Fix Them
The same drawing problems show up again and again, and that's useful. Each mistake tells you which part of the workflow you skipped or rushed. When a hand goes wrong, don't treat it like a failure, treat it like a diagnostic.
| Common Hand-Drawing Errors and Construction Fixes | ||
|---|---|---|
| Common Error | What Causes It | Construction Fix |
| Sausage fingers of even thickness | The fingers were drawn as tubes with no taper or joints | Rebuild them as tapered cylinders and place the knuckles first |
| All fingers the same length | The learner relied on memory instead of observation | Compare fingertip positions against each other before refining the outline |
| Flat pancake palm | The palm was outlined before its volume was blocked in | Start again with a wedge or box and attach the wrist as a cylinder |
| Missing knuckle arc | The hand was copied as a symbol rather than measured | Mark the knuckles with a shallow curve before drawing fingers |
| Hidden thumb ignored | The thumb was treated as an afterthought | Set the thumb base early and decide what part of it is actually visible |
| Fingers floating without overlap | The silhouette was never checked | Rebuild the outer edge and place overlaps before adding detail |
A common error is to fix every problem with erasing. That usually makes the drawing weaker. It's better to repeat the stage that failed, whether that's the gesture, the block-in or the contour pass.
If the fingers feel too stiff, shorten some segments and vary the angles. If the palm feels like a flat shape, push the volume before you worry about line quality. If the thumb disappears, place it earlier in the construction so it belongs to the hand rather than hovering beside it.
Building Portfolio and Coursework Evidence
A strong hand study becomes coursework when it shows thinking, not just finish. Ofqual requires students to record observations and insights as work progresses, refine ideas through experimentation, and use drawing for different purposes (Ofqual GCSE subject conditions). That fits hand drawing perfectly, because a dated sequence of studies can show exactly how the drawing developed.
What to keep in the sketchbook
Keep the gesture study, the construction study and the resolved tonal drawing together on adjacent pages when you can. Add short notes about what changed, for example proportion correction, thumb placement, finger overlap or shadow grouping. Those annotations matter because they show reflection, not just output.
Tutor feedback helps here too. Use it to improve the next study, not to overwrite the current one. That kind of iteration is useful for A Level, Level 3 Foundation and GCSE-style assessment because it shows the drawing is being developed through response, not produced in one lucky sitting.
For students building a larger body of work, tips for building your artistic portfolio sits well alongside this process, because it frames sketchbook material as evidence rather than scraps.
Assessment and access points
If you're studying privately, remember that online learning doesn't remove formal assessment requirements. UK guidance says private candidates still need to register with a school, college or another examination centre to sit the required assessments, and the centre must provide every required component, including non-exam assessment where relevant (UK government guidance on exams and assessments). For art and design students, that means checking the centre can supervise, authenticate and submit portfolio work properly.
For some learners, a structured online provider such as The Online College of Art & Design (OCAD) can sit alongside this process as a tutor-led study route with portfolio workspace and live support. It's still important to keep the learning record separate from the formal assessment route.
Your Two-Week Hand-Drawing Practice Plan
Start small and make it measurable. Two weeks is enough to see whether your hand drawings are getting clearer, especially if you compare each new study with the last one rather than with a finished illustration online.
Week one
- Day 1: make five 2-minute gesture drawings of different hand poses.
- Day 2: do three construction-only studies with no shading.
- Day 3: draw one open hand in line and one in tone.
- Day 4: try a fist and annotate where the knuckles sit.
- Day 5: repeat the fist, but shorten the fingers in perspective.
- Day 6: do two quick studies of a pointing hand.
- Day 7: review the week and circle the proportion errors.
Week two
- Day 8: redraw the best study from week one more carefully.
- Day 9: draw a hand holding an object.
- Day 10: complete a tonal study with five clear value steps.
- Day 11: practise an overlapping finger pose.
- Day 12: draw the same pose from a slightly different angle.
- Day 13: do one finished hand study for portfolio quality.
- Day 14: compare all three strongest drawings and write what improved.
Check four things each time, proportion, overlap, light direction and tonal range. If one of them slips, repeat that stage instead of starting a fresh drawing from scratch.
OCAD supports learners who want structured, tutor-led creative study online, including portfolio-focused routes that suit GCSE, A Level and Level 3 progression. If you want guided drawing practice that fits around school, work or home study, visit The Online College of Art & Design (OCAD) and look at how its online courses can support your next hand study and your wider portfolio work.