

You've got a reference photo beside your sketchbook, a pencil in hand, and a blank page that suddenly feels harder to approach than it should. Perhaps you've drawn the eyes first because they seemed like the easiest place to begin, only to find the rest of the face won't fit. A reliable portrait starts with something less dramatic but more useful: measuring the head, placing guides, and checking what you see.
This method is for Level 2 and Level 3 creative students preparing for assessed work or a university portfolio, as well as home-educated learners and adults returning to art. You'll build a front-facing face, check feature placement, practise a repeatable review process, and then adapt the same construction for turned and tilted heads. Proportion guides are starting averages, not rigid laws. Observation of your reference remains the final authority.
Table of Contents
- Why Construction Beats Copying When You Draw a Face
- Blocking the Head with Proportion Guides
- Placing the Eyes, Nose, Mouth and Ears
- Refining Proportion Through Four Review Checkpoints
- Drawing Faces at Angles and in Profile
- Common Mistakes and How to Fix Them
- Building a University-Ready Portfolio from Your Face Drawings
Why Construction Beats Copying When You Draw a Face
A student who begins with an eye often draws it confidently, then has to squeeze the second eye, nose and mouth into the space left over. The issue isn't a lack of artistic ability. It's that the drawing began with a detail before the artist knew the size and direction of the whole head.
Construction gives you a light scaffold you can adjust. Start with an oval or simplified cranium, add a vertical centre line, and place the eye line before marking the other features. Those guides make it easier to compare the drawing with the reference and spot a misplaced feature while it's still easy to move. If you darken contours or shade too early, you can make a small error harder to diagnose.
Practical rule: Measure and place the head lightly before committing to darker contours.
The order matters. First block in the overall head shape. Then position the features with guide lines and simple forms. Once the proportions hold together, refine the contours, observe the shadows, and model tone. Working from light to dark keeps your corrections visible for longer.
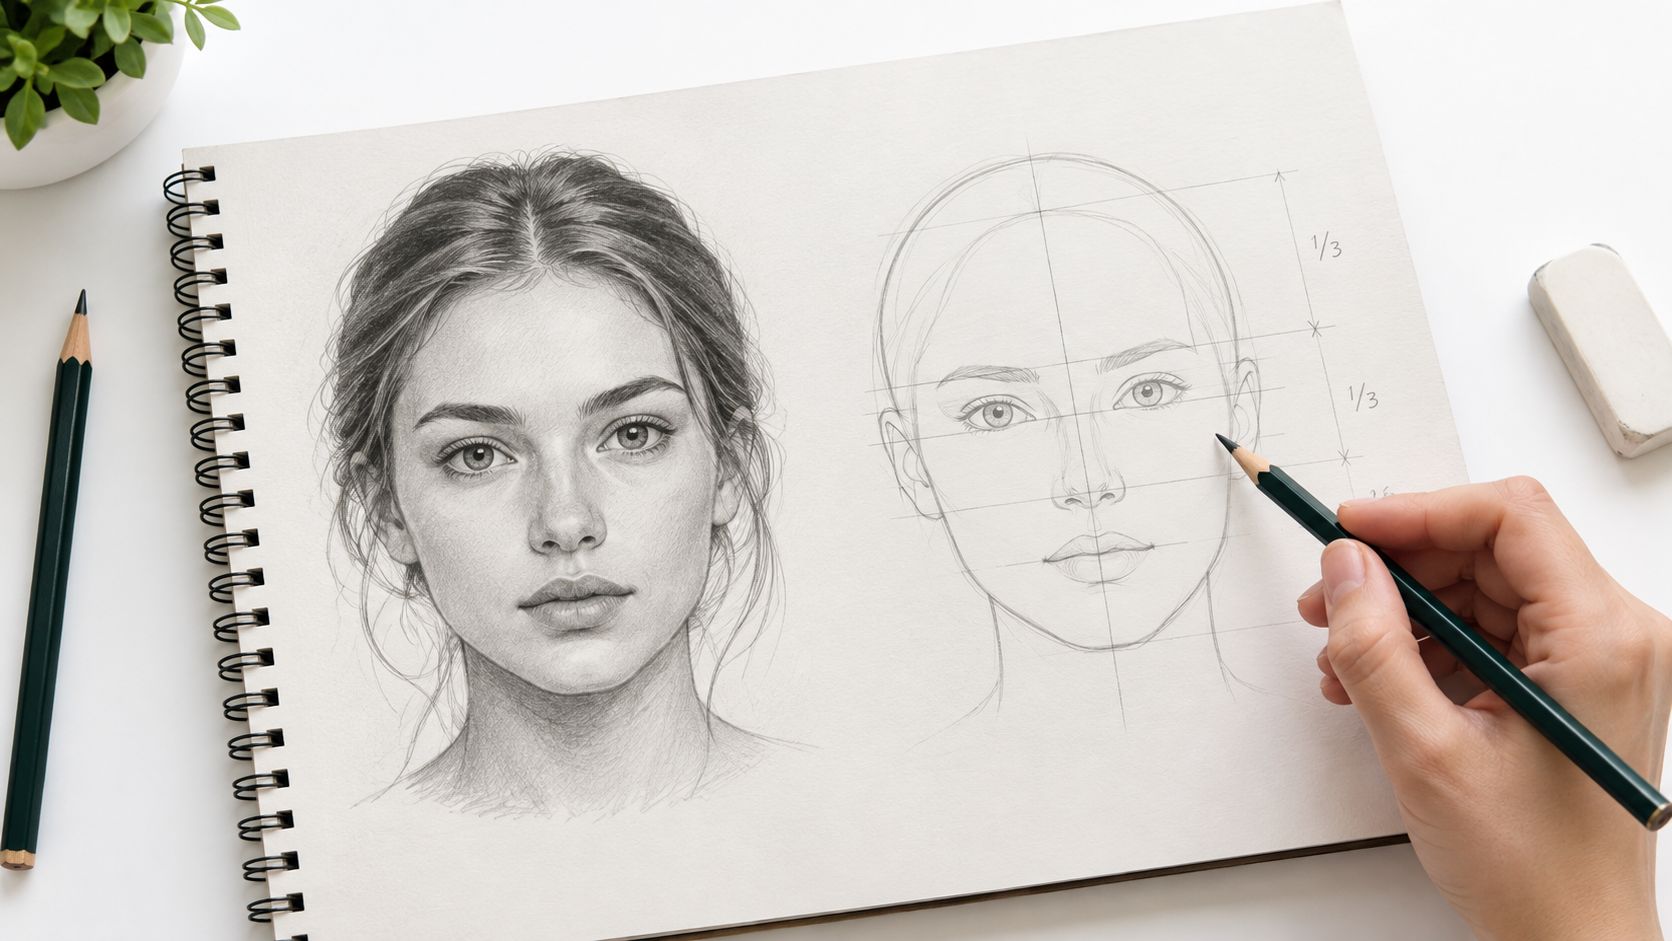
This is a practical way to approach how to draw a face step by step: construct first, compare constantly, and refine only when the drawing's structure works. It also gives you more than a finished portrait to show for your effort. Your guide lines, changes and observations can become useful developmental evidence for coursework and applications.
Blocking the Head with Proportion Guides
A portrait may face forward, turn slightly, or show a profile. Start by blocking in the head's overall shape, then use a centre line to show its direction. These are construction aids: the same oval and guides can be adjusted for different views, rather than treated as a fixed template.
With a reference in front of you, lightly sketch the cranium and compare its width with its height. Keep the outline close to what you observe. A broader forehead, narrower jaw, or uneven angle can make the head differ from a simple oval. Let the reference lead.
Now draw a vertical centre line. On a front-facing head, it may sit near the middle; on a turned head, it curves across the visible surface and shifts toward the side. This line works like a seam on a ball, helping you track which way the face points. Keep it pale so you can correct its path.
Mark the eye line across the head. BBC Bitesize's GCSE Art and Design guidance places the eyes halfway down the head, measured from the top of the skull (BBC Bitesize guidance on drawing a face). Measure from the skull, not the hairline, which may sit higher or lower.
For a front-facing head, use five eye-widths as a rough spacing check across the face: one eye, the gap between the eyes, the second eye, and the spaces at each side. Compare these units with your reference; real faces are not perfectly symmetrical, and a turned head changes what you can see.
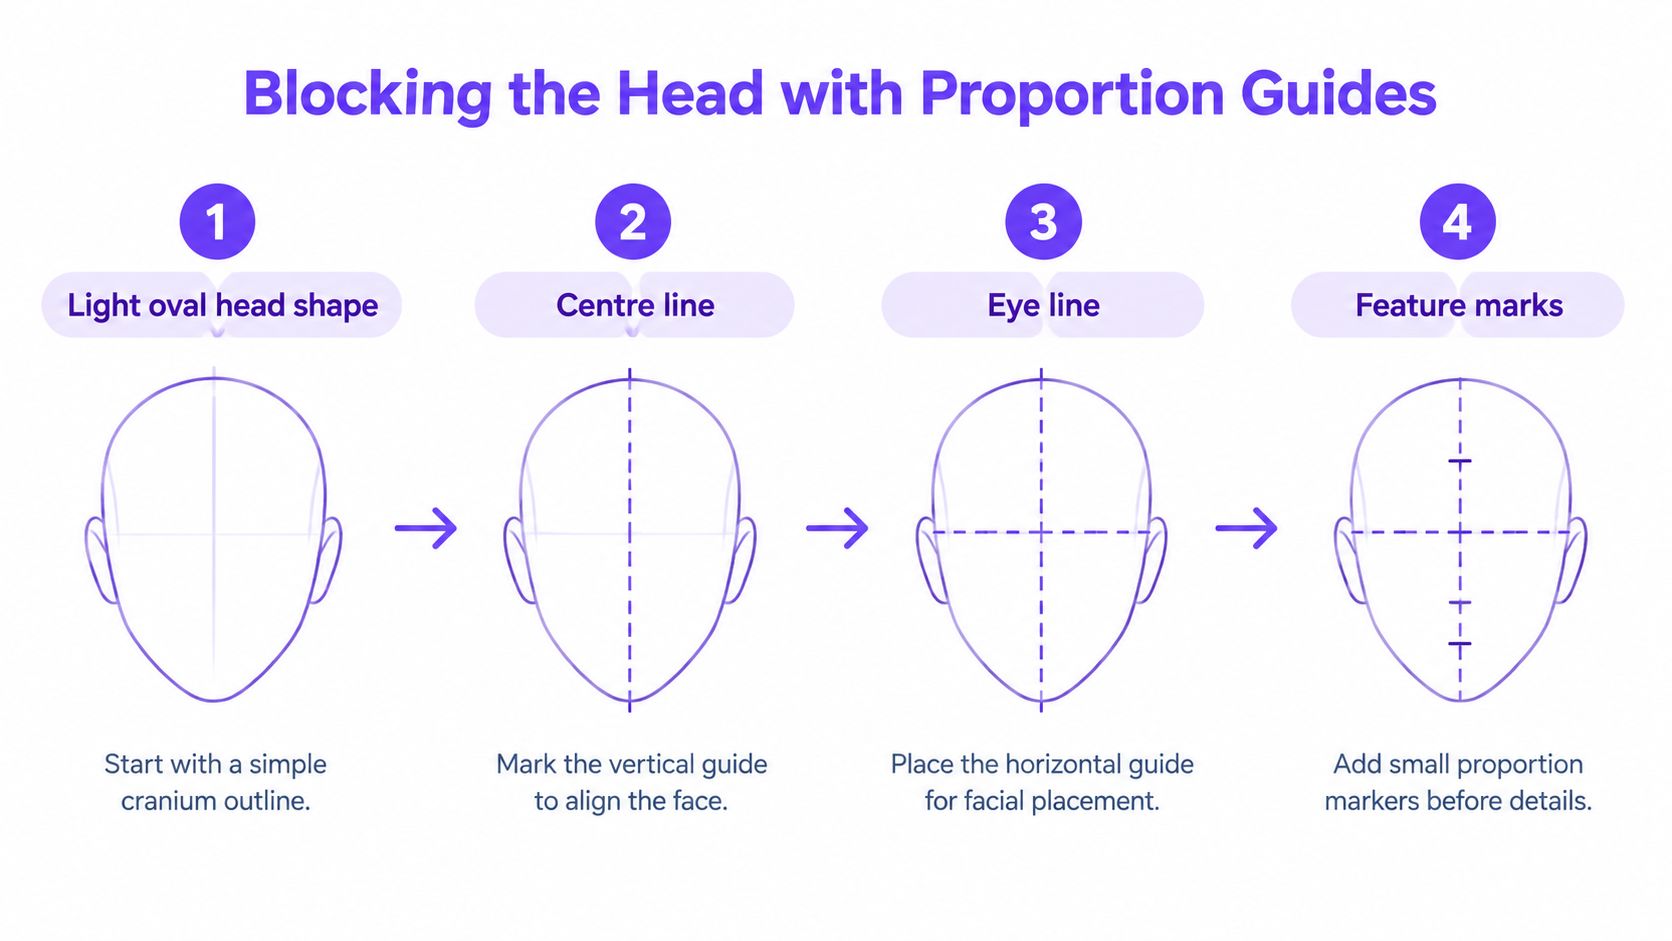
For more practice comparing measurements, consult this guide to drawing human proportions. Keep the marks light. Proportion guides are starting averages, not rules, and pale lines leave room to adjust the structure as you compare your drawing with the reference.
Placing the Eyes, Nose, Mouth and Ears
A face can look strangely unfamiliar even when each feature is carefully drawn. Check how the features relate to one another before adding detail. Use the brow line, eye line and chin as landmarks, then compare each placement with the reference. These proportions are starting averages, not fixed rules: age, expression, individual anatomy and the angle of the head all change what you see.
| Feature | Starting Alignment Guide | Check Against Reference |
|---|---|---|
| Eyes | The eye line sits about halfway down the head, measured from the top of the skull. | Compare its height and tilt with the skull and centre line. |
| Nose | The bottom of the nose often sits halfway between the brow line and chin. | Compare the brow-to-nose distance with the nose-to-chin distance. |
| Nose width | The outer edges often fall near the inner corners of the eyes. | Judge the nose against the eyes in your reference. |
| Mouth | The mouth corners often sit near the centres of the irises. | Check the corners against the irises, allowing for expression and angle. |
| Ears | The top of the ears often aligns with the eye line. | Note how much of each ear shows and where it joins the head. |
For the eyes, lightly block in two socket shapes beneath the brow. Their tilt and spacing should follow the head, rather than a memorised template. Build the nose from a bridge and base, like simple planes catching light, instead of drawing a triangle around it. Place the mouth as a small shape across the face; check its width and position before describing the lip edges.
Ears are easy to overlook, but their visible shape can help you judge the side of the head and its turn. On a front-facing pose, compare both ears with the eye line. If the head turns, one ear may be partly hidden or sit differently in the drawing. Let the reference show you what is visible.
The earlier construction guides give you a starting point for these relationships. Use them like measuring marks on a map: they help you find your way, but the reference determines the route. If a feature falls outside the usual alignment, follow what you observe. A convincing portrait comes from checking the shapes and spaces against the person, not forcing every face into the same template.
Refining Proportion Through Four Review Checkpoints
A portrait improves through investigation, adjustment, recording and presentation, not through one attempt to copy every detail. That iterative approach also fits the GCSE Art and Design assessment objectives. Ofqual and AQA guidance maps the work to AO1, AO2, AO3 and AO4, each weighted at 25% (GCSE Art and Design subject-level guidance).
In practice, investigate the reference and facial structure first. Refine your proportion and decide how you'll use your chosen media. Record observations and corrections while you work. Then present a resolved image using visual language, such as a deliberate approach to tone, edges and mark-making. Keep at least two developmental stages, with short notes showing what you changed and why. Your drawing can demonstrate thinking as well as a finished result.
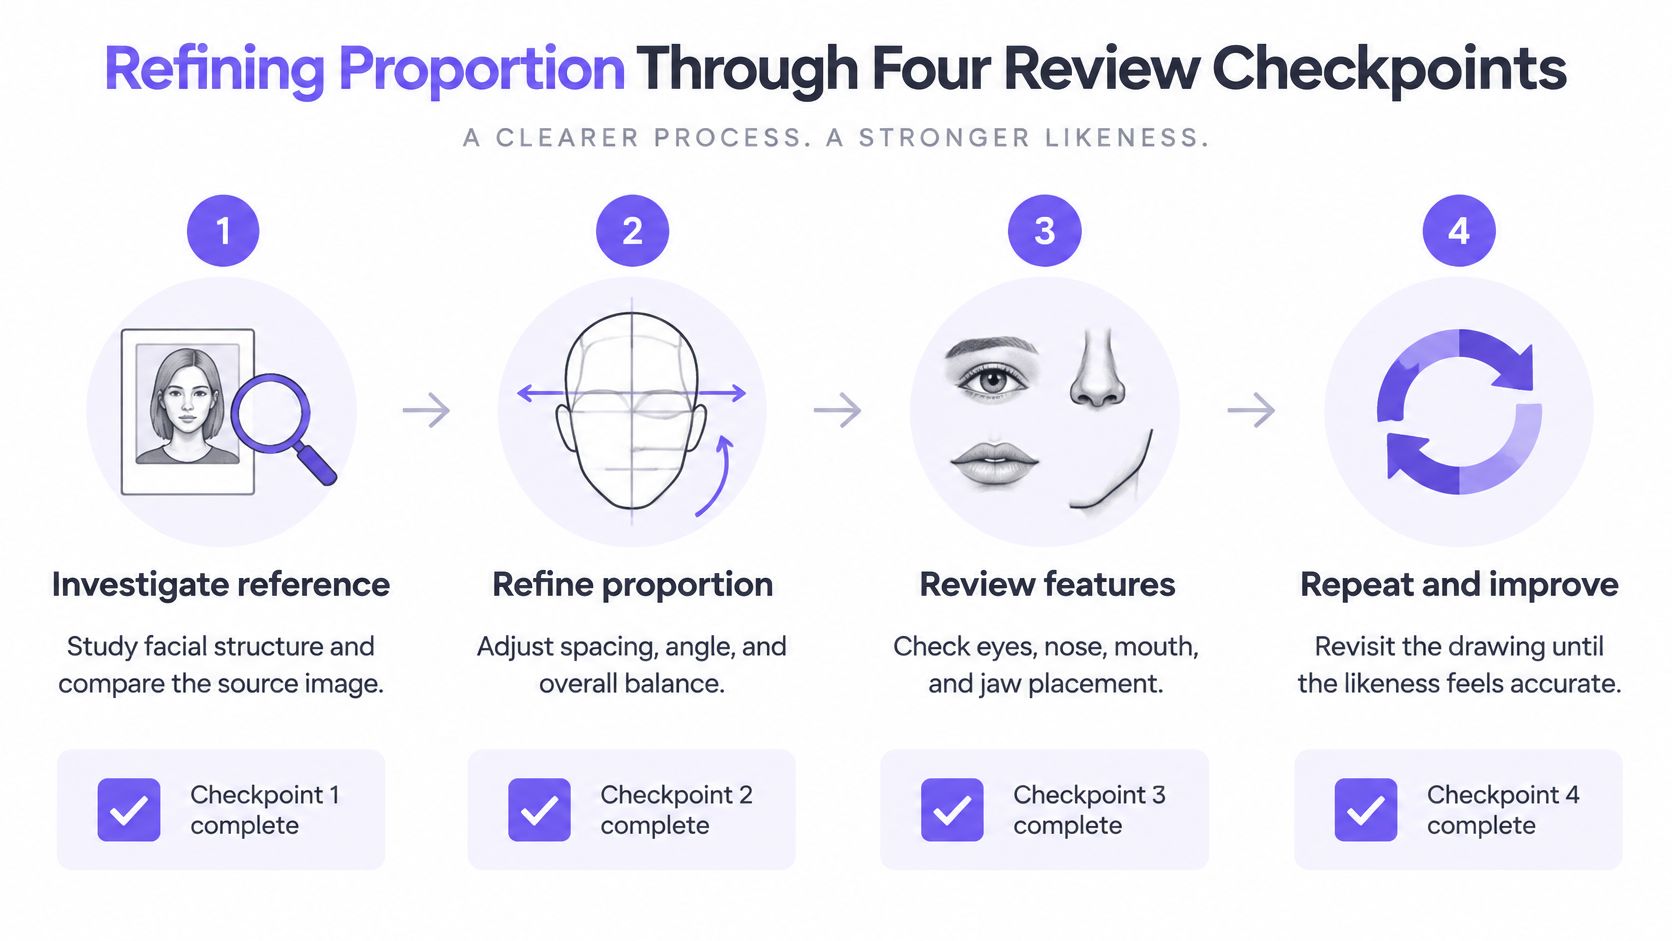
Use these four review checkpoints instead of waiting until the end to erase and redraw:
- Silhouette: Compare the outline, overall width-to-height relationship and direction of the head with the reference.
- Feature alignment: Check the eye line, centre line and placement of the nose, mouth and ears.
- Tonal structure: Compare the large light and shadow areas. Keep the darkest marks out until the main forms are convincing.
- Edges and details: Refine the contours and individual features only after the earlier checks hold together.
At each checkpoint, write a brief observation such as “jaw too wide on the shadow side” or “eye line slopes more in the reference”. Photographing or scanning these stages gives you a record of changes and helps you explain your decisions. The review process isn't a demand for perfect proportions. It's a way to make considered corrections and show how the portrait developed.
Drawing Faces at Angles and in Profile
A front-facing template won't automatically work when the head turns. In profile, you see one eye, the projecting nose and a different outline from forehead to chin. In a three-quarter view, the centre line curves around the head, and the far-side features appear narrower because of perspective. They don't become smaller copies of the near-side features.
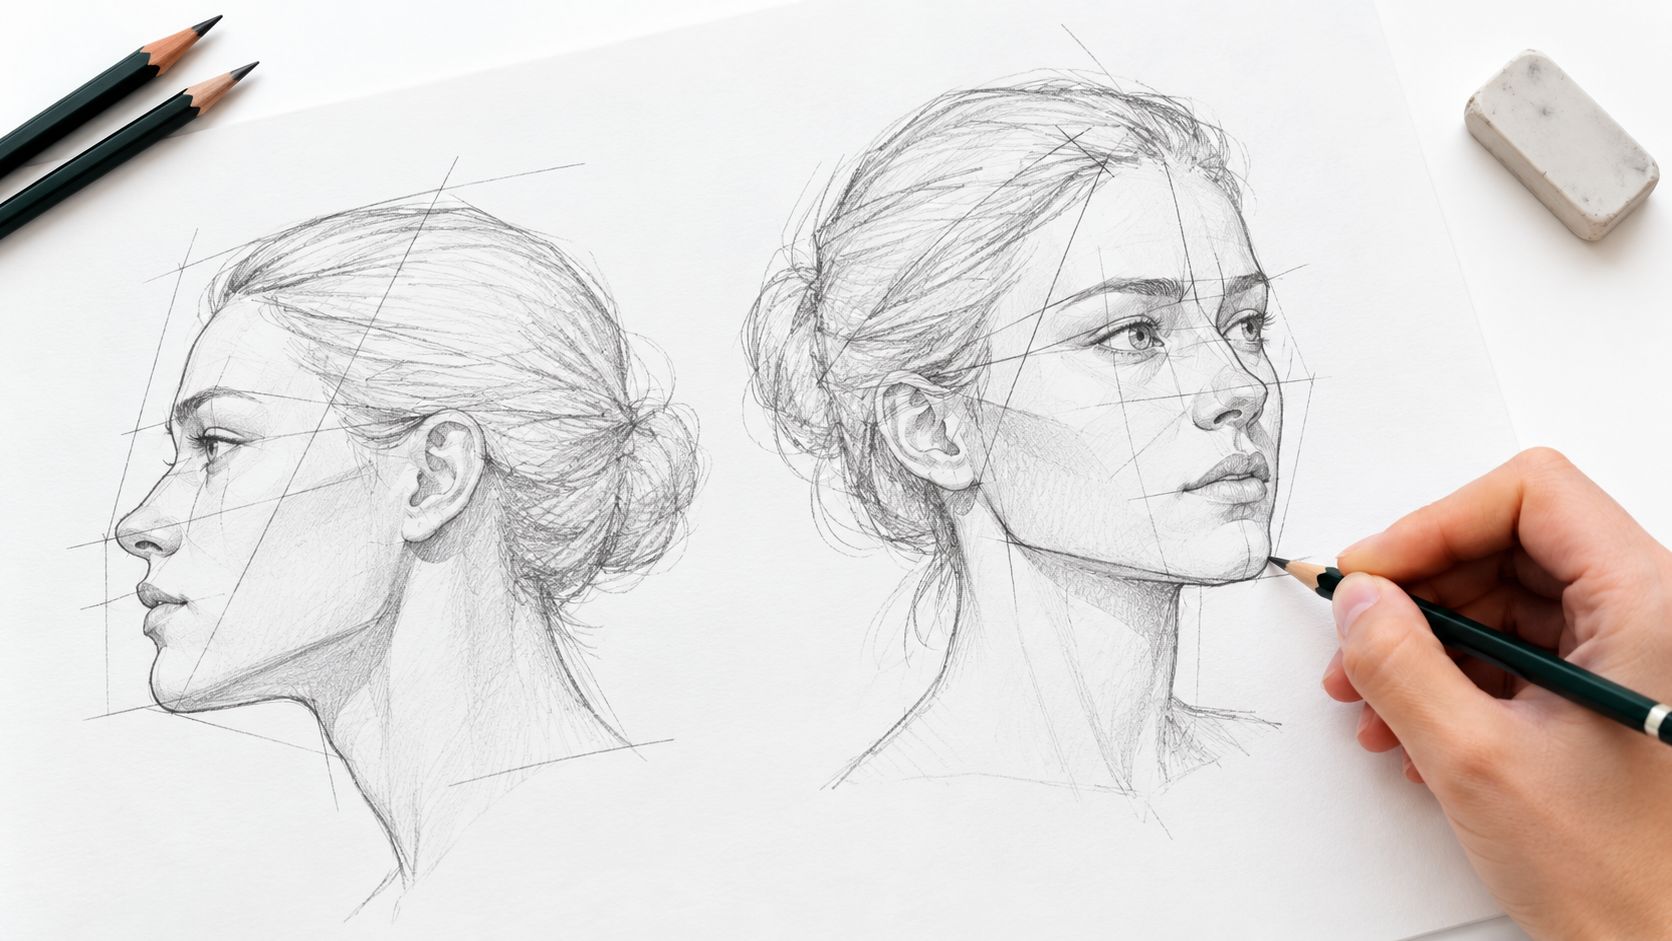
Try drawing the same reference face in a front view, a three-quarter turn and a profile. Keep the cranium, jaw and feature landmarks consistent as the viewpoint changes. For a three-quarter pose, wrap the centre line around the skull rather than leaving it as a flat line down the middle of the paper. Let the eye line follow the tilt of the head, and check how much of the nose overlaps the far-side cheek.
A looking-up or looking-down pose changes the visible planes of the face. When the head tilts, the guidelines should tilt with it. Looking up makes the underside of forms more visible; looking down changes how the forehead and upper planes appear. Don't confuse that shift with expression. A change in viewpoint alters what you can see, while a change in expression alters the shape and position of features.
For more practice with the shape of a turned head, try these exercises on drawing faces in profile. Check whether the centre line wraps around the skull, whether far-side features narrow appropriately, and whether the jaw remains attached to the cranium. These comparisons help you see when a portrait has drifted away from the head's construction.
The video below offers another visual demonstration of working with faces and head studies.
Common Mistakes and How to Fix Them
Symbol drawing is one of the easiest habits to slip into. A familiar almond eye, triangular nose and curved mouth can read as a face, but they may not resemble the person in your reference. Replace these symbols with observed shapes: compare the eye opening, the angle of the nose and the actual direction of the mouth corners.
Another common problem is shading before checking the construction. If you darken the eyes or nose while their positions are still uncertain, those marks can distract you from the underlying proportion errors. Keep the drawing light until you've checked the head shape and feature alignment.
Direct observation is more dependable than drawing from memory. UK art-education guidance recommends repeatedly looking from the subject to the paper and back to improve accuracy (BBC Bitesize guidance on recording observations). Set up a fixed reference in neutral lighting, then make short comparisons before adding detail.
Look at the reference, make a mark, and look back before the next mark.
Work from light to dark. Reserve the strongest accents for pupils, nostril openings and selected points where forms overlap. If you're unsure whether features are aligned, hold a mirror to the drawing or inspect it upside down. A changed viewpoint can make a tilt or spacing problem more obvious.
How you practise also affects the feedback you get. Self-study lets you work at your own pace, but you'll need to record and review your own decisions. Local classes provide in-person discussion and observation, though their timetable and location may not suit everyone. Online tutor-led study can combine flexible practice with feedback on your drawings. The Online College of Art & Design (OCAD) offers one-to-one tuition and portfolio-centred coursework with iterative tutor feedback. Choose the route that fits how you learn and what support you need.
Building a University-Ready Portfolio from Your Face Drawings
A reviewer should be able to follow how you built a portrait, not just see a polished result. Include construction drawings, observational studies, revisions and the finished image. Together, they show how you investigated the subject, tested proportion and responded to what you observed. Keep the stages in an order that makes your decisions easy to follow.
Portfolio requirements vary by course, so check the university course page before choosing what to include. The University of the Arts London advises showing work from 3 to 5 projects, with each project developed from initial ideas and research to completed outcomes (UAL portfolio advice). For a face-drawing project, that development might include reference research, proportion studies, construction sketches, observations from different angles, revisions and a resolved portrait. The sequence works like a map: each drawing shows what you tested and what you changed.
For digital portfolio pages, UAL advises listing the materials, dimensions or scale, and creation dates. Its advice specifies a minimum on-page annotation size of 12-point type and recommends placing strong work at the beginning and end. Keep annotations direct: name the material, identify a correction and explain what you observed. For more guidance on choosing and arranging pieces, see this guide to building your artistic portfolio.
Your qualification level can help you understand the stage of study you are working toward, but it does not guarantee admission. In England, GCSE qualifications graded 9 to 4, or the former A* to C range, are Level 2 qualifications. A levels and Access to Higher Education Diplomas are Level 3 qualifications (GOV.UK qualification levels). Universities set their own entry requirements and may assess your portfolio, practical skills, subject relevance and ability to discuss your process.
Choose a practice route you can sustain
Self-study gives you room to set your own tasks, provided you make time to review your drawings. A local class offers face-to-face guidance and shared practice. An online tutor-led course may fit better around work, caring responsibilities or home education. OCAD offers online creative courses from entry level through Level 3, with one-to-one tuition, portfolio-centred coursework and degree pathways guidance toward BA applications. Consider the kind of feedback that will help you develop your portrait work.
Clear digital project pages also make it easier to share your process alongside finished drawings. If you are comparing ways to present creative work online, browse the content sharing platform picks from LinkShip while deciding how to organise your portfolio. Keep the focus on showing the sequence of study, revisions and final outcome.
Make your next drawing portfolio evidence
Keep the task manageable. Start with short proportion studies, then complete a longer observational portrait and save dated progress images with notes about your corrections. Use the same construction approach for a frontal face, then turn the head into a three-quarter view or profile. Guides give you a starting point, while comparison with your reference helps you judge what needs adjustment.
Choose a fixed reference and complete one front-facing construction drawing. Save two developmental stages with brief annotations that explain what you changed and why. If you want structured feedback as you turn portrait drawings into application evidence, explore OCAD's tutor-led, portfolio-centred art and design courses.