

You've found a bare patch of garden, priced a few concrete blocks and started picturing salads within easy reach. A cinder block raised garden bed looks straightforward until you consider what happens when the soil is soaked, the ground settles or you can't comfortably reach the middle.
Treat the bed as a small masonry retaining wall, not just a container. Check its height, the site's soil history and your working reach before choosing the finish. Those decisions matter more than whether the blocks look attractive on delivery day.
Table of Contents
- Height Limits That Keep a Block Bed Safe
- Materials, Quantities and Costs to Budget
- Testing Drainage and Soil History Before You Build
- Designing for Reach, Paths and Planting
- How to Build the Bed Step by Step
- Filling the Bed With the Right Soil Mix
- Confirm Your Plan Before Ordering Blocks
Height Limits That Keep a Block Bed Safe
Maximum unsupported wall height by block thickness
The UK government's garden-wall safety guidance gives the following maximum unsupported heights, with lower limits in more exposed zones.
| Block thickness | Max height, exposed zone | Max height, sheltered zone |
|---|---|---|
| 100 mm | 325 mm | 450 mm |
| 200 mm | 775 mm | 1,050 mm |
| 300 mm | 1,525 mm | 2,000 mm |
These are garden-wall benchmarks, not retaining-wall design specifications. A bed introduces a different load: wet soil pushes outwards continuously. Frost, saturated ground and uneven support can also move the wall, so being below a table limit doesn't establish that a proposed bed is safe.
Check height before choosing blocks
- Count the courses. Include any proposed extra course rather than treating it as an easy addition later.
- Multiply by the actual block height. Common block heights are approximately 190 to 215 mm; include the effect of mortar joints or coping in the finished measurement.
- Compare height with thickness and exposure. Block height and wall thickness are different dimensions. A tall-looking block laid on its narrow face doesn't create a thick wall.
For a worked example, two courses of 215 mm blocks give approximately 430 mm before joints or coping. With 100 mm-thick blocks, that falls below the sheltered benchmark of 450 mm, but exceeds the exposed benchmark of 325 mm. A 200 mm-thick wall of the same height sits below its lower benchmark of 775 mm.
That comparison is a screening exercise, not permission to dry-stack either arrangement. Foundation conditions, bonding, drainage and retained soil still require judgement.
Practical rule: Don't solve a height problem by buying stronger blocks. Compressive strength doesn't stop a poorly supported wall overturning or sliding.
Avoid adding height just to use leftover blocks. Taller beds can require a wider foundation, reinforcement, and a properly designed drainage arrangement. If your proposed height exceeds the benchmark for its thickness and exposure, have a builder or engineer review the design before construction starts.
Materials, Quantities and Costs to Budget
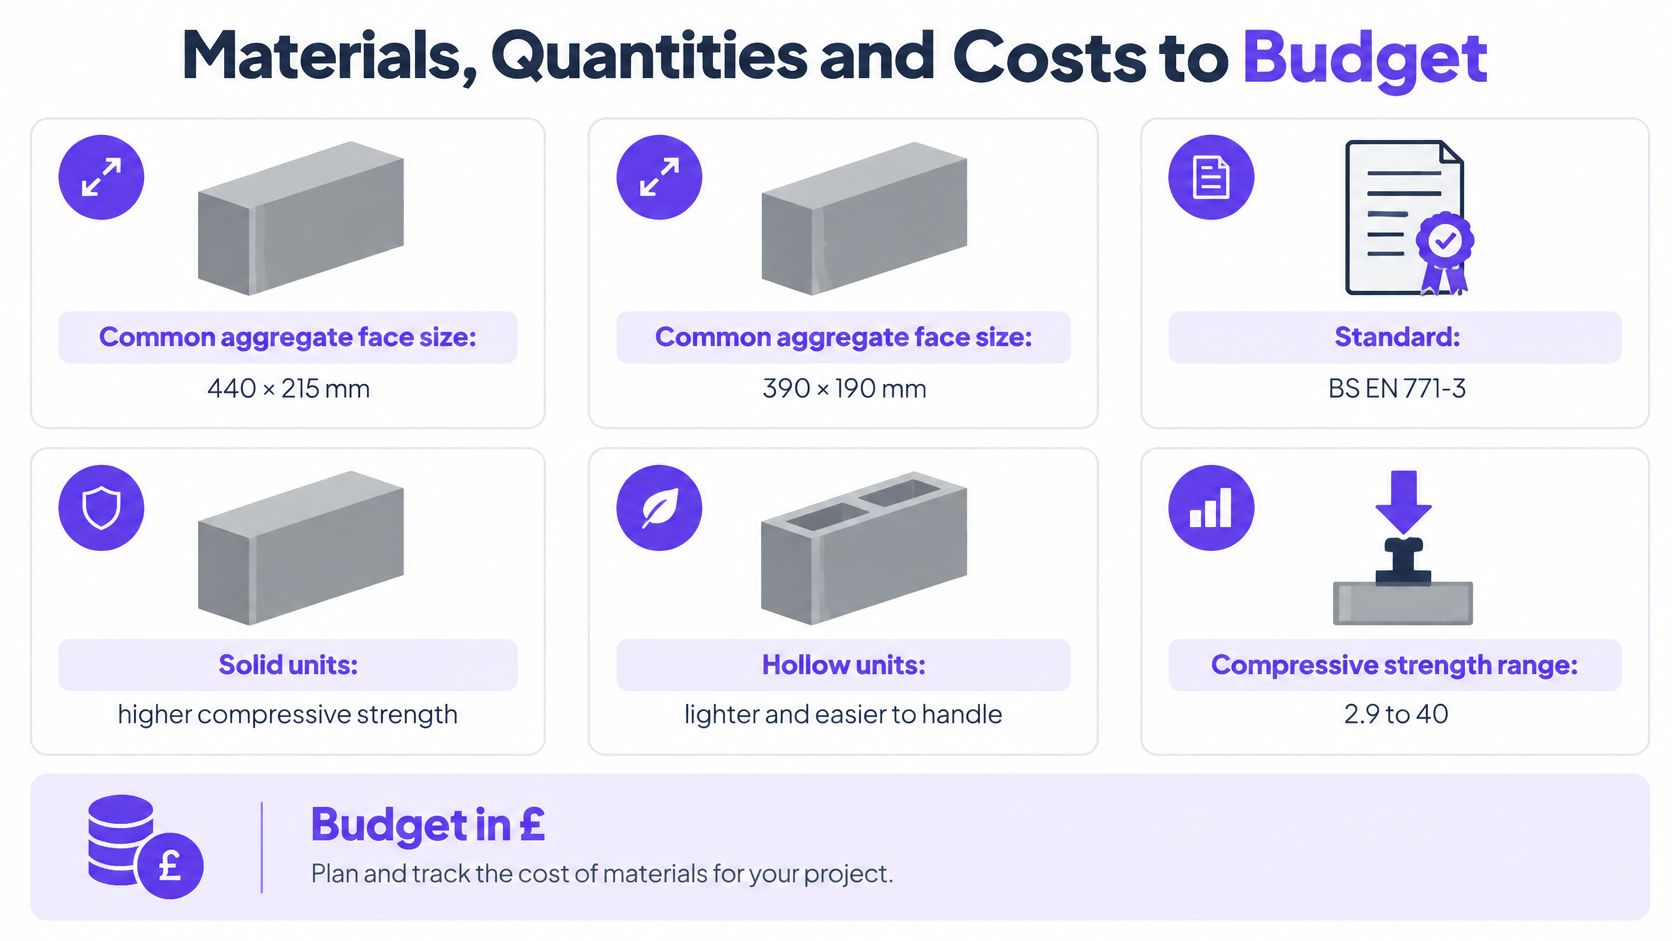
Ask suppliers for the exact concrete-block specification rather than relying on the name “cinder block”. The Concrete Block Association's masonry guidance identifies common aggregate-block face sizes of 440 × 215 mm and 390 × 190 mm, manufactured to BS EN 771-3.
The same guidance gives compressive-strength ranges of 2.9 to 40 N/mm² for solid blocks and 2.9 to 22.5 N/mm² for cellular or hollow blocks, with 3.6 and 7.3 N/mm² common strengths. Hollow units can reduce handling weight compared with equivalent solid units, but check the actual product weight. Neither type compensates for an unsuitable foundation.
Work out quantities before comparing prices
For example, a hypothetical 2.4 m × 1.2 m rectangle has a perimeter of 7.2 m. Dividing by a 440 mm module gives approximately 17 blocks per course, or 34 for two courses.
Treat that as an early budgeting estimate. Draw the corners before ordering because external dimensions, wall thickness, joints and cut blocks change the count. I'd allow 5 to 10% spares for cuts and breakages, then confirm the final quantity against the actual layout.
Reference block sizes and prices
| Block | Size (mm) | Reference price |
|---|---|---|
| 215 mm hollow dense block | 440 × 215 × 215 nominal format; confirm product dimensions | Beesley & Fildes listed £3.32 before VAT, £3.98 with VAT in 2024 |
| 7.3 N breeze block | 440 × 215 × 100 | Coventry Turf listed £2.10 each in 2025 |
| 50-block hollow deal | 440 × 215 × 215 | An eBay UK listing offered £237.00 in 2025 |
| 390 × 190 face-size block | 390 × 190 face; specify thickness separately | Obtain a quote for the chosen thickness and strength |
Using the VAT-inclusive hollow-block reference, that hypothetical block order would cost roughly £135 before spares. These are historical comparison prices, not current quotations; include delivery, foundation materials and growing medium in your budget.
Measure the internal growing space, not the outside footprint, when ordering fill. Leaves & Soul's guide to calculate potting mix quantities helps organise volume calculations, although the growing medium itself should suit a raised bed.
Keep the basic kit practical:
- Setting out: Spirit level, string line and pegs.
- Ground preparation: Shovel, suitable clean rubble and compaction equipment.
- Block handling: Club hammer with a protective tapping block, gloves and safety footwear.
- Drainage and filling: Fine wire mesh, gravel and a rake.
Testing Drainage and Soil History Before You Build
Concrete walls don't make contaminated ground safe. They contain the growing medium, but they don't establish what's underneath it or prevent gardeners from bringing contaminated soil into the bed.
Start with a wet-weather inspection. If water remains for hours or days after heavy rain, don't assume raising the soil will cure the site's drainage problem. Choose freer-draining ground where possible, and identify where water can escape if the bed will stand on paving.
Then investigate the plot before digging:
- Check previous use. Former industrial land, older urban gardens, allotments and roadside plots deserve closer investigation, not automatic rejection.
- Test credible concerns. Where lead, hydrocarbons or other pollutants are suspected, arrange appropriate soil testing and seek local environmental-health advice before growing food.
- Choose a separation strategy. Use documented clean growing material, with an appropriate barrier or alternative container arrangement where advised.
For exposure concerns, the government's contaminated residential-land factsheet recommends raised beds approximately 600 mm deep, with a geotextile membrane underneath to limit mixing while allowing drainage. That depth must still be reconciled with the structural design; contamination precautions aren't permission to build a taller unsupported wall.
A membrane separates materials. It doesn't neutralise pollutants or replace testing. Where the site remains uncertain, containers or grow bags with clean growing medium may be a more manageable choice.
The important question isn't whether the wall is concrete. It's whether the growing medium is clean and stays separated from suspect ground.
Wash or peel harvested produce as appropriate. Soil sticking to crops can contribute more exposure than pollutants taken up into the plant, so clean hands, tools and produce remain important.
Designing for Reach, Paths and Planting
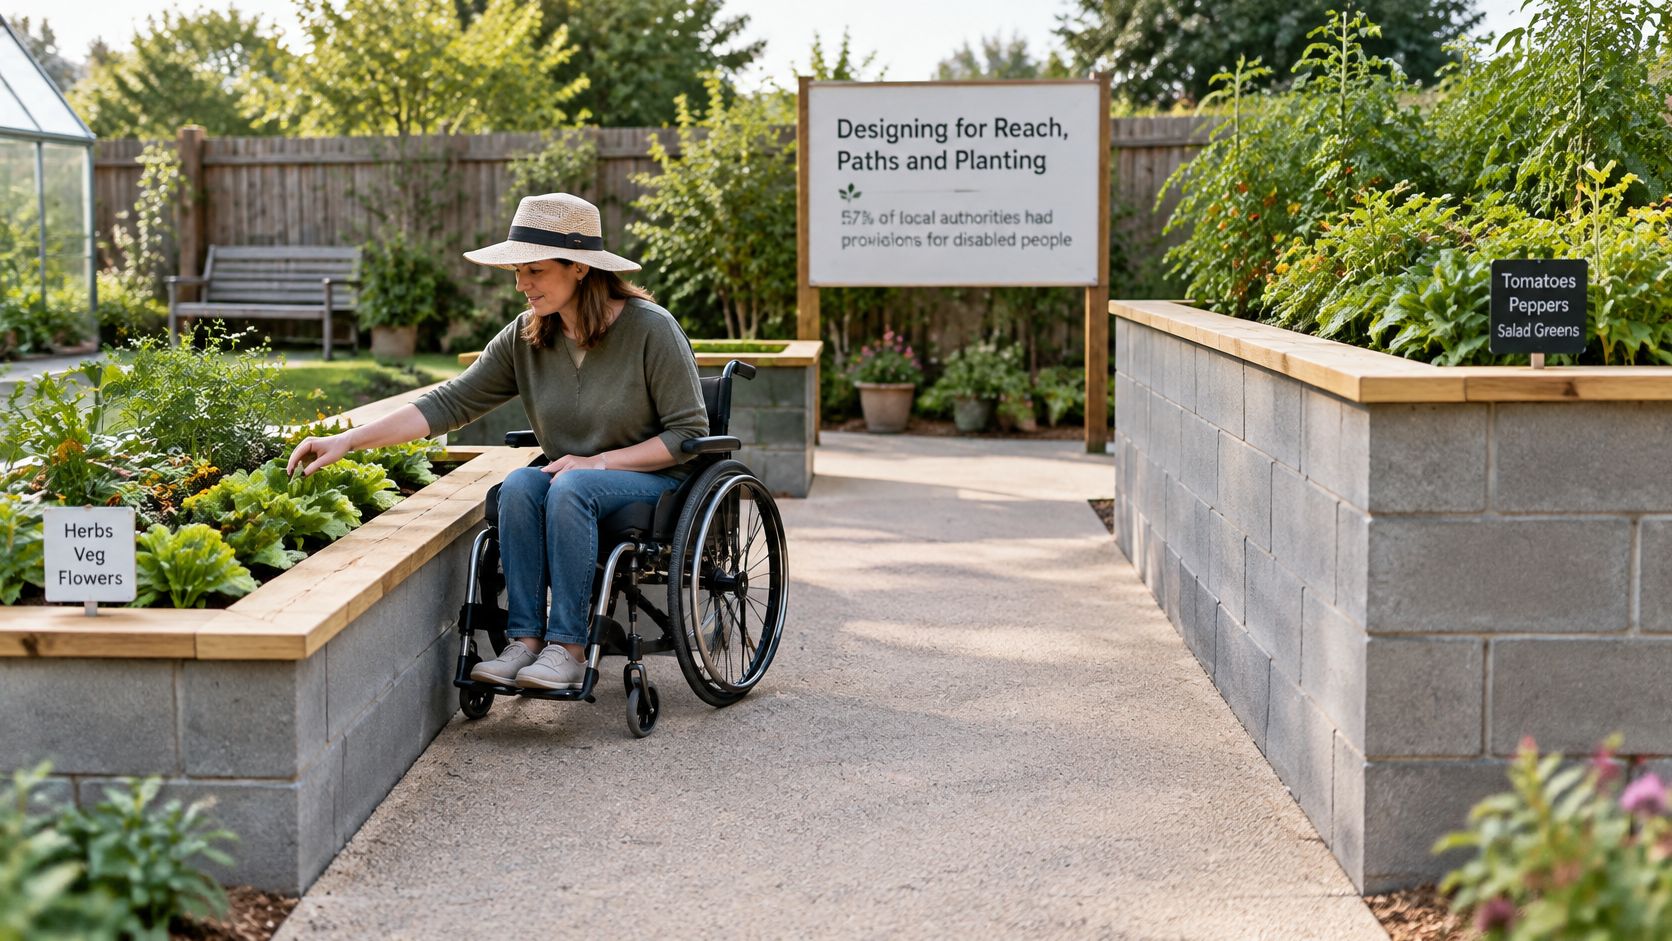
The 2025 APSE State of the Market findings, reported by Garden Organic, found that 57% of local authorities had specific provisions for disabled people, including raised beds and accessible pathways, while 76% had reduced standard plot sizes. Accessibility belongs in the initial layout, not in adjustments after construction.
A tall bed isn't automatically an accessible bed. Thick block walls increase the distance between the gardener and the planting area, and a wheelchair user may need knee clearance that a solid masonry wall cannot provide.
Test the working position
Mark a narrow, double-sided bed and ask its intended user to reach the centre from their usual seated or standing position. For a mock-up, try a working edge around 70 to 75 cm high, but treat that as a trial dimension, not a universal accessibility standard or approved wall height.
Keep paths firm, level and wide enough for the actual mobility aid to turn. Avoid narrow gaps that catch wheels or feet, and check the route to the water supply. A smooth coping can protect hands, but don't use the edge as a seat unless the wall and coping are designed for that load.
Use handling assistance for heavy blocks rather than carrying them across uneven ground alone. Wet leaves, frost and loose gravel also need attention on the finished paths.
- Fast salads: Keep frequently harvested leaves near the working edge.
- Tall crops: Place them where they won't shade shorter planting.
- Watering: Direct water at the soil rather than soaking the path and coping.
For students exploring this as a design discipline, the guide to becoming a professional garden designer without A levels offers a starting point for considering further study. Keep measured sketches, accessibility trials and rejected layouts: they explain your decisions better than a finished photograph alone.
How to Build the Bed Step by Step
Build only after deciding how the wall will be supported and bonded. Dry-stacking ordinary building blocks isn't automatically an adequate retaining-wall system, and mortar doesn't turn an unsuitable foundation into a sound one.
Set out and establish the base
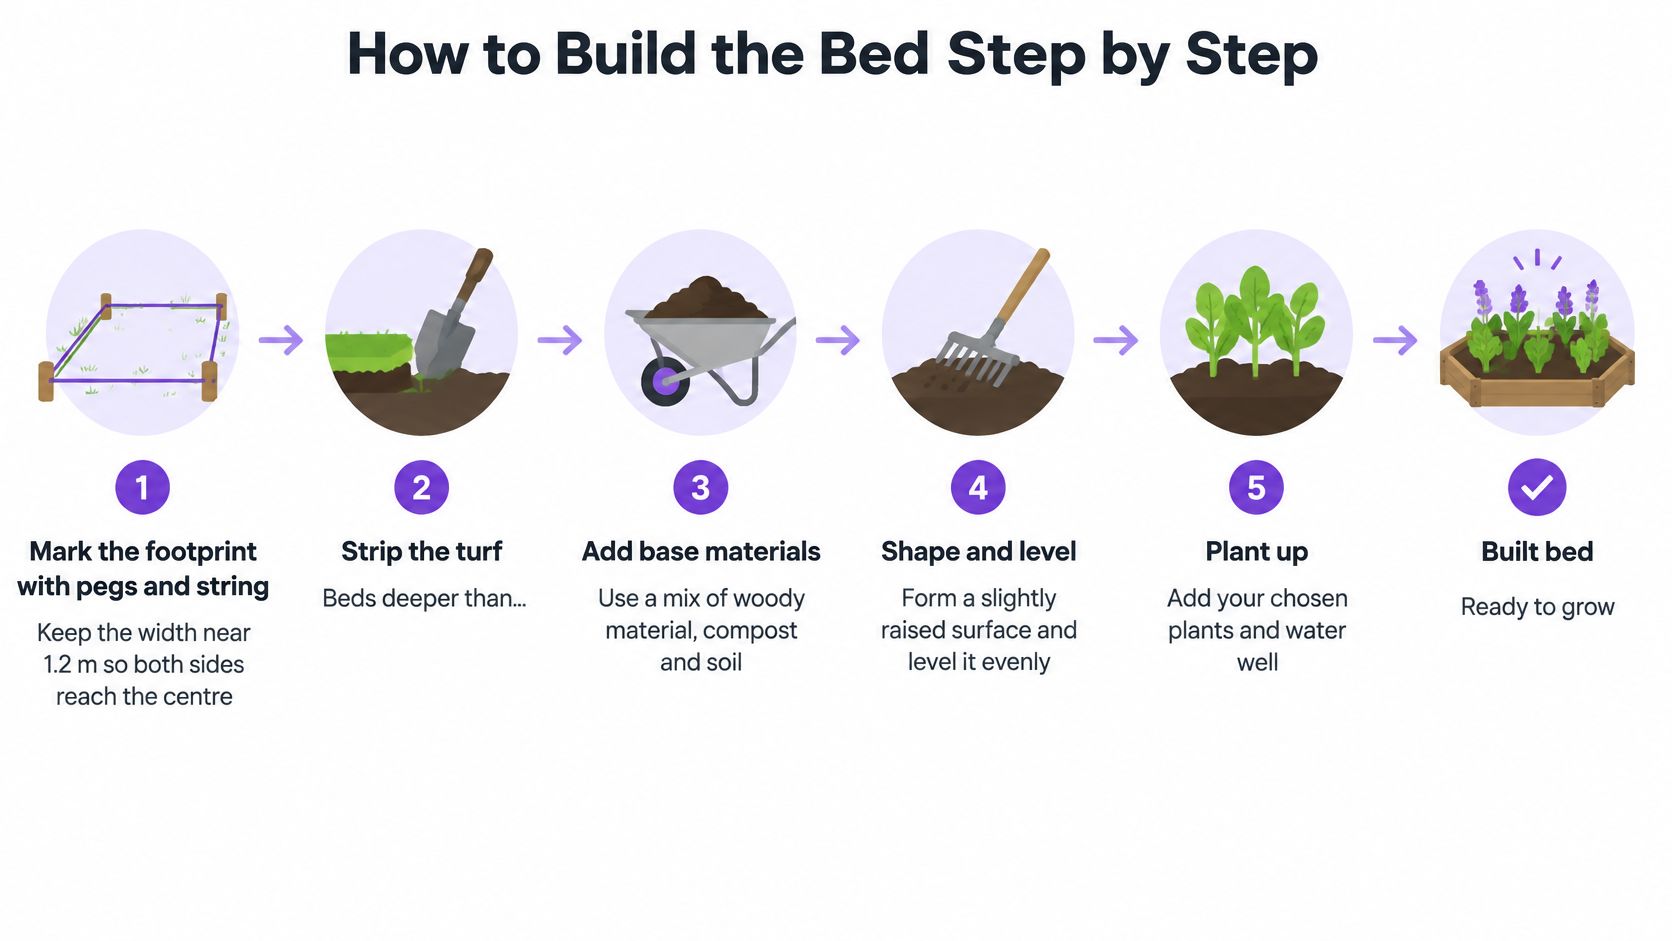
Mark the footprint with pegs and string, because a physical outline reveals awkward corners and blocked routes before excavation. In a hypothetical layout, a width near 1.2 m can be a starting point for testing access from both sides, but the user's reach determines the final width.
Strip turf and prepare the formation, because roots and soft organic ground make unreliable support. For a deep bed, distinguish excavation beneath the wall from space beneath the planting area; clean rubble or suitable subsoil used as lower fill mustn't replace a designed foundation.
Prepare and compact the specified base, checking level along and across the wall line so the first course has even support. Where a compacted rubble base is appropriate, use suitable graded material rather than loose chunks tipped into a trench. Stop if the ground pumps, ruts or remains soft.
Dry-lay the first course to check the arrangement, because corners, bond and cuts need resolving before fixing anything. Use a string line to keep the wall straight, and check that the actual internal dimensions leave enough growing space.
Build without hiding mistakes
Lay the first course using the chosen construction method, checking level and plumb as you proceed. For bonded masonry, arrange running bond with the specified overlap rather than stacking vertical joints directly above each other.
Form drainage outlets as part of the wall construction, because drilling or knocking gaps into a finished wall can damage it. Protect the inner faces of outlets with fine wire mesh backed by gravel, keeping mortar and loose soil out of the water's escape route.
Stagger subsequent joints and recheck each course, because a crooked lower course won't become sound when another row is added. Lift and reset a badly seated block instead of disguising the error with the next course; tap gently through a protective block where adjustment is appropriate.
Inspect before filling, checking for rocking units, cracks, displaced corners and obstructed outlets. Allow mortar or other specified products to cure according to their requirements; leaving the wall overnight doesn't prove it's ready to retain wet soil.
Before filling: Photograph the outlets and foundation arrangement. Once the growing medium is in place, those details become much harder to inspect.
Don't ram fill against unfinished walls. Spread it carefully and stop if the masonry moves, rather than hoping the soil will hold everything together.
Filling the Bed With the Right Soil Mix
Fill primarily with soil, not bags of compost alone. For beds on hard surfaces, the RHS raised-bed guidance specifies seven parts topsoil, four parts sharp horticultural sand and three parts organic matter, measured by volume.
Soil mix for a raised bed on hard surfaces
| Component | Parts | Purpose |
|---|---|---|
| Topsoil | 7 | Main body of the growing medium |
| Sharp horticultural sand | 4 | Keeps the mix free-draining; not builders' sand |
| Organic matter | 3 | Feeds plants and holds moisture while limiting reliance on decomposing material |
Use the same bucket or container for every component so the proportions stay consistent. Mix the materials before adding them, rather than creating separate layers of sand, soil and compost.
Builders' sand isn't a substitute for washed, gritty sharp horticultural sand. Buy the specified material rather than assuming any leftover sand will do. Equally, extra organic matter doesn't automatically produce a better bed: compost-based mixes decompose and slump.
Keep water moving through the bed
For masonry-style beds, the RHS advises drainage gaps approximately every 45 cm (18 in) in the first two courses, protected internally with fine wire mesh and gravel. For beds deeper than 50 cm, its guidance includes removing turf and underlying topsoil and using rubble or subsoil beneath the growing medium to reduce the volume of good soil required.
That lower fill must be clean, suitable for the site and kept clear of outlets. Don't introduce unknown demolition waste into a food-growing bed.
Raised beds can dry faster than surrounding ground. Plan rainwater collection, keep watering equipment within reach and check moisture beneath the surface during dry spells rather than judging by appearance alone.
Watch for these failures:
- Blocked outlets: Check after the first heavy rain and clear escaped soil or debris.
- Already-waterlogged ground: Don't keep adding gravel inside the bed while ignoring standing water outside it.
- Excess organic matter: Top up settled growing medium appropriately, but don't repeatedly replace lost volume with pure compost.
Some settlement is manageable. A wall that moves as the fill settles is a structural warning, not a routine gardening adjustment.
Confirm Your Plan Before Ordering Blocks
Use a simple go or no-go check before paying for delivery:
- Height and structure: Confirm the wall arrangement suits the retained soil, block thickness and exposure. Unresolved structural questions mean the order waits.
- Ground and growing medium: Establish a drainage route and resolve credible contamination concerns.
- Reach and circulation: Test the marked layout with whoever will garden there, including access to water.
- Quantities and cost: Draw the corners, allow for cuts and compare delivered prices, not just unit prices.
For a scaled layout before marking the garden, OutdoorBrite's comparison of the best free garden design software can help you choose a planning tool.
Can Level 2 creative students go straight to university?
Not usually on that qualification alone. The UK qualification-level framework places GCSE-equivalent study at Level 2, while A levels and Access to Higher Education Diplomas sit at Level 3; check each university's alternative-entry provisions.
Is Level 3 enough for a creative degree?
It can provide an appropriate progression route, but admission isn't automatic. The government's qualifications guidance identifies Level 3 as advanced study relevant to university applications; check the exact qualification, grades and course requirements.
Can a garden-design project support my portfolio?
Yes, if it demonstrates investigation and development rather than only a finished bed. Edinburgh's portfolio guidance asks for research, idea exploration, development and resolution, so retain site drawings, material tests and reflective notes.
What should I explain in my application?
Connect the project to what you learned and the subject you want to study. UCA's personal-statement guidance asks applicants to explain their subject interest, preparation through study and useful experiences outside education.
Mark out your bed this weekend, test the reach and inspect the site after rain. Order only when the practical checks pass.
The Online College of Art & Design (OCAD) offers flexible, tutor-led creative courses, including Level 2 and Level 3 pathways and portfolio development. Turn a garden-bed idea into a documented design project with site studies, measured drawings and material exploration, then visit The Online College of Art & Design (OCAD) to explore a course suited to your starting point and university ambitions.