

Your sketchbook is open, your portfolio deadline is getting closer, and you're still wondering what a good face drawing looks like. You might have a carefully shaded eye, several unfinished heads and a portrait that looks convincing until you compare it with the reference. The next step isn't necessarily more detail. It's choosing what you want the drawing to demonstrate.
A drawing of a face can prove observation, technical control, experimentation or personal investigation. For Level 2 and Level 3 students preparing for university, those are different kinds of evidence. A polished likeness is useful, but so is a rough study that shows how you identified and corrected a problem.
Think of your starting point as seven faces, seven methods. Each approach below gives you a repeatable exercise, a way to judge the result and a practical portfolio move. You don't need to master every style or make your sketchbook resemble someone else's.
Choose references with intention, too. Looking at casting portraits for actors and creatives can prompt useful questions about expression, framing and the impression a face creates. For assessed observational work, keep your reference-making process clear and favour your own photographs or a consenting sitter.
Start with the method that addresses your biggest gap, not the one that promises the most impressive finish.
Table of Contents
- 1. Observational Graphite Head Study with Proportional Construction
- 2. Continuous Contour Line Portrait (Blind and Semi-Blind Drawing)
- 3. Tonal Value Study Using Light and Shadow (Charcoal or Graphite)
- 4. Self-Portrait Series Exploring Identity and Concept
- 5. Pen and Ink Hatching and Cross-Hatching Portrait
- 6. Mixed Media Expressive Portrait Using Collage and Layered Materials
- 7. Gestural Life Drawing of the Head (Timed Sessions)
- How the seven face drawing styles compare for portfolio use
- Turning Seven Examples into a Portfolio Plan
1. Observational Graphite Head Study with Proportional Construction
A convincing graphite head begins with relationships, not eyelashes. Establish the skull, jaw and direction of the face before describing individual features. Construction should support observation, not replace it with a standard face.
A UK portrait-drawing study by Harrison, Jones and Davies found that non-expert artists placed the eyes too high when drawing from memory and copying photographs. Mark the top of the skull and chin, then check the eye line against that complete height rather than the visible area below the hair.
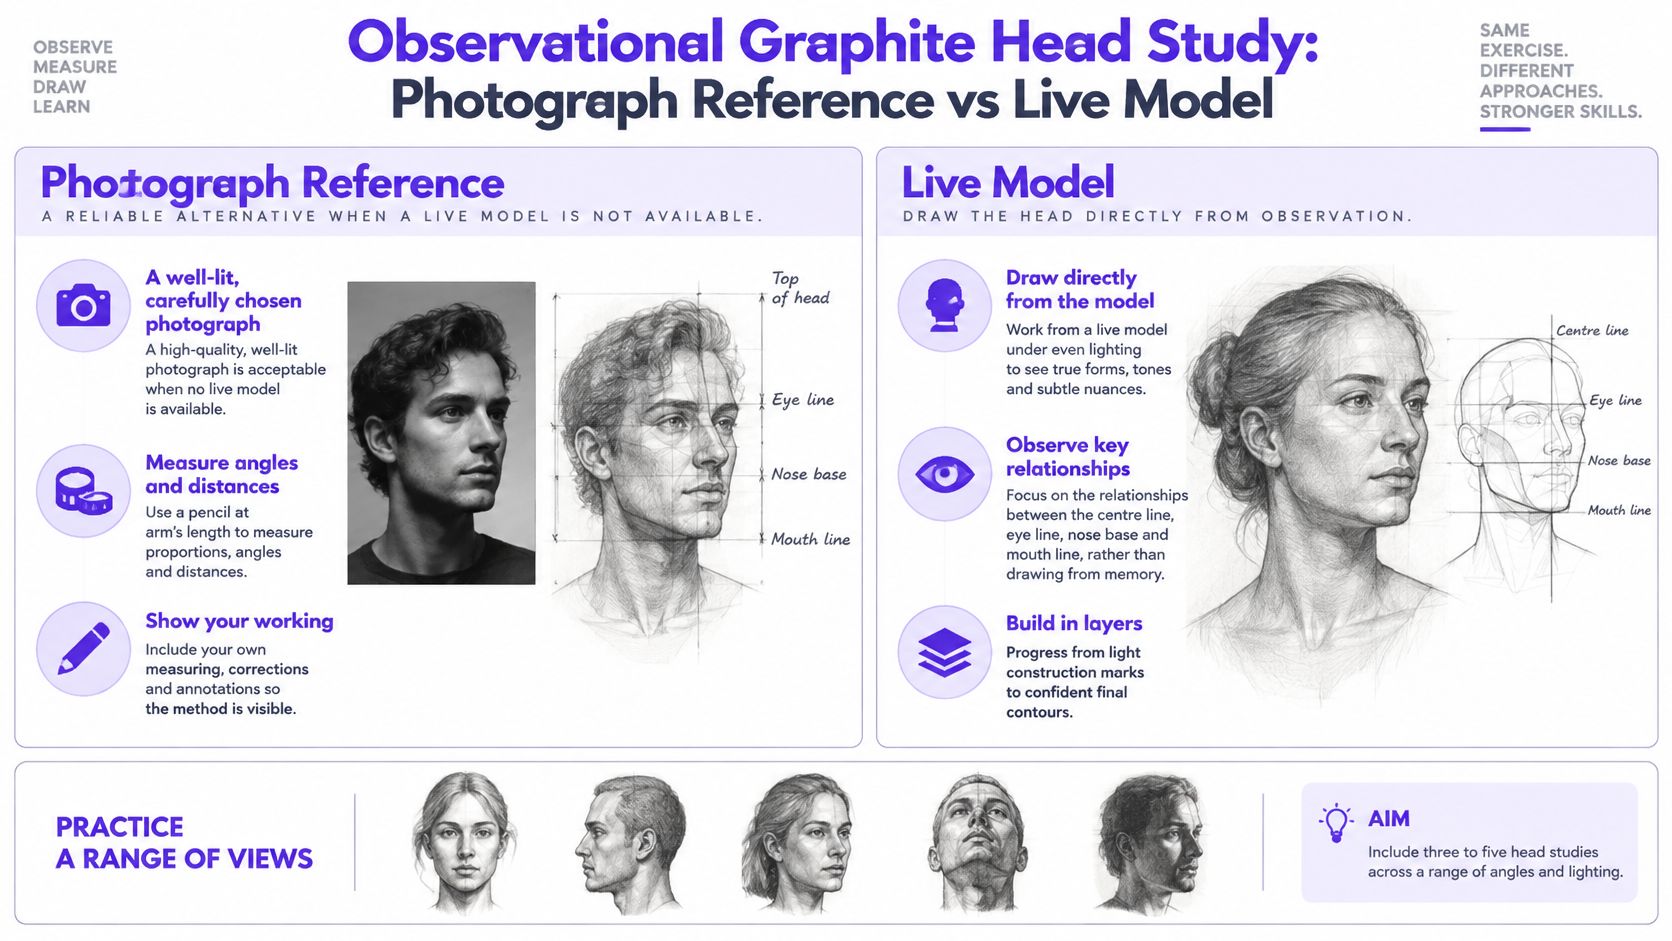
Build a framework you can question
Use Andrew Loomis's head construction as a starting framework, with a centre line showing rotation. Compare it with the structural discipline of Jean-Léon Gérôme-style academic studies, but don't force your sitter into an idealised template. Facial thirds and eye-width divisions are checking devices, not rules every person must match.
For a practical exercise, draw a front-facing sitter with light HB construction, then develop selected shadows using softer pencils up to 6B. Follow the step-by-step face-drawing guide if you need a clear construction sequence.
- Record the structure: Include two or three construction stages so the assessor can follow your decisions.
- Check the likeness: View the drawing in a mirror or upside down to notice misplaced masses.
- Annotate a correction: Explain which measurement changed and how it affected the face.
What it proves: Accurate comparison, spatial understanding and willingness to revise. This makes a useful foundation-level head study because the process remains assessable, even where the final likeness isn't perfect.
Portfolio move: Place the measured construction beside the resolved drawing. Keep the tonal range faithful to the reference rather than making every feature equally dark.
2. Continuous Contour Line Portrait (Blind and Semi-Blind Drawing)
Put down the eraser and follow the face with an unbroken line. In blind contour drawing, you watch the sitter rather than the paper; in semi-blind drawing, you occasionally check where your line has travelled. The distortion isn't something to hide, but it needs to come from sustained looking rather than arbitrary scribbling.
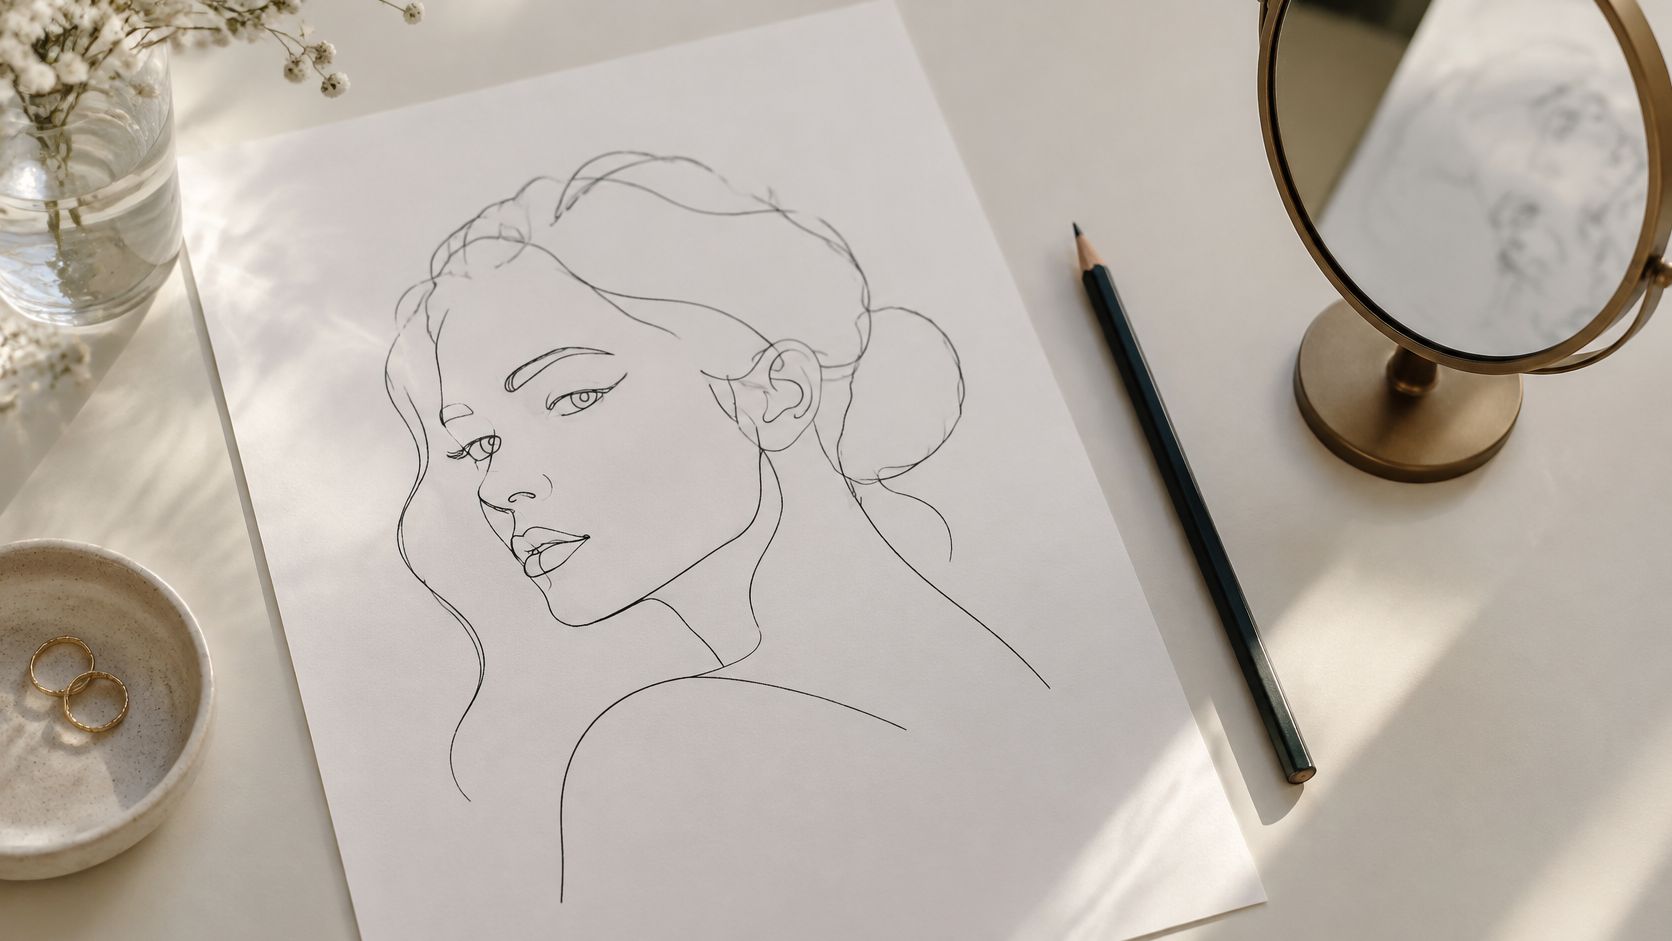
Picasso's simplified line portraits and Jean Cocteau's economical portrait drawings offer useful comparisons. Study where each artist changes direction, interrupts a contour or leaves information out. Don't assume that copying an artist's sparse appearance demonstrates the observation behind it.
Compare looking with checking
Choose a sitter who can remain comfortable, or use a photograph taken from a fixed position. With a ballpoint or fineliner, trace the brow, bridge of the nose, lips and chin slowly enough that your hand follows what your eyes notice. The blind contour drawing guide provides a useful starting exercise.
Make a blind version and a semi-blind version from the same viewpoint. Say the blind portrait stretches the nose but records a distinctive change beneath the lower lip, while the semi-blind version improves placement. That comparison gives you something specific to evaluate.
A contour drawing doesn't need to look tidy. It needs to show that you followed the subject rather than a memorised symbol.
What it proves: Attentive observation, decisive mark-making and an ability to learn from constraints. These are useful qualities to demonstrate in Level 2 and Level 3 observational units, although neatness alone won't establish them.
Portfolio move: Select the strongest four to six results rather than every attempt. Pair contrasting outcomes and explain what you retained in the next drawing. Don't present an accidental likeness as the only measure of success.
3. Tonal Value Study Using Light and Shadow (Charcoal or Graphite)
If your portrait looks flat despite accurate features, stop outlining and organise the light. A tonal study asks you to describe planes, shadow shapes and edges, rather than enclosing everything with a dark line.
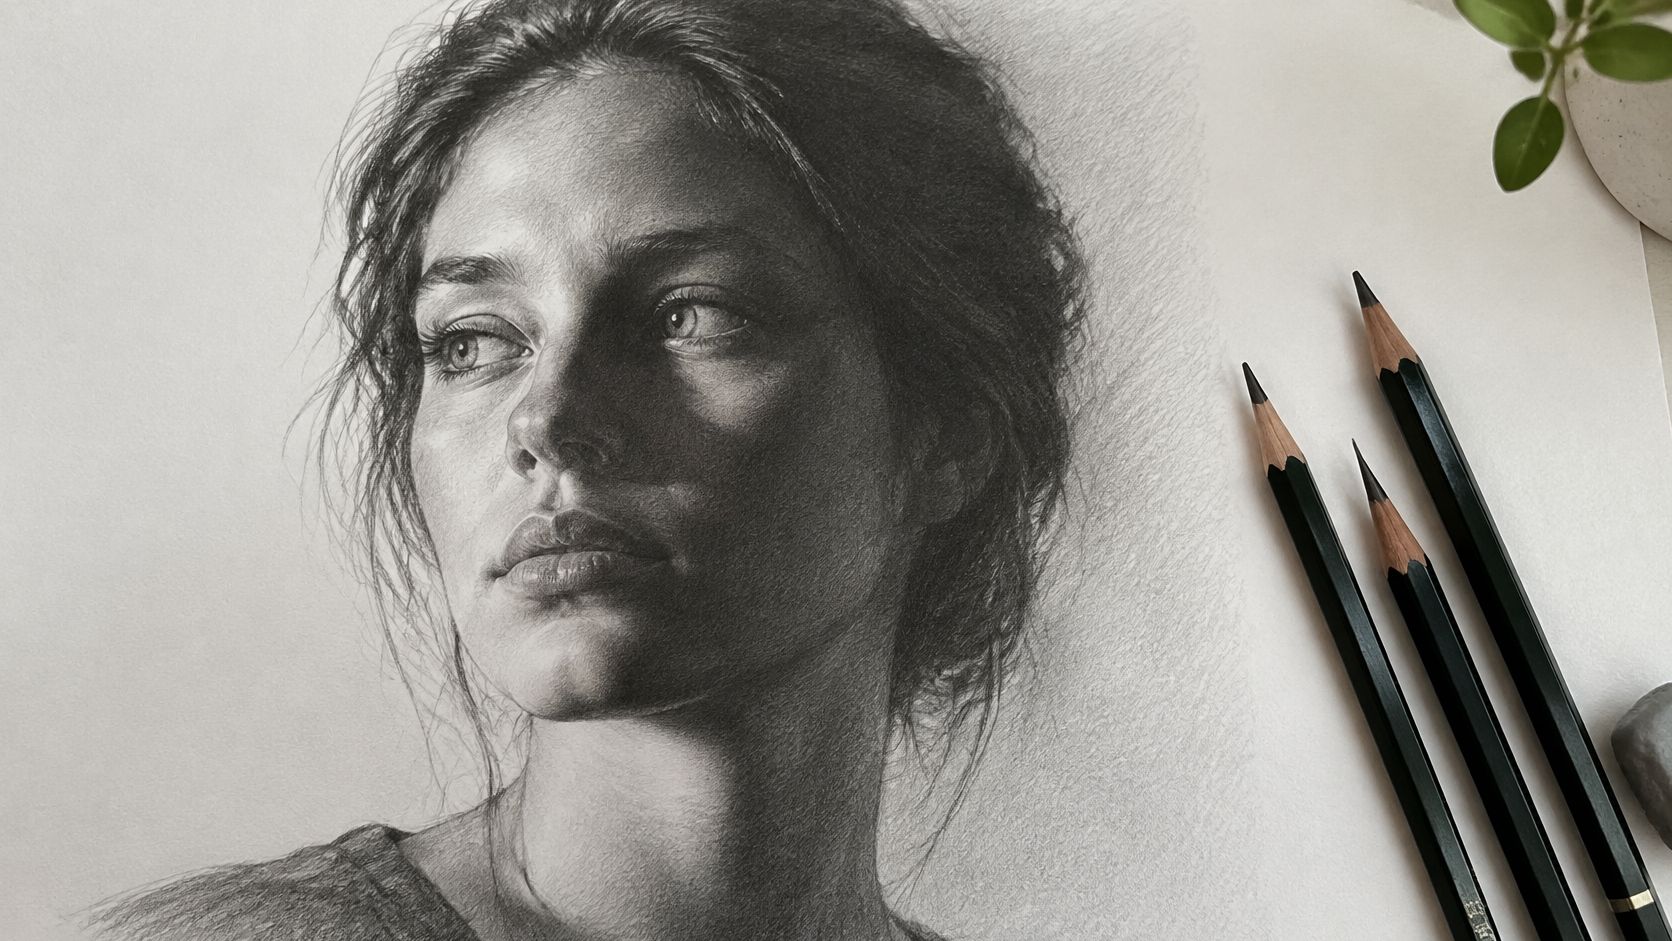
Set a directional lamp beside your sitter and photograph the arrangement so you can reconstruct it. Squint at the face, identify the main connected shadow and block it in before refining the eyes or mouth. Don't assume the whites of the eyes are the lightest areas.
Rembrandt's chiaroscuro portraits are useful for studying selective illumination; Käthe Kollwitz's charcoal and lithographic portraits provide a contrasting route into strong tonal masses and emotionally purposeful marks. Compare how they organise attention, rather than focusing on how dark their backgrounds become.
Make the shadow do the structural work
Say your reference shows a lit cheek beside a shadowed nose. Draw the boundary between those shapes, then judge whether the transition is sharp or gradual. Blending everything smoothly would remove information about the change in form.
- Plan the masses: Put a small thumbnail value sketch beside the final drawing.
- Reserve the extremes: Keep the deepest darks and brightest lights selective.
- Protect the surface: Test a suitable fixative on a sample, follow its ventilation instructions and store the drawing beneath glassine without rubbing it.
What it proves: Control of media, tonal relationships and the ability to distinguish a cast shadow from a turning surface. For a Level 3 Fine Art or Photography portfolio, the lighting setup can also make your visual reasoning clear.
Portfolio move: Include the thumbnail, setup photograph and final study. Explain one edge you softened and one you kept sharp, with a reason grounded in the reference. A full tonal range is useful only when the subject supports it.
4. Self-Portrait Series Exploring Identity and Concept
The same face can support very different questions. You could investigate how you present yourself at home and in public, how fatigue changes expression, or how clothing affects the way a viewer reads you. A series becomes an investigation when the changes are intentional.
The National Gallery's portrait-drawing programme frames portraiture around likeness and personality. That distinction matters: a proportionally accurate self-portrait can still communicate little about the person you're investigating.
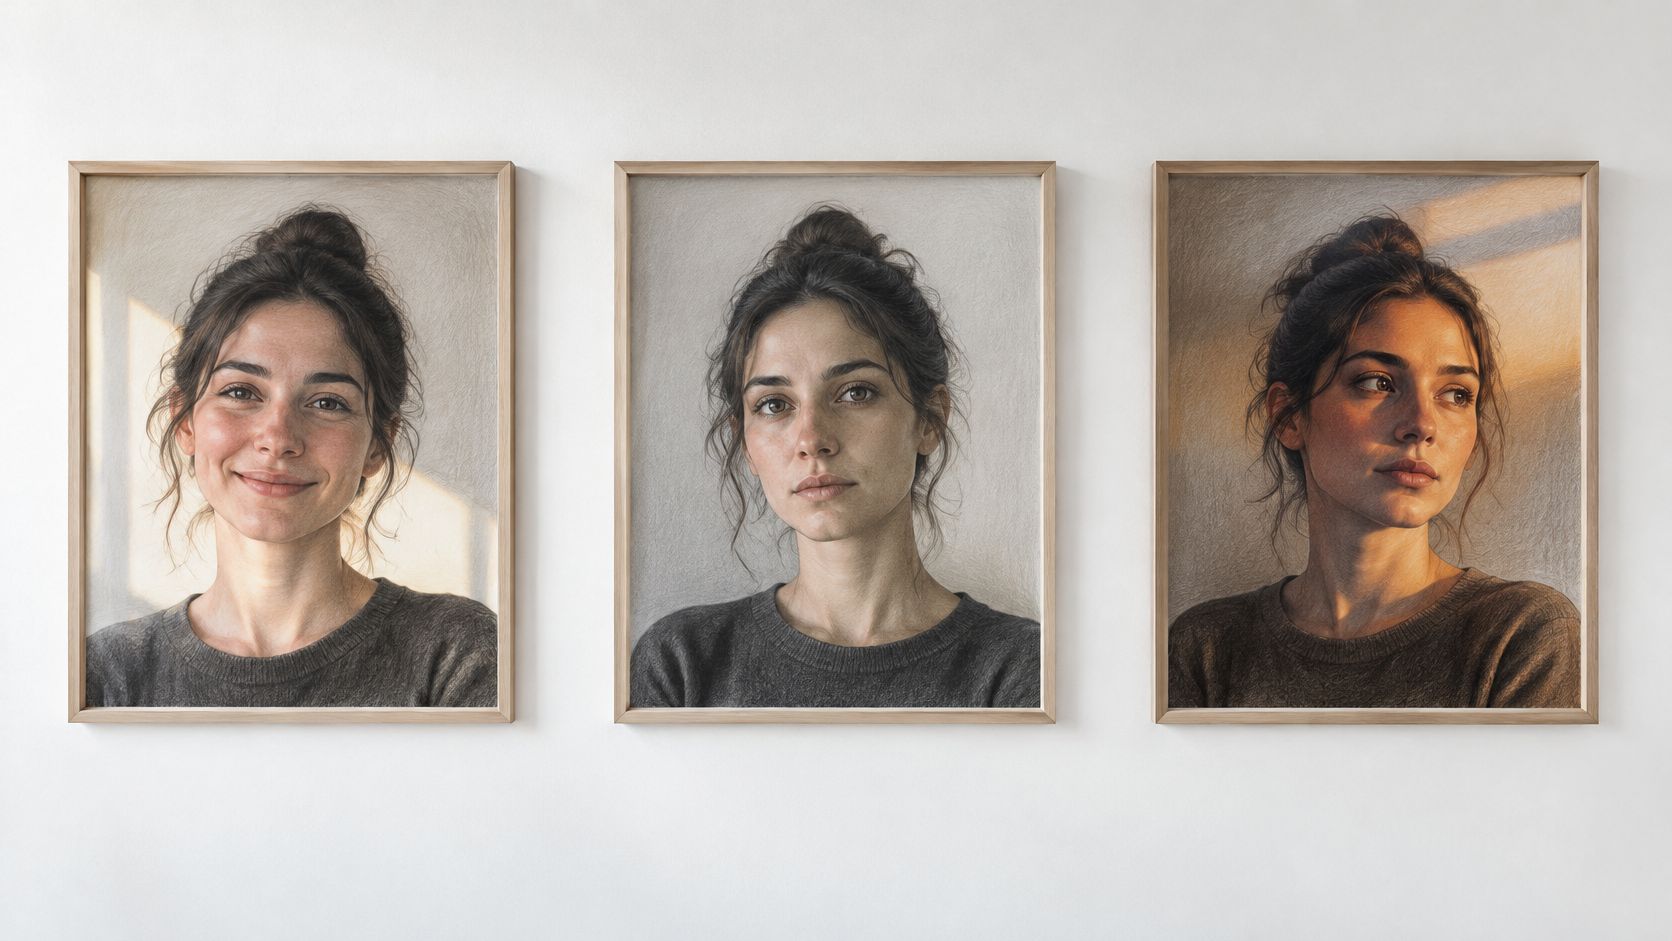
Change something you can explain
Keep the viewpoint consistent with a mirror or a camera on a tripod, then alter a chosen variable. For example, draw the same pose in graphite, compressed charcoal and coloured pencil to investigate how material affects the mood you communicate. Use the self-portrait drawing guide to establish a repeatable starting structure.
Compare Rembrandt's self-examination, Egon Schiele's expressive treatment of the body and Frida Kahlo's use of symbolism. Select at least two artists for contextual pages and identify a decision you tested, rather than writing biographies.
Concept test: If you remove the written explanation, can a viewer still recognise a meaningful relationship between the portraits?
What it proves: Personal enquiry, contextual understanding and purposeful experimentation. An admissions tutor needs to see how the idea developed, not just a collection of different facial expressions.
Portfolio move: Write a 150 to 250 word rationale explaining the variable, what changed and what you would investigate next. Arrange the work in a sequence that makes those changes visible.
Don't use ageing, disability or cultural identity as visual shorthand for a personality trait. Describe your own choices precisely, and distinguish observable features from assumptions about what they mean.
5. Pen and Ink Hatching and Cross-Hatching Portrait
A shadow built from ink marks exposes your decisions. You can't erase a dense patch of cross-hatching back to clean paper, so this method suits students who want to demonstrate planning alongside a distinctive drawing language.
Albrecht Dürer's engraved and pen-based portrait studies provide a useful reference for describing form through line. Compare those marks with Victorian pen-and-ink portrait illustration and contemporary editorial portraiture. Look for differences in direction, spacing and emphasis rather than treating all hatching as the same technique.
Turn a flat patch into a curved surface
Start with a lightly pencilled map of the head and main shadow areas. Practise hatching, cross-hatching and stippling on a separate sheet, then choose a limited vocabulary for the portrait. Too many unrelated mark types can make the face look assembled from separate exercises.
For a worked example, hatch the cheek with lines that curve around its volume. Increase density as the cheek turns away from the light, then use a crossing layer only where you need a deeper value. Keep the lit area comparatively open.
- Vary line weight: Test different nibs or fineliner widths before committing to the face.
- Preserve the light: Leave paper visible instead of outlining every highlight.
- Check reproduction: Scan at high resolution and inspect the image at its intended submission size.
What it proves: Deliberate mark-making, technical consistency and an understanding of how line can describe volume. Irreversible marks aren't automatically confident marks; an assessor still needs to see why you placed them.
Portfolio move: Present your tonal test strip beside a detail crop and the complete portrait. Explain where you changed line direction to describe a facial plane.
The trade-off is time. Dense stippling can produce subtle transitions, but it may add little if the underlying proportions are unresolved. Check the head before investing in surface detail, and don't use repetitive marks to avoid making structural decisions.
6. Mixed Media Expressive Portrait Using Collage and Layered Materials
A torn paper fragment should have a reason to be on the face. Mixed media is strongest when drawing, collage and paint contribute different information, not when materials conceal an unresolved portrait.
Portraiture already encompasses varied forms: the National Portrait Gallery's collection overview includes drawings, prints, photographs, silhouettes and mixed-media works alongside painting and sculpture. You don't need to restrict a portrait to a conventional pencil likeness, but you do need to explain your choices.
Hannah Höch's photomontage portraits offer a route into fragmentation and constructed identity. Picasso's collage and mixed-media work can prompt experiments with shifting viewpoints and the relationship between a real material and a depicted surface.
Make the materials carry meaning
Suppose your project explores the difference between public identity and private thought. Keep an observed graphite face visible, then introduce selected fragments from your own writing around or across it. Test whether covering part of the mouth contributes to the idea, rather than assuming concealment automatically communicates silence.
Document the stages with photographs. Use archival adhesives and suitable paper, and test wet materials on an offcut before layering them over the drawing.
Accessibility can also shape the method. The Cultural Learning Alliance's arts education reporting identifies unequal arts participation affecting pupils with special educational needs or disabilities. Depending on your needs, high-contrast references, larger shapes, adaptive grips or digital layers may make the investigation more workable.
What it proves: Material judgement, experimentation and a connection between process and meaning. Collage doesn't demonstrate ambition because it contains many ingredients.
Portfolio move: Include a clean observational study beside the mixed-media outcome, plus material tests and a short explanation of what each layer contributes. If handwriting or sustained drawing is difficult, discuss audio reflection or photographed annotations with your tutor rather than omitting evaluation.
7. Gestural Life Drawing of the Head (Timed Sessions)
Start with the tilt of the head and the line into the shoulders. A stiff portrait usually fails before the features begin: the skull sits forward, the neck has no weight, and the shoulders arrive as an afterthought. Timed studies train you to establish that structure while the pose is still live.
Set a visible timer and work through poses from thirty seconds to ten minutes. Stop when it sounds, even if the sheet feels unfinished. Short poses force selection; longer poses test whether the first structure can carry more information without tightening into a copied face.
Research involving the University of Birmingham found that face drawing under more demanding stimulus conditions involved stronger differential activation in visual processing regions. Treat changing views as perceptual decision-making: judge the head's angle, then commit.
Capture weight before features
Draw a sitter leaning forward, then sitting upright. In each pose, establish the head's axis, the angle beneath the jaw and the shoulder line before placing the features. Broad charcoal or the side of a graphite stick can help you avoid premature detail.
Study Edgar Degas's rapid studies and Egon Schiele's expressive life drawings for two different kinds of emphasis. Degas shows how a few directional marks can hold movement; Schiele shows how distortion can sharpen tension when the underlying joints still make sense. Look at what each leaves unresolved.
Keep the line that explains the tilt. Leave out the eyelash that doesn't.
What it proves: Prioritisation, direct observation and responsiveness to changing conditions. For a Level 2 or Level 3 assessor, the value lies in seeing you choose the head's action before surface likeness. Speed alone is weak evidence, and vigorous marks will not rescue a head that does not connect to the neck.
Portfolio move: Select one or two resolved studies and arrange supporting attempts in a clear sequence, from fastest to most sustained. Label timing and reference type. If a live sitter is unavailable, use a fixed-pose model video and say so plainly. For assessment, a clear photograph of the original study is more useful than a decorative reproduction, so keep decisions about whether to buy heavyweight art prints separate from the evidence you submit.
How the seven face drawing styles compare for portfolio use
| Item | Primary Medium | Main Skill Shown | Main Drawback |
|---|---|---|---|
| Observational Graphite Head Study with Proportional Construction | Graphite | Accurate observation and proportion | Can look stiff or over-polished |
| Continuous Contour Line Portrait (Blind and Semi-Blind Drawing) | Pen or pencil line | Observation and hand-eye coordination | Distortion can make results appear rough |
| Tonal Value Study Using Light and Shadow (Charcoal or Graphite) | Charcoal or graphite | Tonal control and three-dimensional form | Smudges easily and can become muddy |
| Self-Portrait Series Exploring Identity and Concept | Drawing or painting | Concept development and personal expression | Can feel self-focused without a clear concept |
| Pen and Ink Hatching and Cross-Hatching Portrait | Pen or fineliner | Line-based tone and careful planning | Time-consuming and difficult to correct |
| Mixed Media Expressive Portrait Using Collage and Layered Materials | Drawing, collage, and mixed media | Experimentation and material choices | Can look unfocused without a clear purpose |
| Gestural Life Drawing of the Head (Timed Sessions) | Charcoal, conté, ink wash, or soft pencil | Quick observation and gesture | Individual studies can look rough |
Turning Seven Examples into a Portfolio Plan
Choose two or three methods that cover your strengths and gaps. A balanced starting set might include a measured head study, an expressive or conceptual portrait, and a demanding tonal drawing. Each piece should evidence a different decision, not the same photograph re-rendered in a new medium.
Keep a dated record of references, tests, corrections and outcomes. At OCAD, students upload photographs of completed work and assignments throughout their course to receive tutor feedback and build an art portfolio. Do the same with your own practice: record which feedback you acted on, so the next version reads as a purposeful response rather than a fresh attempt.
What do Level 2 and Level 3 assessors look for?
Your assignment's assessment criteria are the final authority. Level 2 work needs clear observation, material testing and explanation of choices. Level 3 develops those foundations into a sustained enquiry with contextual connections and critical selection. Neither level rewards hiding the process behind a polished final image.
Do university portfolios need realistic face drawings?
Realism is useful evidence of observation, but it isn't a universal requirement or a substitute for ideas. Match the selection to the course. An illustration application might foreground a distinctive line language; a Fine Art enquiry might need stronger conceptual development. Check the university's current portfolio requirements before deciding what to include.
- Show development: Keep an early attempt where it explains a meaningful correction.
- Select with purpose: Remove near-duplicates that add no new evidence.
- Present clearly: Photograph work square-on, avoid glare and include detail views where marks matter.
Can I work from photographs or use tracing?
Photographs are workable references when you identify their origin and understand their limits, for example flattened tonal range and a fixed viewpoint. Tracing can support a study of tone, composition or accessible image-making, but label it clearly and never present traced placement as evidence of freehand measurement. Ask your tutor how it fits the particular assessment task.
What if my drawing isn't technically perfect?
Include it when it demonstrates a worthwhile decision, then explain the limitation and your next test. A drawing of a face can communicate character through selective distortion, but calling an error expressive doesn't explain it. Show the difference through comparison and revision.
Photography resources such as must-have shots for a portfolio can prompt thoughts about variety, but curate your art submission around evidence rather than a fixed shot list. Explore our step-by-step tutorials and study options, then use the short application form if you're ready to plan your next qualification.
We offer flexible, tutor-led online art study, including drawing, tonal studies and mixed media, with portfolio-centred coursework and feedback. Visit The Online College of Art & Design (OCAD) to explore a suitable pathway and apply through our short form, bringing a current face drawing and a clear idea of what you'd like to improve.