

You're midway through a sketch, and the figure on the page keeps going wrong in the same places. The shoulders drift too narrow, the legs feel stiff, and the pose that looked easy in your head turns clumsy once you start drawing. That's usually the moment students reach for a doll for drawing, not because they want a shortcut, but because they need something they can turn, measure, and question before the paper starts to feel expensive.
A drawing doll works best when you treat it like a quiet studio assistant. It won't solve every figure problem, and it won't replace looking at real people, but it can help you build the basic structure that Level 2 and Level 3 portfolios depend on. In UK art practice, articulated mannequins have a documented history stretching back to at least the 16th century, when wax- or wood-made human figures were used for proportion, pose, light, and drapery studies, and the Fitzwilliam Museum has framed the mannequin as an “inconspicuous studio tool” in British art culture since the Renaissance (BBC coverage of the Fitzwilliam Museum exhibition).
Table of Contents
- Why Art Students Reach for a Drawing Doll
- How an Artist Mannequin Actually Works
- Types of Drawing Dolls and Mannequins
- Using Your Drawing Doll for Effective Study
- When a Drawing Doll Falls Short
- Choosing the Right Drawing Doll for Your Course
- Questions Art Students Ask About Drawing Dolls
Why Art Students Reach for a Drawing Doll
A lot of students first buy a doll for drawing after a frustrating sketch session. The figure looked fine in their head, but once they tried to draw it, the body lost balance, the limbs disagreed with each other, and the pose stopped reading clearly. That's not a failure of talent, it's usually a sign that the student needs a way to test proportion before adding detail.
The problem it solves in the studio
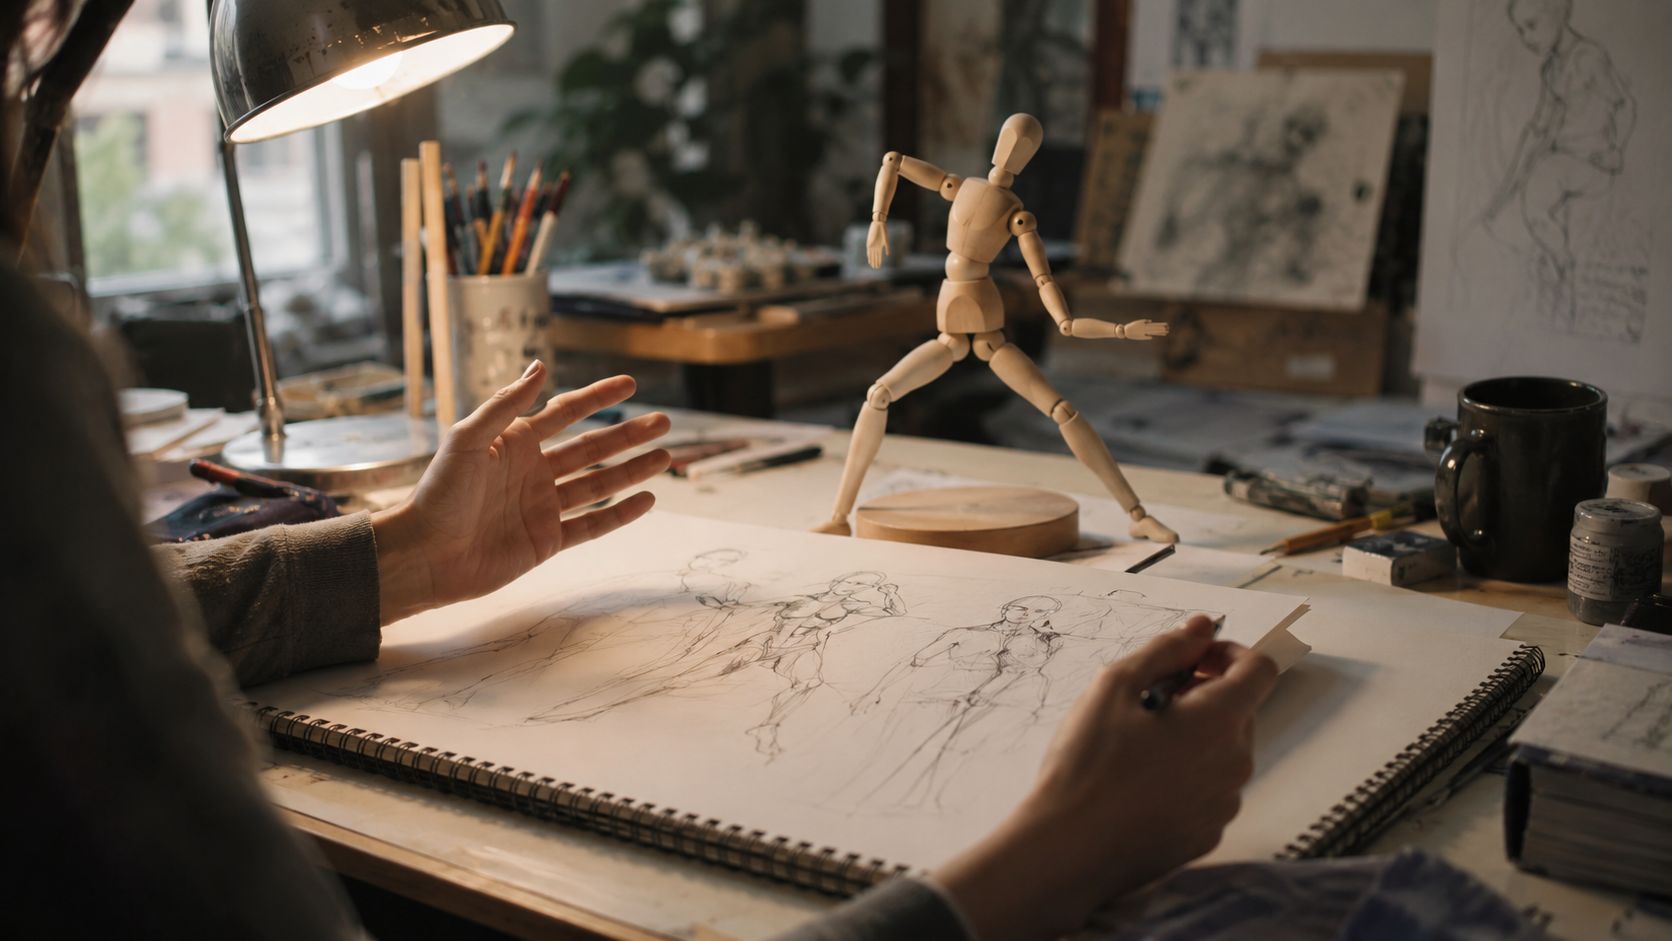
A mannequin helps most when the issue is structure, not style. If you're trying to draw a person from imagination, it gives you a simple body you can turn, tilt, and compare against your page. That makes it easier to check shoulder-to-head ratio, basic limb direction, and the flow of a pose before you commit to line work.
Practical rule: use the mannequin to answer, “Does this figure stand correctly?” before you ask, “Does this figure look finished?”
That matters for coursework because portfolio work often rewards students who can control the whole figure, not just copy a face or hand in isolation. If your body proportions keep slipping, a wooden figure can act as a temporary scaffold while you build stronger observation habits. It's especially useful for learners who need a low-pressure object they can study at home, rotate on a desk, or pose repeatedly without asking a live model to hold still.
The long history of the tool also matters. The British studio mannequin wasn't invented for a classroom workbook, it grew out of a much older visual culture of observation and making, which is one reason it still feels familiar in art rooms today (BBC coverage of historical mannequin use in British art practice).
Why beginners keep returning to it
Beginners often need something physical because imagination alone can hide errors. A doll gives you a pose you can inspect from several angles, which is useful when you're learning how a body changes as it turns. It also helps with gesture flow, since you can angle the torso and limbs until the silhouette starts to make sense.
If you're already working on structured sketch habits, you may also find it helpful to pair this with practical drawing improvement guidance for art students. The mannequin then becomes one part of a broader study routine, not the whole routine.
How an Artist Mannequin Actually Works
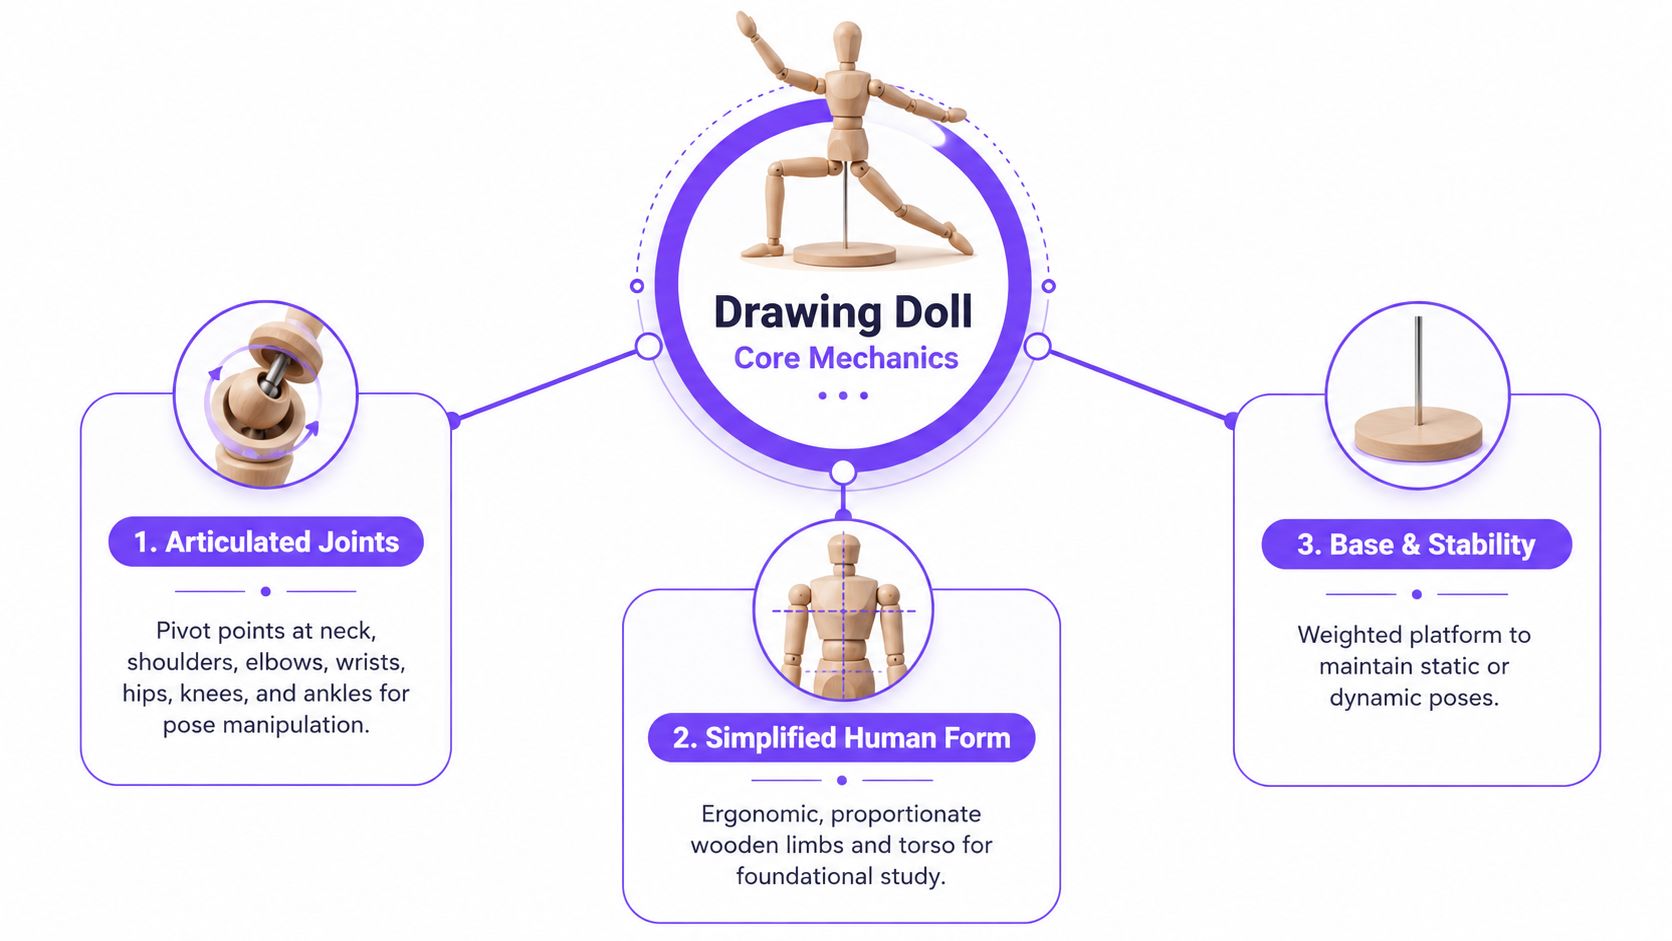
A drawing doll is most useful when you stop seeing it as a tiny human and start seeing it as a measuring device. Its job is to simplify the figure into parts you can position and compare, so you can build confidence in proportion before you move into more detailed observation. That is why the joints, the torso shape, and the stability of the base all matter.
Joints, landmarks, and proportion
The key feature is articulation. Neck, shoulders, elbows, wrists, hips, knees, and ankles can pivot, which lets you test how a body changes when weight shifts or an arm lifts. If those joints are too loose, the pose collapses. If they're too stiff, you can't explore the kind of changes that help you learn.
The Tate's classical proportional system gives a useful way to think about this. In that framework, the full body height is constructed to equal eight heads, and the head becomes a repeatable unit for checking landmarks such as shoulders, navel, crotch, knees, and feet (Tate proportional figure reference). That doesn't mean every real person looks like a mannequin. It means the doll is most useful when you treat it as a proportion-checking tool, not a literal anatomy model.
The mannequin should help you measure the figure, not flatten the figure into a wooden copy of itself.
Why some mannequins look a little elongated
Students often worry when the figure looks slightly idealised. In practice, that can help, because the proportions push you to compare placements instead of obsessing over surface detail. The important thing is not whether the doll looks exactly human, but whether it gives you dependable landmarks for your drawing.
A good habit is simple. Check the head size, then compare it to the shoulders, hips, knees, and feet. That keeps the pose grounded in measured relationships rather than guesswork. Once you get used to that method, the mannequin stops feeling like a toy and starts acting like a studio measuring aid.
Types of Drawing Dolls and Mannequins
Not every drawing mannequin solves the same problem. A full-body wooden figure is good for whole-body proportion, but it's not always the best choice for hands, clothing folds, or portrait study. Choosing well matters more than buying the biggest one, especially if your workspace is small or your course tasks change from week to week.
Matching the tool to the problem
A full-body wooden mannequin suits students who need to study stance, balance, and the relationship between upper and lower body. A hand mannequin is better when the issue is finger position, knuckle structure, or grip. Miniature articulated figures are useful for quick pose planning and general gesture work, while flexible pose figures can be helpful if you want a wider range of movement.
The material also changes the experience. Wood feels solid and tends to hold a pose well. Plastic can be lighter and easier to move, but sometimes feels less stable. Wire-armature figures are flexible, although that flexibility can make landmark checking harder if the figure won't hold still. For students doing longer independent study sessions, stiffness and durability matter because the reference has to stay reliable while you sketch.
The history of the British mannequin industry shows how these tools evolved alongside manufacturing practice. A scholarly thesis records Gems and Grabham as the earliest recorded British manufacturer of mannequins in 1898, and notes that British producers later developed fibreglass mannequins in the 1960s (British mannequin design history). That history matters because it shows these objects have never been one single product. They've changed with studio needs.
| Drawing Doll Types Compared | Best For | Material | Skill Level |
|---|---|---|---|
| Full-body wooden mannequin | Whole-figure proportion, stance, drapery planning | Wood | Level 2 to Level 3 |
| Hand mannequin | Finger structure, hand gestures, close-up study | Wood or plastic | Level 2 to Level 3 |
| Flexible pose figure | Dynamic poses, movement planning | Plastic or wire-armature | Beginner to intermediate |
| Miniature articulated doll | Quick gesture sketches, composition thumbnails | Wood, plastic, or mixed materials | Beginner |
If you need a wider context for costume-related display and mannequin use, the guide for UK costume professionals is a useful parallel read. It's not a drawing tutorial, but it helps you think about how pose, support, and display purpose change the tool you choose.
Using Your Drawing Doll for Effective Study
The biggest mistake is to copy the doll exactly. That creates a stiff little wooden person on the page instead of a drawing that understands structure. Use the mannequin as a starting point, then check the relationships that matter in real figure drawing, especially shoulder width, head size, and the placement of major landmarks.
A simple study routine
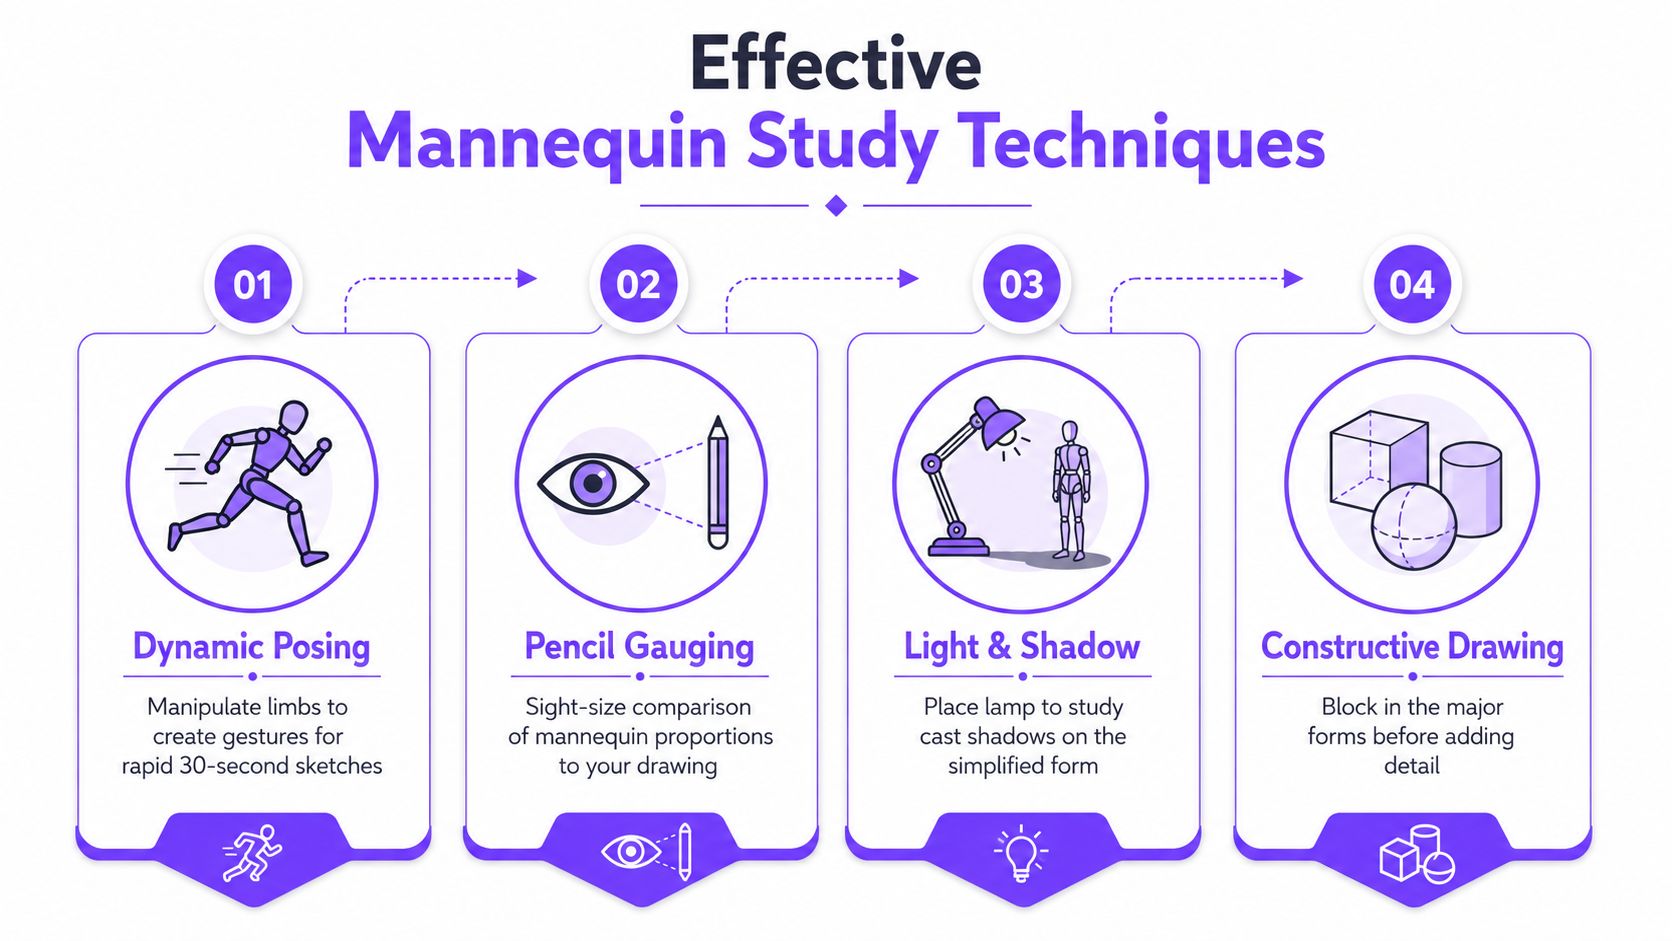
Start with a pose that has a clear line of action. Tilt the torso, adjust one arm, and shift one leg so the figure doesn't stand in a dead upright block. That gives you a better reading of weight and movement, even though the model itself is simplified.
Then block in the whole figure before adding detail. The art-reference guidance from Artists & Illustrators points out that common proportion errors often come from misjudging landmark relationships, especially shoulder width versus head size, and recommends comparing horizontal and vertical relationships with a pencil gauge (Artists & Illustrators proportion guidance). That is exactly how a drawing doll earns its place in the studio.
A practical sequence looks like this:
- Set the pose. Turn the head, shoulders, and hips so the gesture is readable.
- Check the head unit. Compare the body against the head before drawing anything detailed.
- Block large shapes first. Sketch torso, pelvis, limbs, then adjust.
- Use the pencil gauge. Compare widths and angles against the mannequin, not your memory.
- Add drapery or shadow studies later. Let the structure hold before you decorate it.
Studio habit: if the mannequin looks wrong, the drawing usually goes wrong in the same place.
If you're building coursework from observation exercises, it can help to compare your mannequin studies with this learning-to-see lesson demo for Level 2 art students. That keeps the exercise focused on seeing relationships, not just copying outlines.
Exercises that actually build skill
Timed gesture drawings work well because they stop you overthinking the doll. Drapery studies help once you hang cloth over the figure and observe how folds follow the body underneath. Foreshortening practice is useful if you keep one limb pointing toward the viewer and compare what happens to length and angle.
The point of all of these exercises is consistency. A mannequin won't teach you to observe on its own, but it can give you a repeatable setup that makes practice easier to organise.
When a Drawing Doll Falls Short
A doll for drawing is not the right reference for every task. It's strongest where structure matters, but it becomes weaker when you need texture, expression, or natural weight. If you use it for everything, your work can drift towards a stylised habit that looks neat but doesn't really observe the world.
Where another reference works better
Photo reference is often stronger for facial expression, skin tone, and fabric behaviour because the camera records surface information the mannequin can't give you. Live models are better when you need to observe subtle weight shifts, breathing, and the way a body inhabits space. Figure-drawing apps can also help when you need a wider pose library or a quicker digital workflow for planning.
The official guidance on drawing also matters here. UK-facing content notes that drawing includes line control, tone, shading, and symbolic mark-making, not just gesture or pose copying (UK art-reference guidance on drawing skills). That means the mannequin can support drawing, but it can't replace the wider skill set students are expected to build.
The right and wrong use cases
Use the doll when you need to solve a construction problem. Use a photo when you need detail. Use a live model when you need presence, balance, and nuance. If you're drawing a hand with visible tendons or a face with a specific mood, the wooden figure will run out of information very quickly.
A mannequin gives you a framework. It doesn't give you life.
For students who want to avoid turning references into copied outlines, this guide on using references without copying is worth keeping nearby. It pairs well with mannequin work because both ask the same question, what do you need from the reference, and what do you need to add yourself?
Choosing the Right Drawing Doll for Your Course
The best choice depends on the problem you're trying to solve, not on how complete the mannequin looks in a product photo. If you're short on space, a smaller articulated figure may be enough. If your work focuses on whole-body proportion or clothing studies, a full-body wooden mannequin gives you more useful information.
What to think about before you buy
For home study, stability matters more than novelty. A mannequin that falls over or won't hold a pose will waste time, especially if you're studying alone or fitting work around family and other commitments. If you need repeated setup for online lessons, choose something that can be moved and reset without fuss.
Accessibility matters too. UK post-16 SEND law requires providers to make reasonable adjustments and use best endeavours to secure special educational provision, including changing practices, altering physical access, and providing auxiliary aids and services (SEND guidance summary). In practice, that means a learning tool should support the student's needs, not make them work harder than necessary. A mannequin that's easy to handle can be a real help for students who benefit from routine, tactile study, or slower pacing.
A sensible buying decision usually comes down to these points:
- Space: pick a figure that fits your desk or studio shelf.
- Durability: choose joints and a base that hold still during drawing.
- Course emphasis: prioritise hands, whole-body proportion, or gesture according to your briefs.
- Accessibility: make sure the tool suits physical handling, setup, and visual clarity.
- Progression: choose something that helps you move from simple observation into portfolio-level decision making.
If you're working towards university, remember that creative courses often expect Level 3 qualifications and use UCAS tariff points, with Foundation Studies in Art and Design / Art, Design and Media carrying 80 points for Pass, 96 for Merit, and 112 for Distinction (UCAS tariff tables). Many degree courses also accept Level 3 routes such as A levels, Extended Diplomas, and Foundation Diploma in Art & Design, and examples from the sector show tariff offers like 104 to 120 UCAS Tariff points with creative subject expectations (accepted qualifications and tariff examples). A drawing doll won't earn those points for you, but it can support the observational work that helps your portfolio feel mature enough for the next step.
Questions Art Students Ask About Drawing Dolls
Is a drawing doll accepted in a portfolio?
Yes, when it's used as part of your study process rather than as the subject itself. Tutors usually want to see that you can observe, measure, and develop ideas, not just copy a pose. The mannequin is strongest as a planning tool that supports your own drawing decisions.
Should I use a mannequin or a photo reference?
Use the mannequin when you're testing proportion, pose, or gesture flow. Use a photo when you need surface detail, facial expression, or fabric information. Many students get better results when they combine both, then draw from understanding rather than tracing one source.
What size mannequin should I buy for home study?
Choose the size that fits your desk, sketchbook, and storage space. A smaller model is easier to keep nearby, but a full-body figure is more helpful if you're studying stance and body relationships. The best size is the one you'll set up and use often.
Are free apps enough on their own?
Sometimes they're enough for pose ideas, but they don't replace the tactile control of a physical object. A wooden figure lets you control light, angle, and placement on the table in a way that's easier to repeat. If you're building a university portfolio, the smartest approach is usually to mix tools rather than rely on one.
Does a doll for drawing help if I'm not strong at anatomy yet?
Yes, because it gives you a simple framework before you tackle complex anatomy. It won't teach every muscle or facial feature, but it can help you learn where the body sits on the page and how major parts relate to each other. That's a strong foundation for Level 2 and Level 3 students who want cleaner, more controlled figure work.
If you're building figure confidence for coursework, portfolio pieces, or university preparation, The Online College of Art & Design (OCAD) can help you study in a flexible way that fits real life. Visit The Online College of Art & Design (OCAD) to explore tutor-led art learning that supports observation, structure, and progression from Level 2 through Level 3.