

You've opened a sketchbook, found a reference photo, and drawn two large eyes that somehow don't belong to the same owl. The head feels too wide, the body looks flat, and adding more feather lines only makes the problem harder to fix. That's a normal starting point. Learning how to draw an owl becomes much easier when you build the bird from observable shapes first, then add texture, light and character.
For Level 2 and Level 3 creative students, this exercise can become more than a pleasant doodle. A carefully developed owl study can show observation, proportion, mark-making, tonal control and reflective development, all useful evidence when you're building work for formal progression.
Table of Contents
- Why Learning How to Draw an Owl Builds Real Drawing Skills
- What You Need Before You Start Sketching
- Building Your Owl From Simple Shapes and Proportions
- Adding Feather Texture Light and Character
- Finishing Touches and Turning Your Sketch Into Portfolio Evidence
- Next Steps to Keep Improving and Explore Formal Study
Why Learning How to Draw an Owl Builds Real Drawing Skills
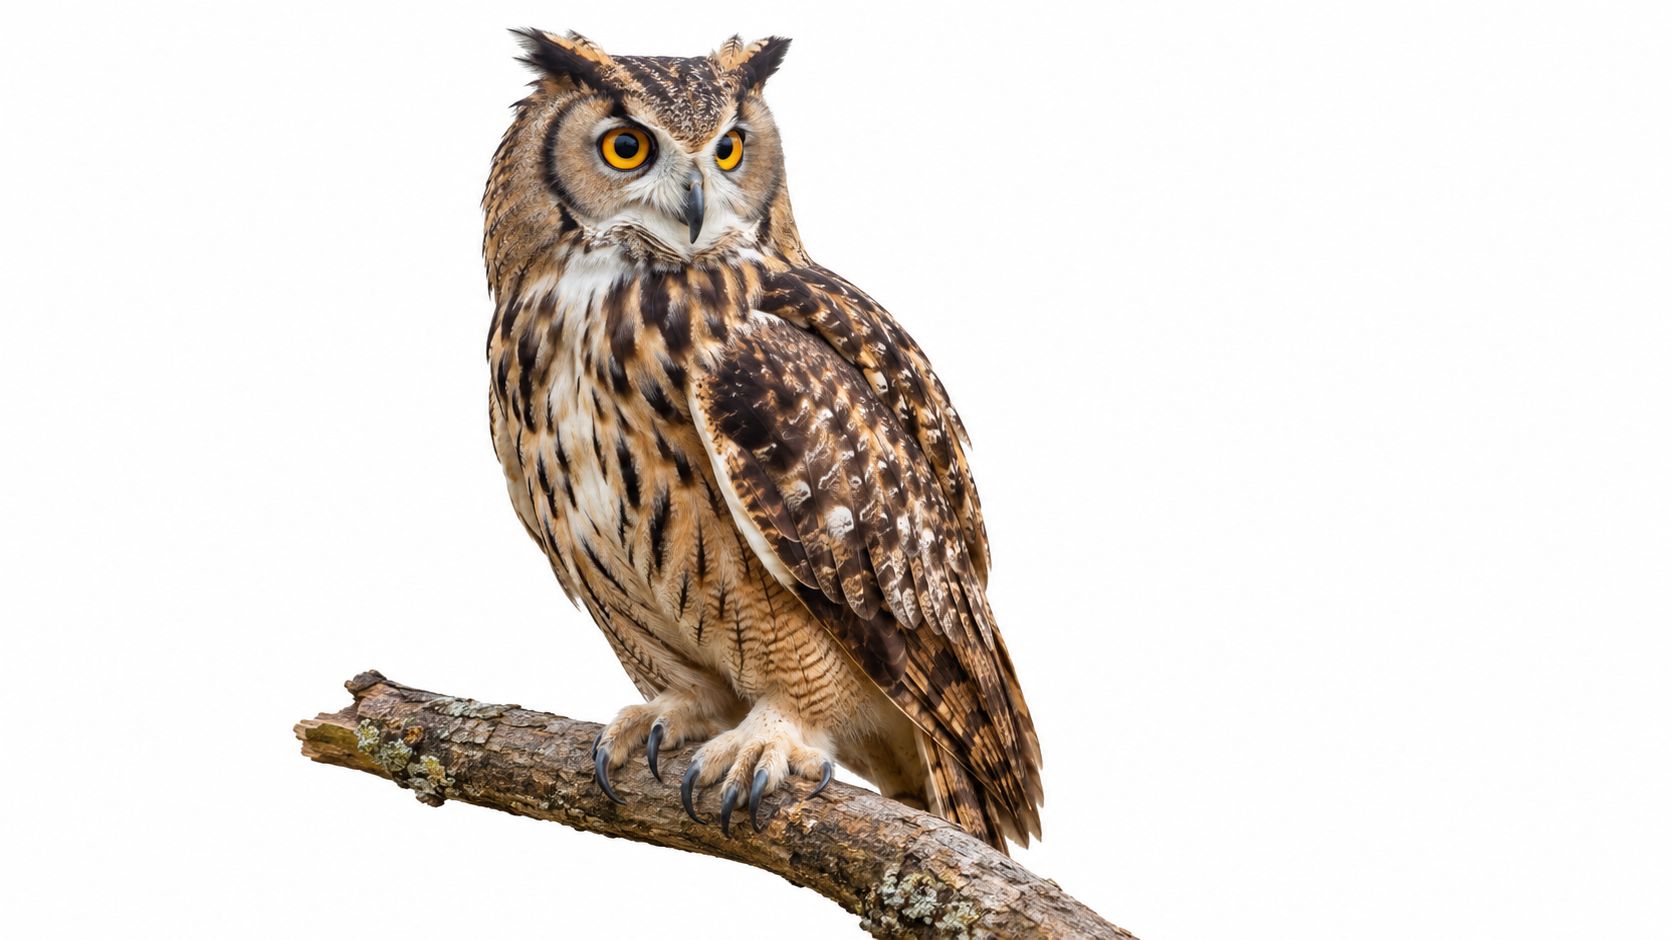
An owl is an excellent subject because its features are clear and visually demanding. The rounded body, strong head shape, forward-facing eyes and layered feathers give you several problems to solve at once. You'll practise line, proportion, form and mark-making without needing a complicated scene.
A beginner might start with a small cartoon owl, then gradually compare it with a reference. The eyes may be oversized at first, but that mistake becomes useful. You can ask whether the eye line is level, whether the beak sits centrally, and whether the head joins the body at the correct width. Each correction develops observation rather than relying on symbols from memory.
A simple drawing with serious purpose
In England, drawing is explicitly treated as a core part of art and design education. The Department for Education's research review on art, craft and design education describes drawing as central to art and design curricula at primary and secondary level, and notes that the national curriculum names drawing as a “way of making”.
That context matters. An owl drawing gives you a manageable subject through which to study observation, line, form and surface. The same review records GCSE art and design entries in 2022 at a similar level to 2002, while art and design entries were higher than in 2010, showing that the subject retains a measurable examination presence despite pressures on arts teaching.
Your first attempt may wobble. That doesn't mean you lack ability. A shape-first process gives you a way to identify what went wrong and a clear method for improving the next study.
Practical rule: Don't judge the drawing while you're still constructing it. Check one relationship at a time, such as head width compared with body width.
What You Need Before You Start Sketching
You don't need a large equipment collection. A small, reliable kit will help you make pale construction marks, deepen shadows gradually and lift highlights without damaging the paper.
Choose smooth cartridge paper if you want clean outlines and controlled shading. Rough paper can be useful for expressive work, but its surface may interrupt delicate feather marks. Keep an HB pencil nearby for construction, then use softer grades from 2B to 4B for darker areas and richer tonal passages.
A kneaded eraser is especially useful for owl studies. Rather than rubbing aggressively, press and lift it to remove graphite from the forehead, eye rings or feather edges. A clean piece of scrap paper under your drawing hand will reduce smudging, while a soft brush can move loose graphite without dragging it across the page.
Set up your reference and workspace
Use a clear reference showing the whole bird, with enough light to distinguish the eye sockets, bill, wing and tail. A UK species can give the study a strong sense of place. Britain has five owl species that live and breed here, the barn owl, tawny owl, long-eared owl, short-eared owl and little owl, while the little owl was introduced to Britain in 1842, as summarised in UK wildlife reporting.
Keep the reference at a comfortable viewing height, rather than placing it flat beside your hand. Sit with both feet supported and pause regularly so you're not leaning into the page. Short, focused sessions often produce better observation than a long session during which your eyes become tired.
Before you begin, decide whether you're making a loose study or a finished portfolio piece. For a study, leave construction lines visible. For a finished piece, keep a separate photograph of the early stages so the development remains part of your evidence.
Building Your Owl From Simple Shapes and Proportions
Start with the pose, not the feathers. Lightly draw a long axis through the owl's body. It can be gently curved if the bird is leaning or perched at an angle. This line helps you understand balance and prevents the body from becoming an isolated oval with no sense of weight.
Block the body as an oval or egg shape. Don't press hard. At this stage, you're asking how tall the body is, how broad it becomes at the chest and where it narrows towards the tail. The bird's silhouette should already suggest an owl before you add a single feather.
A practical bird-drawing workflow recommends beginning with a long axis for posture, blocking the body as an oval or egg, then adding the head and bill before checking proportions and the eye-bill line. You can compare this approach with the bird sketching guidance from Painters Online. The method is transferable because it asks you to solve structure before decoration.
Check the head, eyes and bill
Place the head as a rounded shape that overlaps the upper body. The head may look circular in a frontal pose, but avoid forcing a perfect circle if the owl is turning. A slight tilt can make the drawing feel more natural.
Draw a light horizontal guideline across the face to establish the eye line. Then mark the centre line of the head. These guides don't need to remain in the final drawing, but they help you check symmetry. The eyes should relate to the centre line and sit inside the facial disc, not float near the outside edges.
The bill usually sits between and slightly below the eyes. Check the distance from each eye to the bill rather than placing the bill by instinct. If one eye is closer to the bill than the other, the owl may look unintentionally twisted.
Refine the silhouette before surface detail
Connect the head and body with the outer contour. Look for the broad chest, the tucked wing and the taper towards the tail. Keep the line light enough to alter. Feathers added too early can disguise an incorrect silhouette and make the owl's overall “jizz”, or characteristic shape, less convincing.
Use comparative measuring with your pencil. Hold it at arm's length to compare the head height with the body height, or the distance between the eyes with the width of the bill. You don't need exact measurements. You need consistent relationships.
For additional practice with construction principles, use this drawing construction resource. A balanced outline is a successful milestone. Once the body carries its own weight and the facial features sit securely within the head, texture will strengthen the drawing rather than cover structural problems.
Adding Feather Texture Light and Character
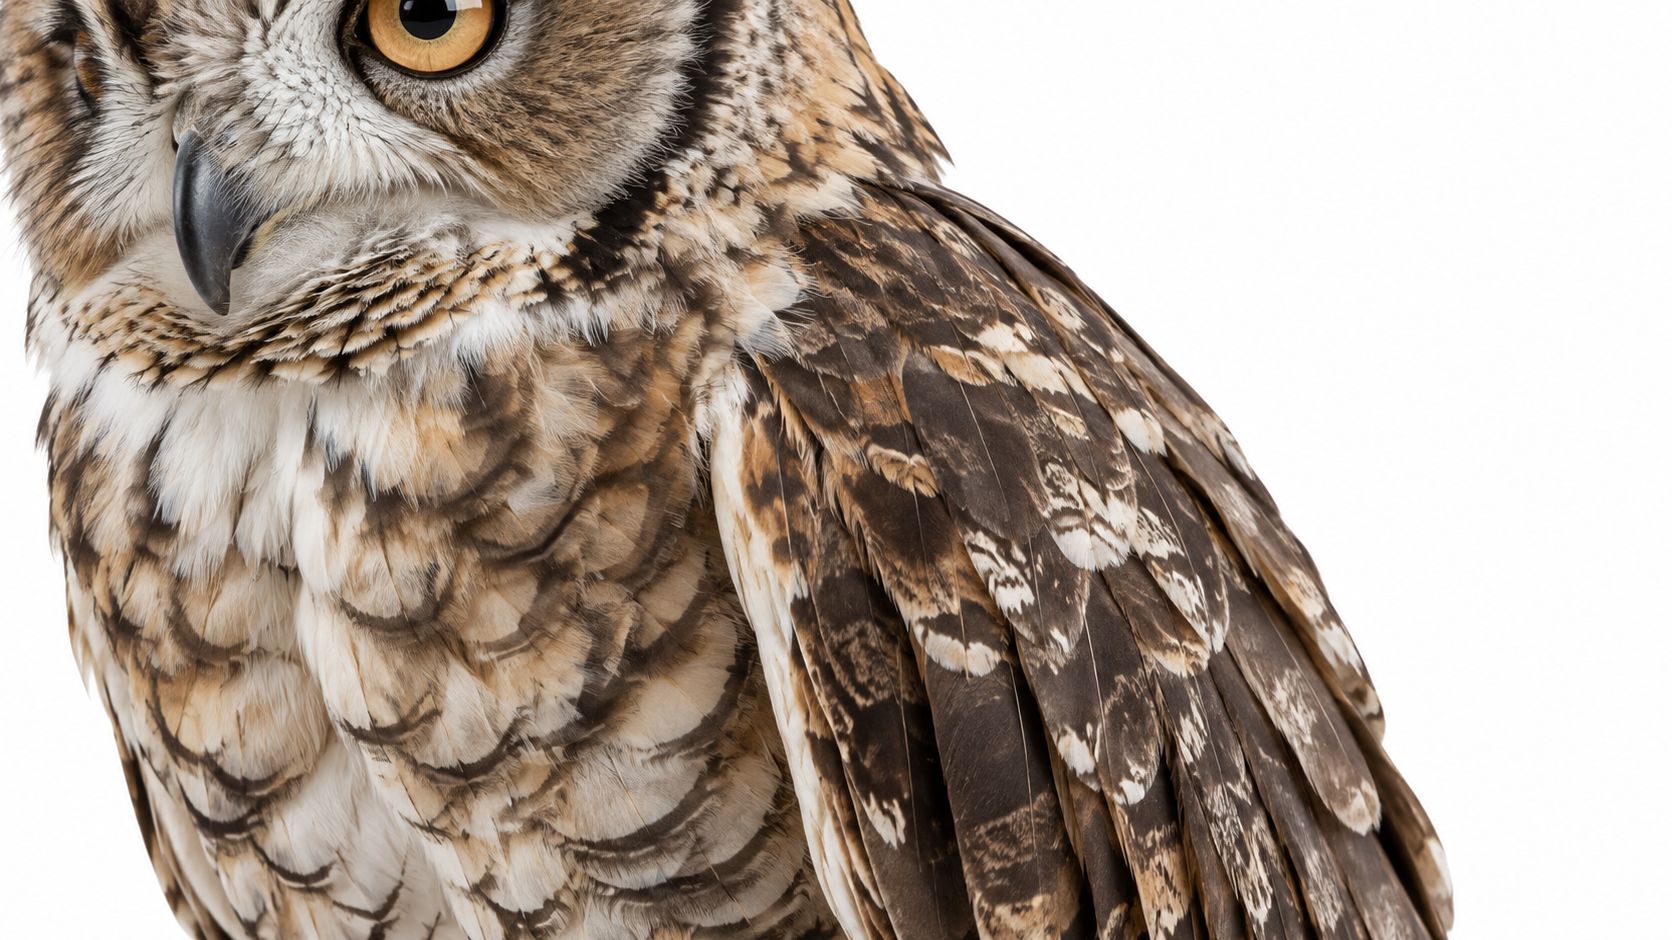
Texture works best when it follows the owl's form. Random short lines may suggest activity, but they won't necessarily describe softness, direction or volume. Before marking, identify the main feather groups: the facial disc, chest, wing and tail.
The facial disc often needs delicate, radiating marks that lead towards the eyes and bill. On the chest, use longer, softer strokes that follow the downward flow of the body. Wing feathers overlap in firmer, more directional shapes, while tail feathers tend to taper and point away from the body.
Choose marks by feather group
| Owl Area | Recommended Mark | Why It Works |
|---|---|---|
| Facial disc | Fine radiating strokes | Follows the circular structure of the face |
| Chest | Soft, layered vertical marks | Suggests downy volume without hard outlines |
| Wing | Overlapping curved strokes | Describes the direction and structure of flight feathers |
| Tail | Tapered, pointed marks | Reinforces the narrowing form |
Vary the pressure of your pencil. A light touch can describe pale down, while a firmer stroke can separate overlapping wing feathers. Avoid outlining every feather. Instead, group several marks, leave quiet areas and use darker accents where one form passes beneath another.
Use light to create volume
Choose one light direction before shading. If the light comes from the upper left, the right side of the facial disc, body and wing can become slightly darker. Build this slowly with layered graphite rather than pressing immediately with a soft pencil.
The eyes need a clear value range. Keep the iris rich and dark, leave a small highlight, and soften the surrounding eye socket so the eyes don't look pasted onto the face. The highlight should remain clean, so protect it with a kneaded eraser or reserve the paper from the beginning.
A barn owl and a tawny owl can make different drawing studies. The barn owl offers pale areas and a heart-shaped facial disc, while the tawny owl provides opportunities to study darker, mottled patterning. Recent UK estimates cited in the press suggest about 12,000 breeding pairs of barn owls and 50,000 pairs of tawny owls, giving artists observable native subjects to explore, as noted in UK wildlife coverage. The numerical estimates are useful context, but your drawing should still depend on the reference in front of you.
For rounded tonal practice, this sphere drawing exercise can help you understand how gradual value changes make a form appear solid. Apply that principle to the chest and facial disc, then reserve sharper contrast for the eyes, bill and selected feather overlaps.
Finishing Touches and Turning Your Sketch Into Portfolio Evidence
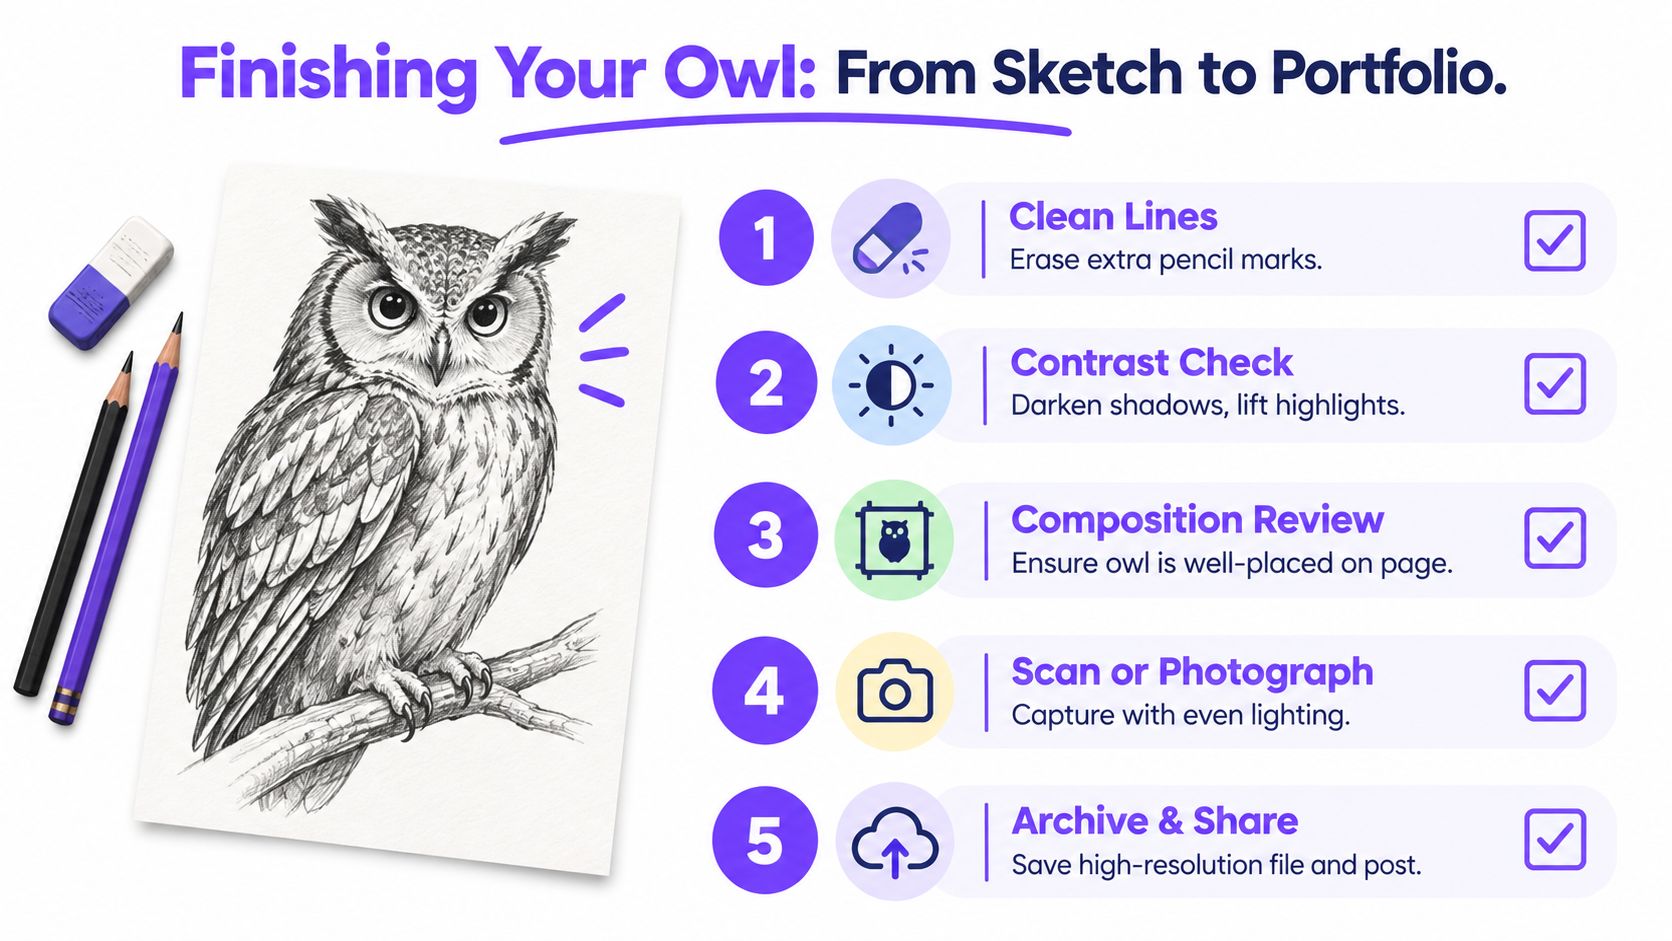
A finished owl doesn't need every line darkened. Selective editing usually creates a stronger result. Erase construction marks that compete with the subject, strengthen only the most important contours and keep some edges soft where feathers blend into the background.
Review the drawing from a distance. Does the owl sit securely on its branch? Is the head still balanced with the body? Do the darkest areas guide the viewer towards the face, or has the whole drawing become equally dark?
Present the process, not only the final image
UK creative course applicants are commonly asked for a digital portfolio showing finished work and work in progress. The University of Portsmouth advises that portfolios may be submitted as a multi-page PDF, a video up to 5 minutes, a website link or a curated social feed, and some universities advise including 5 pieces or more, as explained in its portfolio guidance for creative undergraduate degrees.
One owl drawing can become a small project sequence:
- Observation page: Include the reference notes, quick pose sketches and early shape studies.
- Development page: Show the construction lines, proportion checks and experiments with facial texture.
- Resolved study: Present the cleaned drawing with controlled tonal range.
- Reflection note: Record what changed, what remains uncertain and what you'll test next.
The Royal College of Art recommends a curated portfolio rather than an exhaustive collection. Its portfolio advice supports including sketchbooks, rough prototypes, research documents and process books to communicate creativity, imagination, innovation and potential.
Make the digital file easy to view
Photograph or scan the work with even lighting. Keep the page flat, avoid shadows across the paper and check that the image is sharp before uploading. University of Brighton advises that digital portfolios should be accessible from a single link, hosted on one platform and viewable without a password. It also specifies JPEG images at 72 dpi, with maximum dimensions of 800 pixels on the longest side, in its online portfolio advice.
Use a clear filename and keep the original high-quality file stored safely, even if the submission version needs resizing. A portfolio reviewer should reach the owl study without requesting access or searching through disconnected platforms.
For a broader presentation checklist, use these tips for building an artistic portfolio. Your aim isn't to prove that one drawing is perfect. It's to show that you can observe, test, refine and explain your decisions.
Next Steps to Keep Improving and Explore Formal Study
Keep the next practice task small enough to complete. Begin with loose gesture ovals to study posture, then make a page of eye and bill studies, and finally create a full tonal owl using one clear light source. Each exercise isolates a different skill, so you'll know whether you're improving in structure, expression or surface.
Build a sketchbook trail around the subject. Compare a barn owl with a tawny owl, try graphite beside coloured pencil, or place the owl in a simple branch setting. Adults, home-educated learners and SEND students can all adapt the pace, reference size and session length while keeping the same progression from observation to reflection.
Level 3 study can support progression towards higher education, further education, employment and other training routes. UAL describes its Level 3 diploma and extended diploma qualifications as providing the knowledge, skills and understanding needed to progress to degree-level study or employment in its qualification information. A consistent body of work will give your tutor more useful evidence to respond to than isolated finished drawings.
When you're ready to organise digital work, Tinymoose digital portfolio tips offers practical guidance on arranging and sharing creative evidence. Make your next action specific: complete one owl study, photograph the stages and write a short note about the proportion decision you made.
The Online College of Art & Design (OCAD) offers flexible, tutor-led online courses from entry level through Level 3, including art and design qualifications, foundation diplomas and portfolio-centred study with feedback through Microsoft Teams for Education. If you want structured help turning drawing exercises such as this owl study into progression-ready work, visit The Online College of Art & Design (OCAD) and explore the course pathway that fits your goals.