Introduction
Following on from the second two lessons in this series , I will be demonstrating the final stages required to complete the study.
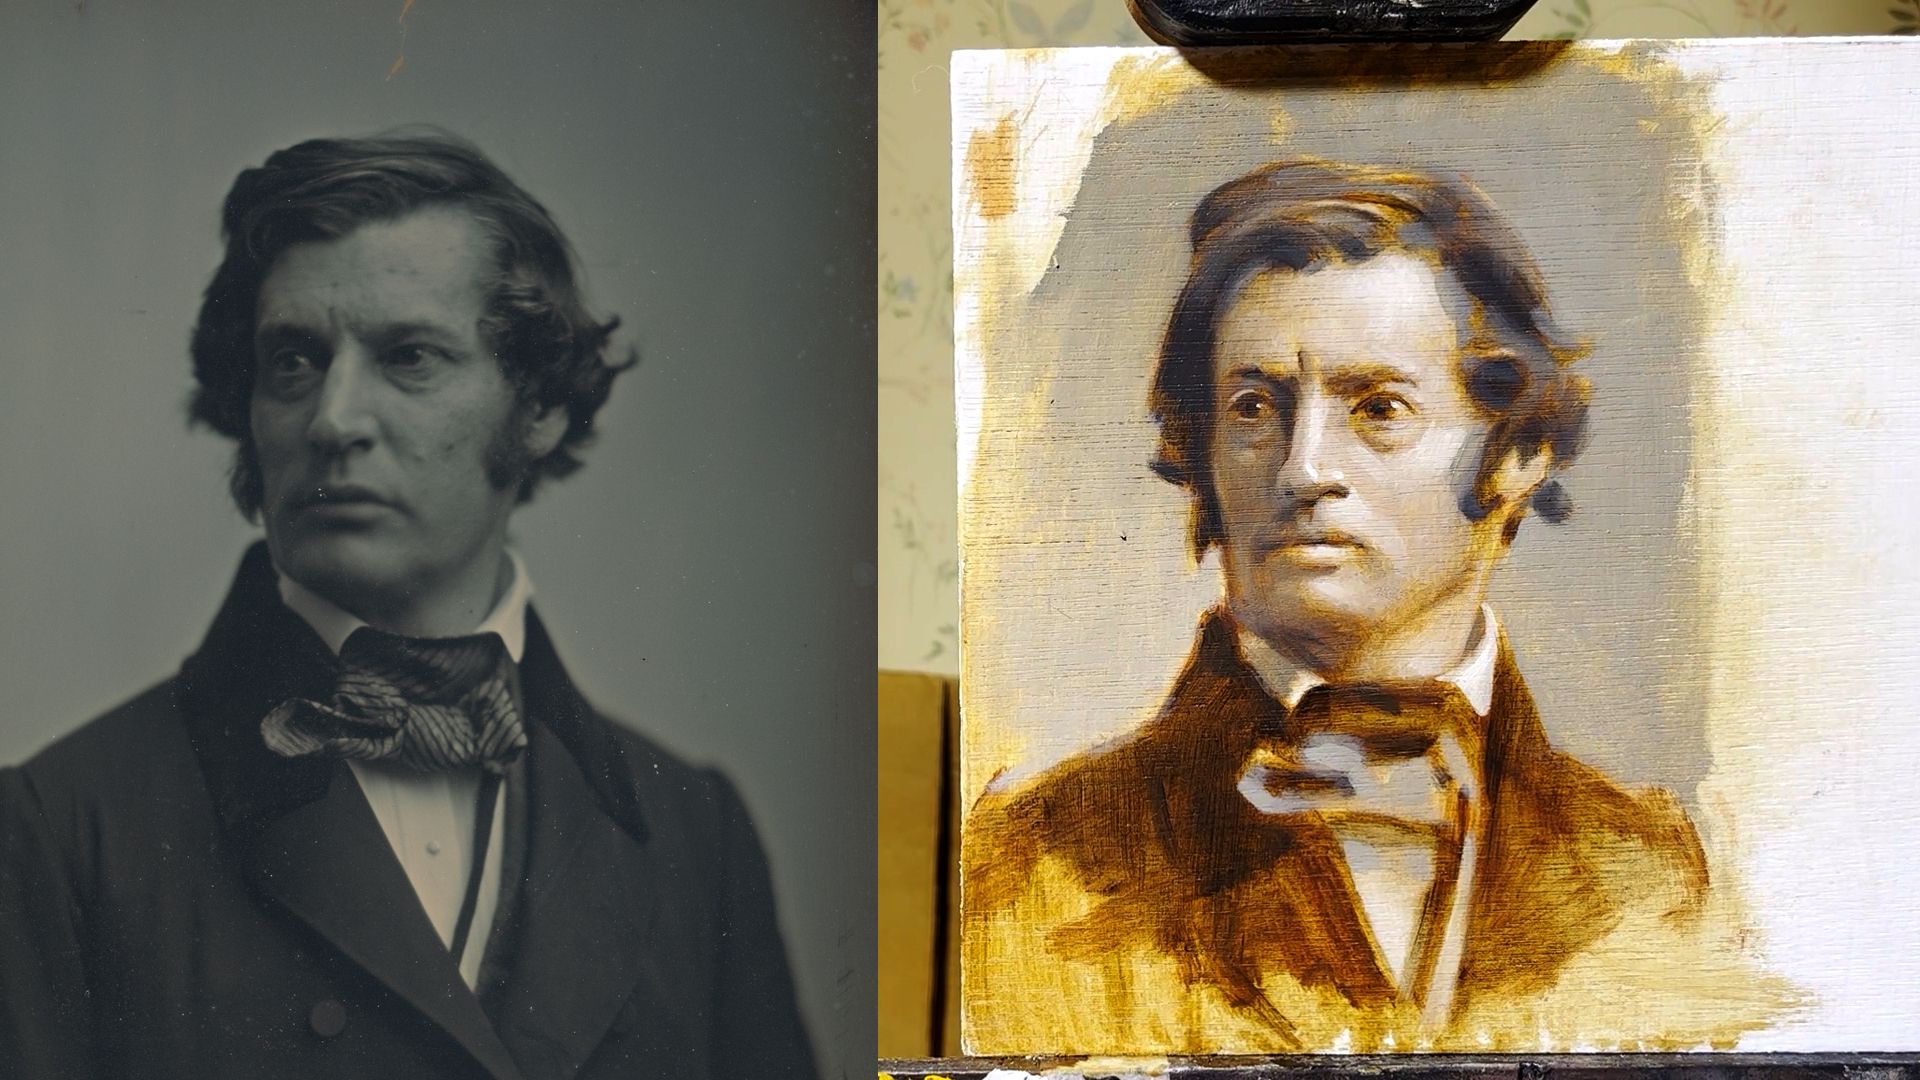
Reference image link (from the Met Museum collection)
Materials
- Canvas, panel or paper for oil painting
- Palette
- Two medium brushes (one stiff, one soft)
- Small soft brush
- Mineral spirits for diluting
- Burnt Umber, Raw Umber and Ivory Black oil paint
- Paper towel or a rag
Unifying the Tones

Mix up a light and dark tone that matches the general coolness and saturation of the face from the previous session. The use these two mixtures to create a gradient across the background (from darker to lighter) this will create a sense of space behind the head.
Do the same with the hair; you can mix up a few more in-between tones for this (some extra dark mixtures and highlights). Also start to soften the edge of the hair where it meets the skin on the face.

Now do the same thing with the clothing; make sure that the overall warmth and saturation matches the rest of the piece. Play around with the correct balance of black, white, and umber to achieve these mixtures. Once you’ve done this the whole painting should be harmonious. You can now leave it to dry ready for the next pass of detail
Black Glazing and Dark Accents

Using a fairly soft, medium sized brush, dilute some black paint to a thin wash before laying this over all the darks. It will be transparent so the previous details will be retained but the darker tones will be more unified and create a stronger contrast against the lighter parts of the image.

You can let this thin glaze spill over into the darker halftones to keep a gradual transition from light to dark and also to further enhance the brightness of the lighter tones. Finally – take a smaller brush to add small, dark accents across the image. Look for dark notes like eyelids, nostrils and shadows in the hair.

You can also use the smaller brush to hatch in darker areas of shadow within the original glaze pass. You can see that I have done this extensively in the shadow side of the face and within the clothing.
Final Touches

Begin with a final wash of medium to saturate the entire painting (this shows you how the painting will look when it’s finally varnished.

Then begin to build up some more paint and further gradual transitions over the lighter tones in the face. Add the thicker paint with the bigger brush and make smaller blendings and adjustments in tone with the smallest brush. In general you want the paint layer to be thickest where it is lightest and thinner towards and within the shadows.

Finally – use the same approach with the clothing. I added some more detail and a clearer set of highlights to the bow tie. You can keep adding detail as much as you like but I’m happy with this level of detail and energy.
For more detailed guidance, you can watch these complete lessons on our YouTube!
Unifying the Tones
Dark Accents: