

You've got your sketchbook open, a water pot beside it, and a scatter of coloured pencils across the desk. The first few marks look promising, but the thought of adding water makes you hesitate. You know how to draw, yet you're not sure whether watercolour pencils belong in serious coursework or only in a relaxing afternoon activity.
They can do much more than that. Used deliberately, watercolour pencils art gives you evidence of observation, experimentation, material control and reflection, all of which can strengthen a portfolio for a creative degree. The important shift is to stop treating each drawing as an isolated finished image. Treat it as a record of decisions.
Table of Contents
- What Watercolour Pencils Are and Why They Suit Your Coursework
- Building a Dry-to-Wet Workflow You Can Trust
- Comparing Dry, Wet, and Blended Techniques
- Choosing Materials That Actually Matter for Your Studio
- Sample Projects That Double as Portfolio Evidence
- Turning Your Practice into a University-Ready Portfolio
- Your Next Steps and Weekly Practice Plan
What Watercolour Pencils Are and Why They Suit Your Coursework
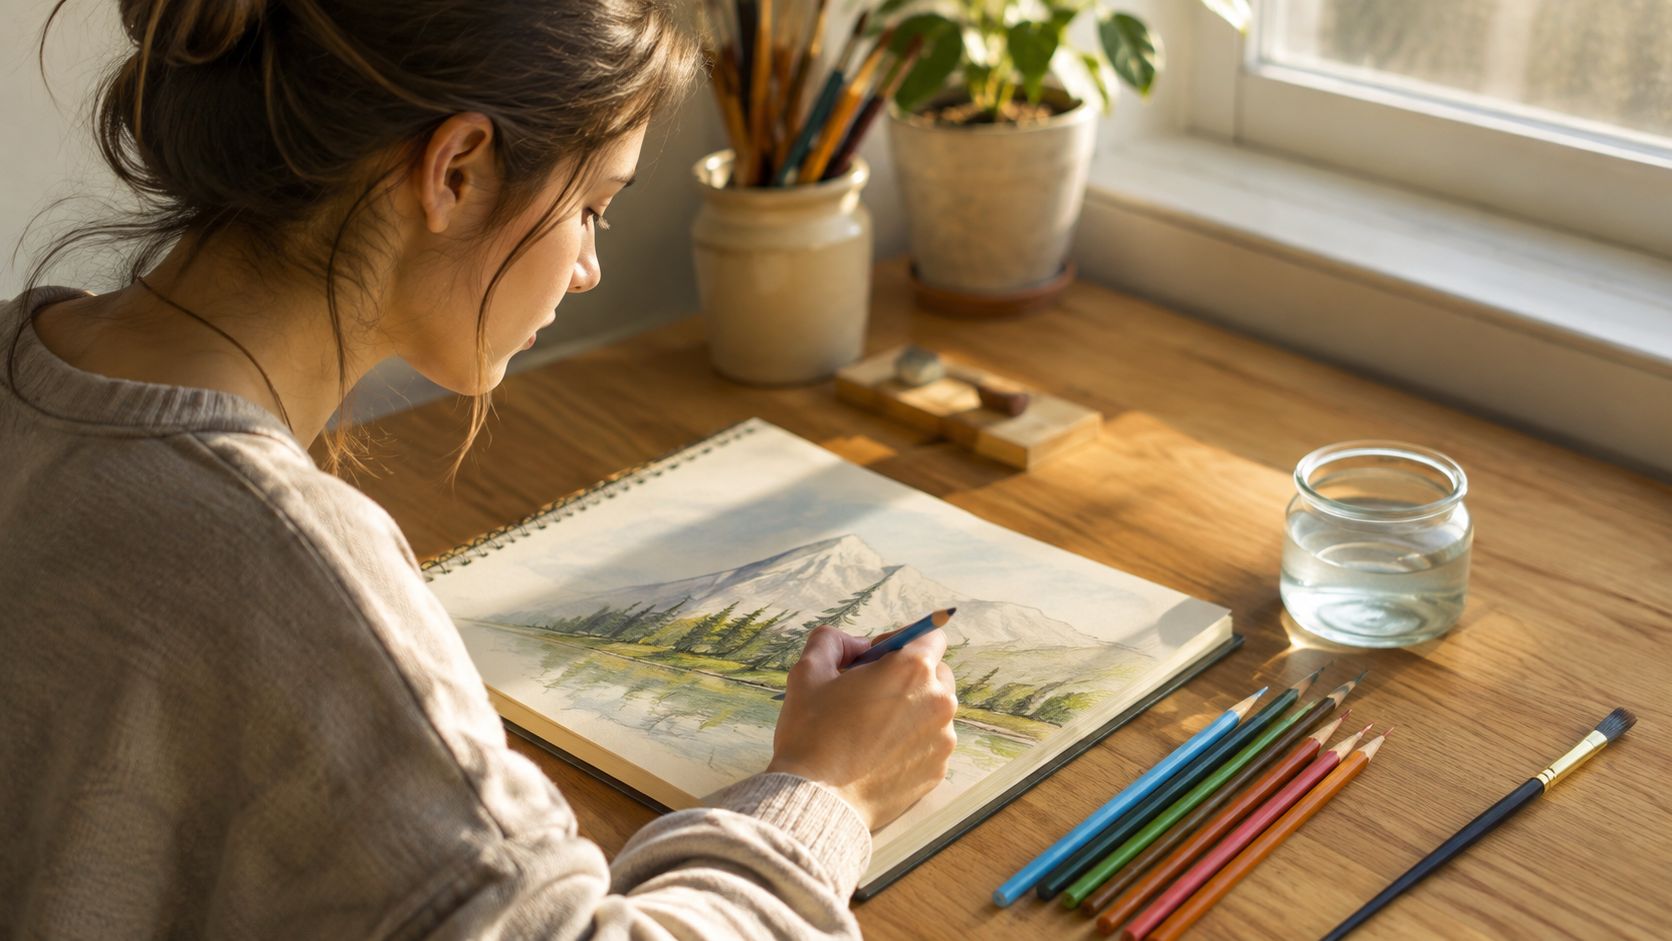
A watercolour pencil contains pigment held in a water-soluble binder, rather than the wax or oil binder used in standard coloured pencils. Dry, it behaves like a drawing tool. You can sketch lightly, build measured layers and keep edges sharp. Add water with a brush and the pigment dissolves, spreading into a transparent wash. Guidance from UK art suppliers recommends applying colour evenly before using a brush to dissolve and move it across the paper (colour pencil guidance from Hope Education).
That change in behaviour makes the medium useful for Level 2 and Level 3 coursework. One study can show accurate observation, colour testing and controlled experimentation, then become evidence for a portfolio. The dry marks provide structure, like the framework of a building, while the activated areas introduce movement and atmosphere. A university tutor can therefore see both the image and the decisions behind it.
Drawing first, painting second
Begin with a light sketch in soft HB or non-photo blue pencil. Keep the construction visible on an early sketchbook page instead of erasing every adjustment. Those marks show how you considered proportion, placement and viewpoint. Once the main shapes are established, add dry pigment to them. You can judge the colour balance before water alters its appearance.
Activate selected areas rather than covering the whole page automatically. A crisp foreground beside a softened background demonstrates a deliberate change in focus. An untouched highlight can show that you understand the paper itself is part of the lightest value.
This contrast supports the coursework habits of recording, developing ideas, and refining technical skill. It also gives you specific points to annotate. Explain why you kept the foreground crisp, softened the background, or left a highlight unactivated. A short note beside process photographs and swatches can show intention more clearly than a polished final image alone.
Students who learn visually may find that process photographs, colour tests and staged sketchbook pages make decisions easier to review. The overview of visual learning science offers context for organising information in visible stages. For a degree application, that organisation matters because your portfolio should show investigation, not just attractive outcomes.
Watercolour also has a substantial British history. It became closely associated with Britain during the period often called the British “Golden Age of Watercolour”, from the mid-18th to the mid-19th centuries. English watercolour societies formed in 1804 and 1832 (The Metropolitan Museum of Art's history of British watercolour). Pencil manufacturing developed a related industrial tradition in the Keswick area. Banks, Son & Co. opened a factory there in 1832, and the business later became the Derwent Cumberland Pencil Company in 1916 (history of the Derwent Cumberland Pencil Company).
You do not need to copy historical watercolour painting. Use that history as a reason to treat the medium seriously, then develop a subject, mark-making style and visual language that belong to your own coursework.
Building a Dry-to-Wet Workflow You Can Trust
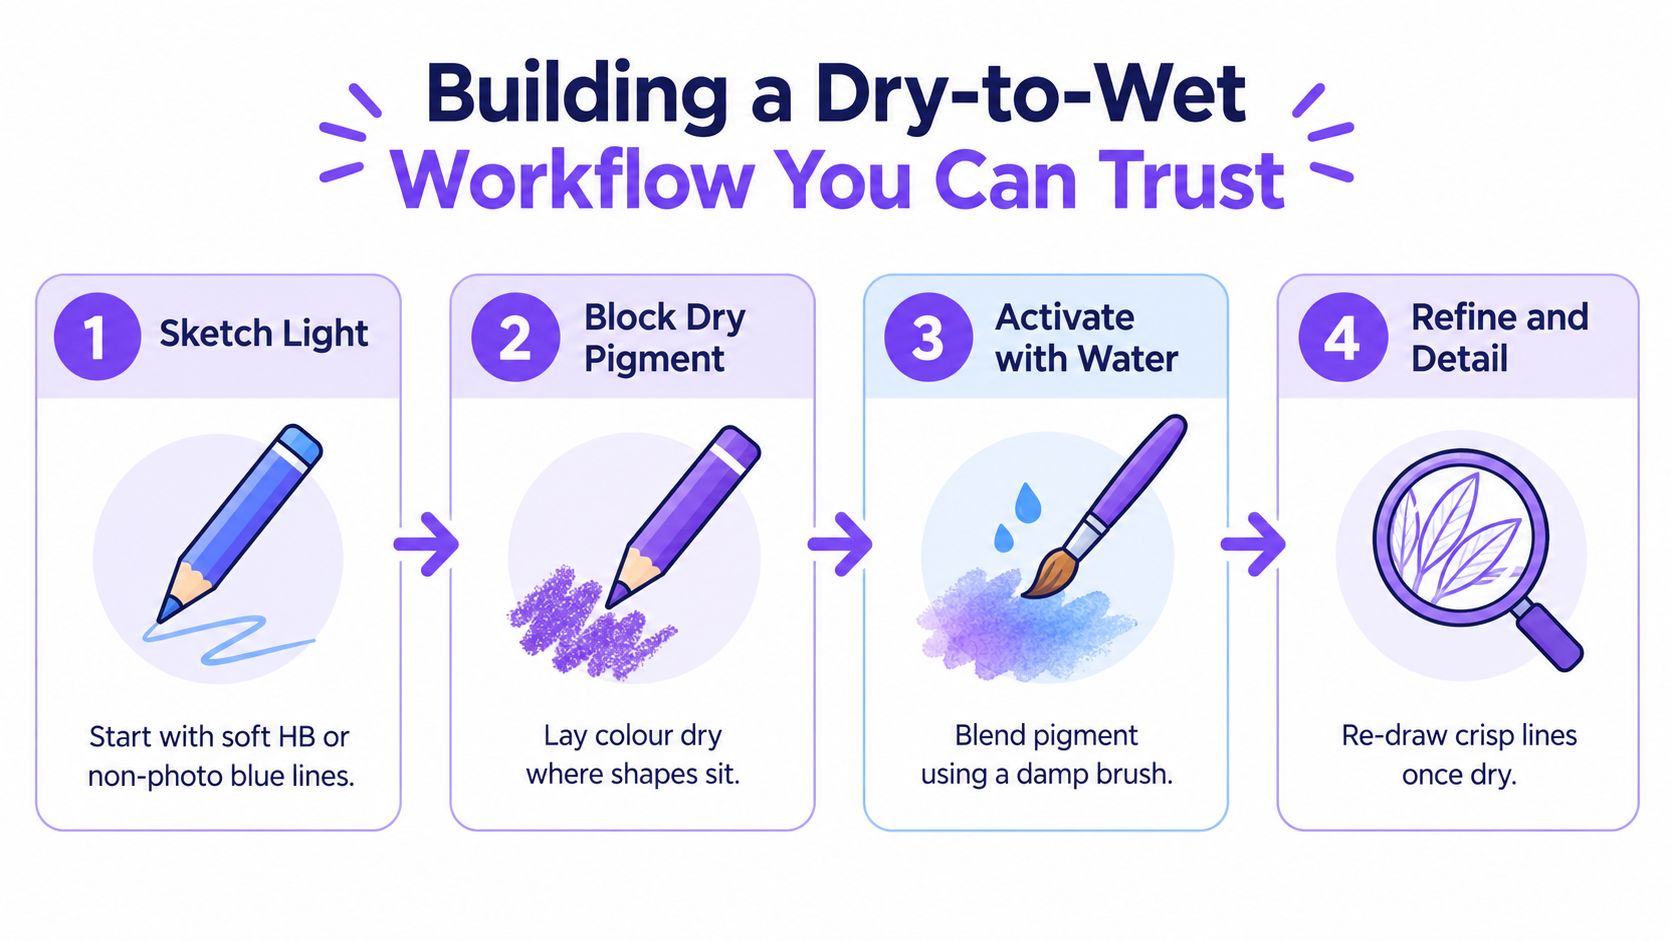
A strong portfolio study should show controlled decisions, not just a pleasing final wash. Start with a light drawing that places the main shapes, proportions and focal area. A soft HB pencil suits ordinary studies, while non-photo blue can keep construction marks quiet. Use gentle pressure. A deep groove in the paper behaves like a permanent track, catching pigment and making corrections difficult.
Add dry colour before water. Hold the pencil on its side for broad passages and use the point for contours, texture and small accents. Keep this first layer lighter than the result you have in mind. Water usually intensifies the pigment, and a restrained base leaves the paper texture available for later layers. Photograph this stage for your sketchbook, since it records how the image developed.
Activate one area at a time
Use a medium mop or round brush with controlled moisture. A fully loaded brush can flood a small study, so touch the brush to kitchen roll before it reaches the page. Begin with the lightest areas and move towards darker passages. Rinse the brush before changing colour, especially when you are working across a pale section.
Tilt the paper slightly so you can watch the wash travel. If an area becomes too wet, blot it gently rather than scrubbing. A hairdryer may help with a stubborn damp patch, but let the surface settle before drawing over it.
Practical rule: If you cannot see the paper texture clearly, the surface may still be too wet for another layer.
Drying belongs to the drawing process. Let each activated layer dry fully before adding depth, since working into damp paper can lift pigment and produce muddy passages (Castle Arts guidance on watercolour pencils). Tape or stretch the sheet when using a generous wash. A stable surface makes edges easier to judge and gives your process photographs a clearer record.
Once the page is dry, sharpen the pencil and return to the focal area. Reinforce a contour, restore a lost edge or introduce a second colour where the first layer feels flat. A pre-wetted pencil tip dries quickly, so re-wet it briefly when detailed marks begin to lose strength (STAEDTLER guidance on watercolour pencils.
The same rhythm can support different coursework aims. Keep a botanical study mostly dry when you need crisp veins and edges. Reserve water for the sky or distant forms in a study of mountains. On an abstract page, allow selected colours to meet and bloom, then record what the reaction contributes to the composition.
Watch the embedded demonstration with one question: where does the artist stop blending, and where do dry marks return after the surface has dried?
Comparing Dry, Wet, and Blended Techniques
Before starting a piece, choose the behaviour you need from the medium. Students often activate every mark because the pencil is called a watercolour pencil, but selective activation usually gives a more convincing result. Contrast creates structure.
| Technique | Best For | Finish | Control | Drying Time |
|---|---|---|---|---|
| Dry layering | Botanical studies, architecture, fine details | Textured and crisp | High | None before further dry work |
| Wet activation | Skies, fabric folds, atmospheric backgrounds | Soft and transparent | Moderate | Required before detailed reworking |
| Partial blending | Still life, mixed surfaces, focal subjects | Combination of sharp and fluid passages | High when applied selectively | Local drying between activated areas |
Dry layering
Use light pressure and several passes when you need gradual tonal development. This suits a leaf study because veins, serrated edges and small changes in direction remain readable. It also works for architectural drawings where windows, brickwork and perspective lines need to stay firm.
The finish will show the paper texture more clearly. That isn't a weakness. It can provide visual evidence of touch and material choice, particularly when the surface supports the subject.
Wet activation
Wet activation creates a wash from the dry pigment already on the page. Use the belly of a medium brush for a broad sky or soft fold, then change to the point of a smaller brush near an edge. Keep your water ratio controlled. A damp brush gives you more pigment movement without turning the area into a pool.
This approach is effective for atmosphere, but it removes some immediate control. Plan where the wash can travel before you touch the page, and leave pale sections unactivated if they need to remain bright.
Partial blending
Partial blending is often the most useful portfolio choice because it demonstrates judgement. You might activate the reflected colour inside a glass bottle, leave the bottle's contour dry, and use rough dry marks for a wooden table. The viewer sees different surfaces because you changed your method rather than applying one effect everywhere.
For digital submission, consider how each passage will photograph or scan. Crisp dry detail can read clearly, while a very pale wash may need even lighting and a straight camera angle. If you're comparing mark-making tools before choosing a visual language, you can browse marker colour tools, then return to your watercolour pencil tests with a clearer idea of the finish you want.
For further practical exercises, keep these watercolour technique tips beside your sketchbook and record what happened, not only whether you liked the result.
Choosing Materials That Actually Matter for Your Studio
A home studio might be a bedroom desk cleared after homework, a shared kitchen table, or one corner of a room where your materials need to be packed away each evening. You don't need a dramatic collection of supplies. You need tools that let you repeat a process and explain your choices.
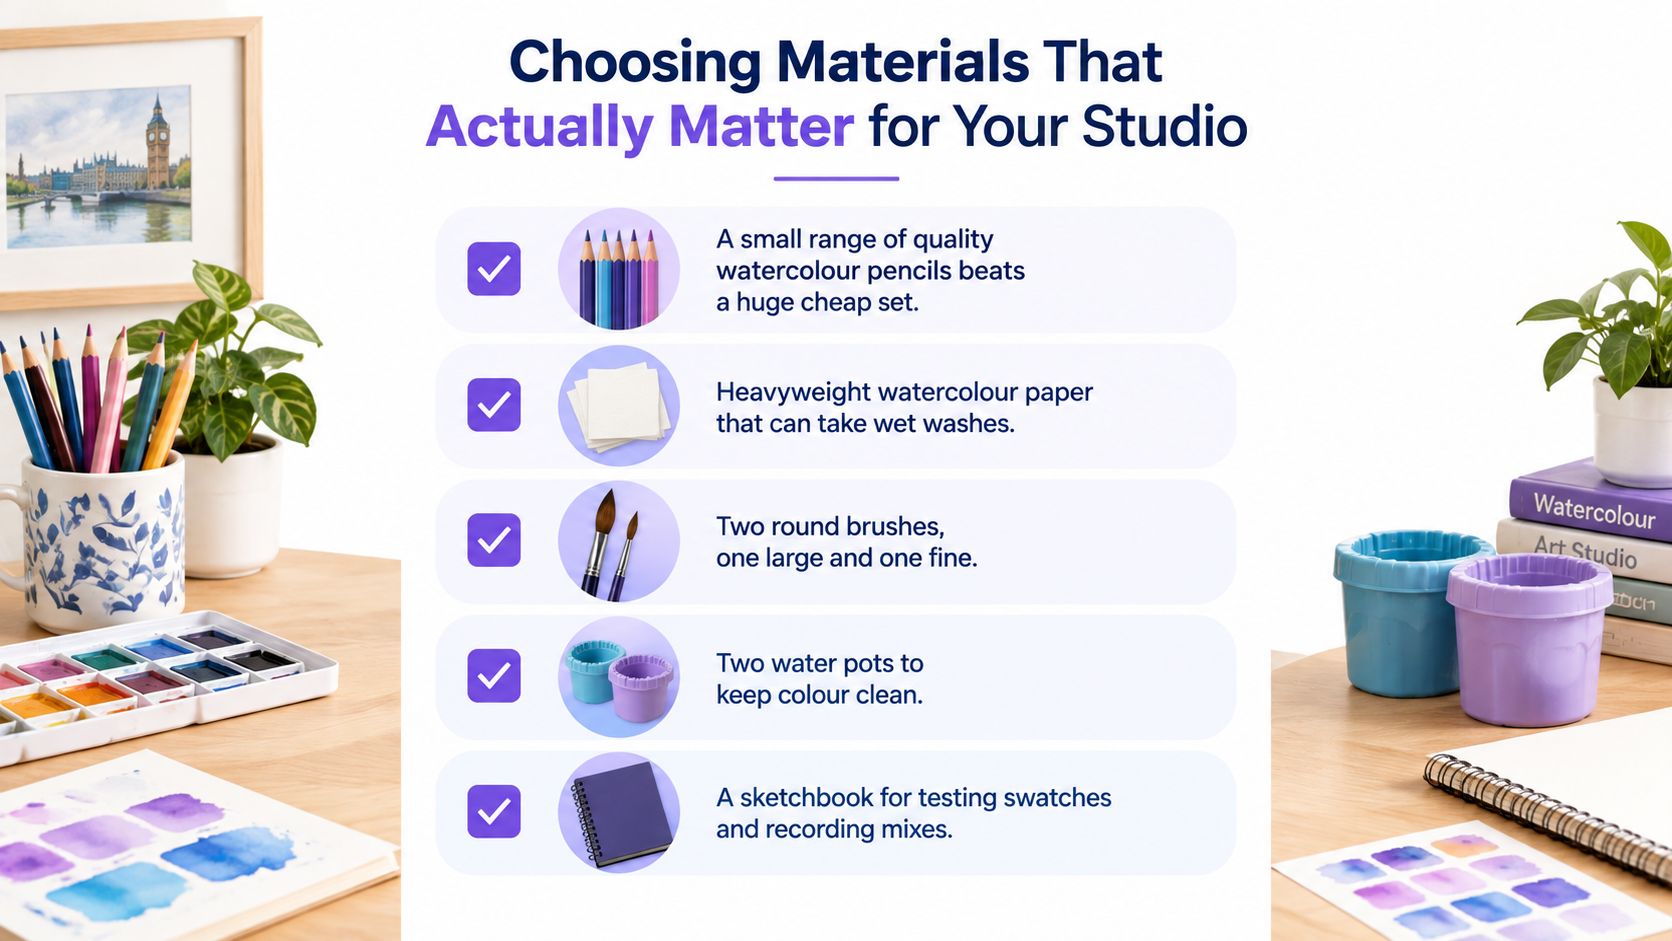
A small set of reliable pencils can teach more than a large set you rarely test. UK buyer guidance highlights lightfastness, core softness and lead width as more useful considerations than just counting colours (Creative Bloq's pencil guidance). If you hope to exhibit work, permanence matters because a strong photograph can't compensate for fading materials.
Build a working kit
Choose watercolour paper that tolerates repeated wetting. Heavier paper is generally more comfortable for washes, while smoother paper can help with fine detail. Tape the edges when you need a stable surface, and test a small corner before committing to a full study.
Keep two round brushes, one larger for washes and one fine for edges. Two water pots are useful in a shared studio because one can stay cleaner for lighter passages. Add a sharpener that doesn't crush the core, kitchen roll for controlled lifting, masking tape and a notebook for swatches.
A restricted palette is a strength, not a compromise. Some UK guidance recommends learning with fewer colours so that you practise mixing and control instead of collecting unused sets (Pencil Topics' watercolour pencil guidance). Write down the colours used in each test, the paper surface, and whether you activated the pencil immediately or after layering.
That record becomes valuable reflective evidence. “I used blue because it was available” says little. “I kept the palette limited so the reflected colours stayed connected, then activated only the background to separate it from the dry foreground” shows technical reasoning.
For work involving portraits or figures, you can also keep this coloured pencil skin tone guide nearby as a reference for testing layered colour rather than relying on a single “skin” pencil.
Sample Projects That Double as Portfolio Evidence
A strong project should leave you with both a finished image and a clear record of your decisions. Keep swatches, failed edges, thumbnail sketches and alternate compositions. These pages can support applications for Art Foundation, Fine Art, Illustration or Textiles because they show how your skills developed, not only how neatly you finished.
| Project | Technique | Portfolio evidence |
|---|---|---|
| Botanical observation | Dry layering | Careful observation, patience, line control and tonal development |
| Urban weather study | Wet activation | Atmosphere, perspective, tonal control and editing |
| Imagined sky or scenery | Partial blending | Personal voice, material experimentation and compositional decision-making |
Botanical observation
Select one plant, seed pod or group of leaves. Start with structural drawing, then build colour through dry layers at a manageable scale. Activate only selected shadow areas so veins, edges and small changes in texture remain clear.
Keep a photograph of the object, your early sketches and at least one colour test. Annotate how you translated the surface. Explain whether you used broken marks, layered colour or controlled water to suggest texture, instead of just listing the materials.
Urban weather study
Use a street corner, bus stop or building façade as your subject. Keep perspective lines relatively dry, then activate a grey sky, reflected pavement or distant vehicles. A medium brush can cover broad areas, while a smaller brush protects windows, signs and other architectural details.
The finished study should show atmosphere without losing structure. Record an attempt that received too much water if this occurs. Note how the overloaded paper affected the marks, then explain what you changed in the next version. That comparison gives your portfolio evidence of testing, evaluation and adjustment.
Imagined sky study
Begin a personal piece with several small thumbnail compositions. Select one, then use partial blending to let the sky shift into unexpected colour while keeping the landform or foreground relatively dry. The aim is not a technically perfect sunset. It is to show how watercolour pencils can communicate an idea or mood through deliberate choices.
Keep the thumbnails, colour swatches and rejected combinations beside the final image. A tutor can then follow the route from possibility to selection, seeing how composition, colour and technique supported the final decision. That route gives the finished work useful context.
Turning Your Practice into a University-Ready Portfolio
A tutor reviewing your portfolio should be able to follow your thinking from first observation to final image. UK portfolio guidance commonly asks for investigative work, idea development, finished pieces and reflective text. One undergraduate guide requests a single PDF of up to 20 pages and a maximum file size of 50MB. Its submission window is scheduled for 1 December 2026 to 27 January 2027, ending at 12pm on 27 January 2027 (University of Edinburgh portfolio requirements).
Requirements vary by course. Birmingham City University states that applicants must submit their digital portfolio within 28 days of receiving an invitation to portfolio review, using a PDF, PowerPoint or Word document with a maximum size of 10MB (Birmingham City University portfolio guidance). Read the specific course page before you export anything.
Show the decisions
Arrange your work as a sequence, like a visual argument:
- Start with investigation: Include photographs, drawings, visual references and material tests.
- Keep development visible: Show changes in composition, unsuccessful experiments and revised studies.
- Add finished work: Place your clearest resolved images where they can be viewed without distraction.
- Write concise reflections: Explain what changed, why you changed it, and what you would test next.
A UK arts portfolio guide suggests applicants normally show 15 to 30 items of creative, experimental or finalised work (University of Suffolk portfolio review guidance). Another UK university advises including sketchbook and workbook samples, arranging work logically or chronologically, and placing strong work first and last (London Metropolitan University portfolio guidelines).

Watercolour pencils do not need to fill the whole portfolio. Pair them with photography, collage, ink, textiles, digital work or observational drawing when those media help develop the idea. The connecting thread should be your questions and decisions, rather than a repeated visual effect.
For curation and sequencing advice, see these tips for building your artistic portfolio alongside the university guidance. Photograph pages in even light, keep the camera parallel to the paper, and add a detail view when texture matters. A short note can identify the paper choice, dry-to-wet decision and next experiment, turning each image into evidence of both technique and judgement.
Your Next Steps and Weekly Practice Plan
You can build useful evidence without waiting for a large project brief. Give each week one clear purpose, and save the physical and digital record as you go.
Week one, dry control. Make pencil swatches, practise light-to-dark layering and draw a small object from observation. Test pressure, direction and edge quality. Photograph the page before adding water.
Week two, controlled activation. Choose one botanical subject. Sketch it lightly, place dry pigment, activate one area at a time and wait for the paper to dry before adding a further layer. Keep a failed test beside the successful study and write one sentence about the difference.
Week three, atmosphere and choice. Make a small cityscape or layered sky. Compare a fully dry passage with a wet passage and a selectively blended passage. Decide which method supports the subject, then record that decision in your sketchbook.
Week four, portfolio selection. Choose the strongest two sheets, photograph the process pages and write short annotations. Include the initial idea, the material test, the change you made and the next question you'd investigate.
University portfolio advice repeatedly values process, observation, analysis and development. Your watercolour pencil work can show all of these when you keep the evidence rather than cleaning the journey away.
Log the time you spend, photograph key stages, and ask your art teacher for feedback early enough to act on it before UCAS deadlines. If you work from home, online or with SEND support, a repeatable routine can make the transition from practice sheet to assessed portfolio much less intimidating.
The Online College of Art & Design (OCAD) offers tutor-led online courses from entry level through Level 3, including art and design pathways with portfolio-centred coursework and feedback. If you want structured support while developing watercolour pencils art for university progression, visit The Online College of Art & Design (OCAD) to explore its flexible study options.