

You've drawn a standing figure that looked convincing in the reference, yet your version feels stretched. The elbows sit too low, the torso seems too long, and the head looks as though it belongs to a different body. This is a familiar problem for Level 2 and Level 3 art students, especially when a memorised rule becomes more important than careful observation.
Human proportions for drawing work better as a flexible measuring system than as a formula you must obey. You'll use the head as a unit, check landmarks such as the navel, elbows and wrists, then adjust the structure for age, body type, pose and viewpoint. That approach supports quick exam studies as well as slower portfolio work, where development, corrections and tutor feedback show how your thinking has grown.
Table of Contents
- Introduction to Human Proportions as a Drawing System
- The Head Unit and Standing Figure Canon
- Head and Face Proportions Every Artist Should Know
- Proportions by Age and Body Type
- Adjusting Proportions for Pose and Perspective
- From Proportion Studies to Portfolio Ready Work
- Printable Guides and Practice Drills for Steady Progress
- Quick Reference Glossary and Cross Referenced Lookup
Introduction to Human Proportions as a Drawing System
A learner at the easel may begin with a standing reference, then face a seated figure or a model viewed from below. The same measuring system still helps, provided it follows the pose rather than forcing the body into a fixed template. Establish the figure's main directional movement first, then test its larger relationships.
A proportional system gives you something to check, not a formula to copy blindly. The head can provide a useful unit, while the ribcage, pelvis, elbows, wrists, knees and feet act as landmarks. These checks work like scaffolding around a building. They support the construction while you correct its shape, balance and weight.
British art education has long used proportional canons as practical teaching tools. The Royal Academy records a formal study titled The proportions of the human body. Tate also describes a teaching tradition connected to Turner's lecture diagram and Albrecht Dürer's Four Books on the Proportions of the Human Body. Its art-term entry links height, outstretched arm span and an eight-head construction, showing how numerical systems became part of institutional art teaching.
This history explains why head-unit methods appear so often in UK classrooms. They organise a figure quickly, but they cannot describe every body or viewpoint. A child has different relationships from an adult. A broad-shouldered model may need a different width structure, while a seated or strongly foreshortened figure may appear shorter because parts overlap or point towards you.
How to use this guide at the easel
Keep three questions beside your drawing:
- What is my unit? Establish the head length, or choose another clearly visible measurement.
- Where are the landmarks? Check the chin, ribcage, pelvis, elbows, wrists, knees and feet.
- What has the pose changed? Look for compression, overlap, foreshortening and altered angles.
Use these questions to decide when the seven-to-eight-head convention needs adjustment. A younger figure, a different body type and a changing viewpoint each provide a reason to observe before applying the canon.
Working principle: Use proportion rules to begin observing, not to stop observing.
For university applications, proportion studies can also strengthen development pages. Show an initial construction, a corrected version and a brief note explaining the change. OCAD tutor feedback can help identify which checks need further practice as you develop work towards Level 3 and degree applications.
The Head Unit and Standing Figure Canon
The head unit is a repeatable measuring tool. Draw or observe the head, then use its vertical length to estimate the height of the rest of the figure. BBC Bitesize connects Leonardo da Vinci's c.1492 human-figure study with practical rules still used in GCSE Art teaching, including the eyes halfway down the head, ears aligned with the eyebrows and nose, and pupils aligned with the corners of the mouth. The same resource describes a standing figure as commonly measuring seven to eight heads tall in its GCSE Art guidance.
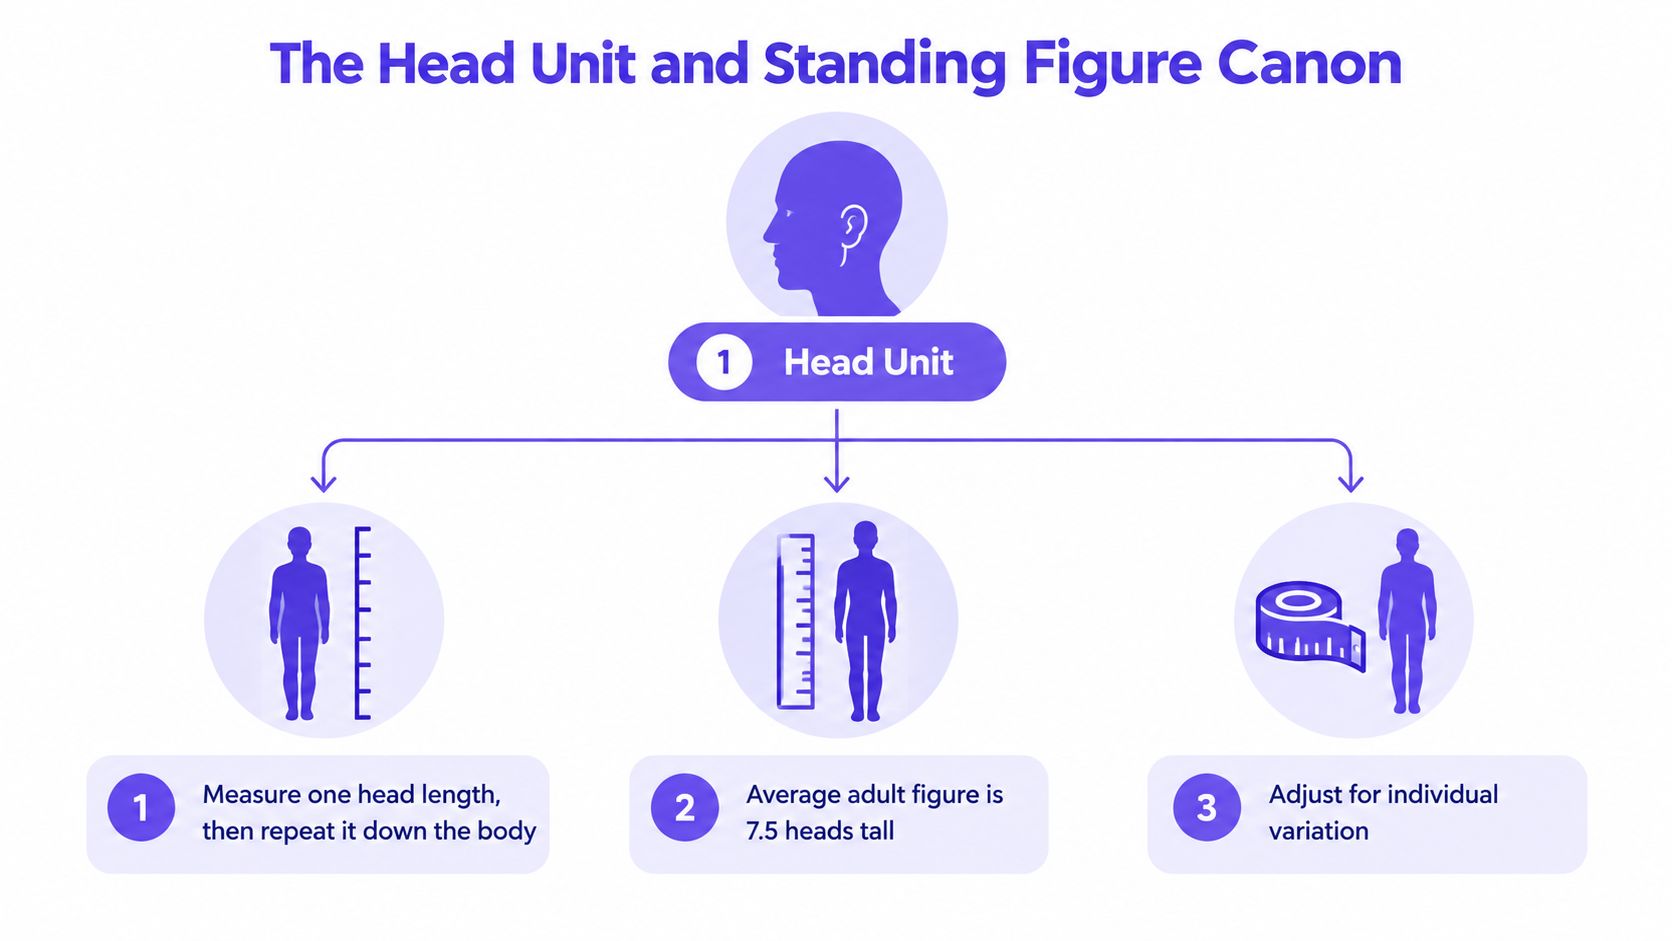
Build the figure in measured stages
- Establish the head. Lightly draw the top of the skull and the bottom of the chin. Measure that distance with your pencil, a strip of paper or a ruler held at arm's length.
- Repeat the unit. Transfer the same length down the central axis of the body. Don't press hard. These marks are scaffolding, not final anatomy.
- Place the major landmarks. Use the belly button, elbows and wrists as checks rather than treating the repeated divisions as a perfect template.
BBC Bitesize's UK teaching guidance gives a practical relationship between these landmarks. The belly button sits around three heads down, the elbows align with the navel, and the wrists sit level with the top of the legs, as described in this human proportions drawing reference. These alignments help you block in a believable figure before you spend time on contour, clothing or muscle detail.
The point of the checks is to catch structural errors early. If your elbows fall far below the navel, compare the arm angle and torso length before redrawing the fingers. If the wrists sit too high, inspect the forearm length and the position of the pelvis. A landmark can be visually displaced by a bent limb, but it still gives you a question to investigate.
Treat seven to eight heads as a range
A seven-to-eight-head range is more useful than a single ideal. BBC Bitesize's guidance for AQA, Edexcel and Eduqas presents the adult figure as a range, which allows artists to respond to different bodies and references without forcing every figure into one canon.
Begin with the scaffold, then compare it with the reference. Shoulder width, torso compression, limb length and the angle of the pelvis may all need adjustment. The drawing becomes more accurate when the canon serves observation, rather than replacing it.
Head and Face Proportions Every Artist Should Know
A small shift in the face can change a sitter's apparent age, expression or likeness. Begin with a light construction system for a front-facing head, then adjust it to match the reference. These measurements are starting alignments, not rules that every face must follow.
Leonardo's figure study links the eyes to the head's midpoint, the ears to the eyebrow and nose region, and the pupils to the corners of the mouth. Treat these relationships as a network of checks. Rather than guessing each feature separately, compare every feature with its neighbours and with the shape of the skull.
Start with the centre and eye line
Draw a light vertical centre line from the crown towards the chin. Let it follow the direction of the head. On a turned or tilted head, this line will curve or shift, rather than remaining perfectly straight on the page. Add the horizontal eye line across the head's overall height. The halfway point belongs to the whole head, not to the visible facial features.
Place the ears in relation to the brow and nose. Their height changes in appearance when the head tilts because they follow the perspective of the skull. Use the alignment as a check, then allow the reference to determine the final position.
Check width before detail
Learners often place the eyes carefully while overlooking the width of the cranium and jaw. Compare the gap between the eyes, the width of the nose, and the distance from the nose to the mouth corners. The pupil-to-mouth relationship can reveal that the lower face has shifted sideways.
Keep the first marks pale and loose. Heavy eyelids, nostrils and lips make corrections awkward before the underlying construction has been tested. A light guideline works like scaffolding: it supports the drawing while you adjust the structure, then disappears beneath the finished work.
A useful test: Cover one half of the face and compare the uncovered side with the reference. Symmetry provides a guide, while expression and viewpoint create natural differences.
A three-quarter view requires a different reading of the form. The centre line curves around the front plane, while the far eye, cheek and side of the jaw occupy less visible space. Follow the head's volume rather than flattening it into separate features. Check the brow ridge, cheek plane and jaw turn before refining likeness.
Use this system alongside observation, especially when deciding whether the familiar seven-to-eight-head figure canon suits the subject. Facial landmarks can remain consistent while age, body type and pose alter the overall proportions. That flexibility supports more convincing studies and gives you a stronger basis for selecting portfolio work for OCAD progression.
Proportions by Age and Body Type
The adult canon breaks down most obviously when you apply it to a child. Children generally show a larger head in relation to the rest of the body, while adolescents often sit between child and adult relationships as the limbs and torso develop at different rates. If you force a young figure into an adult seven-to-eight-head template, the result can look unnaturally mature or elongated.
The important lesson isn't to replace one formula with another. It's to compare the head with the whole figure and observe the visible relationships. BBC Bitesize offers the adult range as seven to eight heads, but that range is a scaffold for adult figure construction, not a universal measurement for every age or body type.
Compare the main variables
Age changes the relationship between head and body. A young child's head occupies more of the total figure height, so repeating an adult unit down the body can make the torso and limbs too long. Adolescents need careful observation because growth can make the limbs appear long before the rest of the body catches up.
Body type changes width and mass. A narrow shoulder span, a broad ribcage, a fuller abdomen or a shorter neck can alter the figure's character without changing the basic identity of the pose. Don't make the shoulders wider just because the canon suggests a certain ideal. Measure the reference.
Pose changes apparent length. A raised arm can look shorter because it points towards the viewer. A compressed torso can make the pelvis seem close to the ribcage. These are observational effects, not mistakes in the model.
When to ignore the eight-head ideal
Ignore the adult ideal when it conflicts with clear evidence from the reference. Mark the top of the head and the feet, then compare that span with your repeated unit. If the model's figure doesn't sit comfortably within the adult scaffold, adjust the scaffold rather than stretching the model.
For a stylised project, you can deliberately exaggerate the head, shoulders or limbs. The key is consistency. A deliberate choice should repeat across the design, while an accidental distortion usually appears in one isolated area.
When sourcing visual references for character or fashion-based work, a hand-drawn female figure such as this self adhesive wrap lady woman design can also prompt useful discussion about stylisation, silhouette and how decorative imagery simplifies the body. Treat it as a visual reference for graphic shape, not as an anatomical authority.
Adjusting Proportions for Pose and Perspective
A standing figure viewed straight on is the easiest place to learn head units because the body's vertical relationships are visible. Movement changes that clarity. A seated body compresses vertically, a lifted limb may overlap the torso, and a foreshortened leg can appear much shorter than its actual length.
Begin with gesture, the flowing line that describes the figure's overall movement. It may run from the head through the spine into the supporting leg, or it may follow the curve of a reclining body. Gesture prevents you from building a rigid mannequin before you understand what the pose is doing.
Use a pose-first construction
- Draw the action line. Find the main sweep of the spine and the direction of the shoulders and pelvis.
- Block the ribcage and pelvis. Use simple box, oval or barrel forms. Their relationship tells you whether the torso is twisting, leaning or compressed.
- Add the limbs as directional forms. Mark the start and end of each limb, then show the bend at the elbow or knee.
- Recheck the landmarks. Apply the head unit after the gesture and masses are in place, not before.
In a seated pose, the distance from head to feet is reduced because the hips and knees bend. The body hasn't lost its anatomy. Its parts have changed direction and overlapped. Compare the length of the thigh with the lower leg along their actual paths, while remembering that perspective may hide part of either form.
Foreshortening occurs when a limb points towards or away from you. The visible length compresses, and the nearer end may appear larger. Instead of drawing the limb as a long pair of parallel lines, identify the overlapping forms and the ellipse-like ends that show direction.
Check span and balance
Tate's account of Turner's lecture diagram links the classical system to the relationship between body height and outstretched arm span within a Dürer-derived teaching tradition. This check remains useful for a relaxed standing figure, but it shouldn't override the pose. Bent arms, perspective and cropped framing all alter what you can see.
For practical construction exercises, use drawing in construction to practise reducing the figure to directional lines and simple masses. Once the pose reads clearly, add the head, hands and feet as connected forms rather than isolated symbols.
Studio check: Squint at the reference. If the gesture and major masses still read, your proportion structure is probably doing useful work. If the pose disappears, you've probably refined details before solving the movement.
From Proportion Studies to Portfolio Ready Work
A page of proportion studies can become valuable portfolio evidence when it shows decisions rather than repetition without purpose. UK university applications commonly ask for both developmental and resolved work. The University of Edinburgh's guidance allows up to 10 images of development or sketchbook work and up to 10 images of resolved work, with a minimum of 5 images in each category, plus up to 5 images showing influences for most programmes.
That makes your figure practice relevant beyond an exam sheet. Keep early construction drawings, annotations, failed attempts and later studies that demonstrate a clear correction. A resolved figure drawing can then show how you applied those lessons to observation, composition, tone or a wider project theme.
Curate a progression, not a pile
Select work that answers different questions:
- Construction pages: Show head-unit trials, landmark checks and corrections.
- Observation studies: Include different ages, body types and poses where the reference demanded adjustment.
- Development pages: Explain a change in proportion, viewpoint or stylisation.
- Resolved work: Present drawings where anatomy supports the intended mood, narrative or design purpose.
File limits make editing part of the creative task. The University of Edinburgh asks for one PDF of up to 20 pages for most programmes, with a maximum file size of 50MB, while UCL Bartlett requires a PDF of 10 pages maximum and no larger than 5MB in its portfolio guidance. Check the current requirement for each course because institutions set their own rules.
Loughborough states that shortlisted Fine Art applicants need an online interview as well as a portfolio in its application guidance. York St John asks applicants to show a range that can include conceptual thinking, problem solving, experimentation, finished projects, sketchbooks, drawings, photography, three-dimensional work, storyboards, animation and written work.
Your proportion studies don't need to dominate the portfolio. They need to earn their place by showing how you investigate and improve. A short tutor comment beside a revised figure can make the progression legible to an admissions reviewer.
Printable Guides and Practice Drills for Steady Progress
Good proportion drawing develops through repeated checking, not through memorising a list once. A printable practice sheet can reduce the number of decisions you make at the start, leaving more attention for observation and adjustment. Make one page for the head unit, one for landmarks and one for pose analysis.
Build a simple printable scaffold
Draw a light figure template with space beside it for notes. Include:
- Head-unit column: A vertical strip where you can repeat the measured head length.
- Landmark boxes: Areas for the chin, navel, elbows, wrists, knees and feet.
- Pose notes: A line for gesture, a note about viewpoint and a note about compressed or foreshortened forms.
- Review box: Write what feels too long, too short, too wide or too narrow.
Use tracing paper or a transparent sheet over a reference if you're learning to compare alignment. Place the sheet over your drawing after the study, not before every mark. The purpose is to develop judgement, not to outsource it.
A drawing mannequin or doll for drawing can help you test simple poses and joint direction. It's most useful when you treat it as a movable structure, then compare the result with a real reference to study the differences in soft tissue, weight and individual shape.
Use a varied practice cycle
Standing study: Establish one head unit, place the main landmarks and block the figure with simple forms. Spend the final stage checking whether the shoulders, pelvis and feet support the pose.
Seated study: Ignore the apparent total height at first. Draw the spine's gesture, then locate the hips and knees before constructing the legs.
Foreshortened study: Mark the near end and far end of each limb. Use overlap and size changes to describe depth instead of extending the limb to match an imagined side view.
Age and body-type study: Draw from references that don't fit the adult ideal. Write one sentence explaining which relationship you changed and why.
For flexible or remote learning, submit a small group of studies for tutor review rather than waiting until a finished piece feels perfect. Ask a precise question, such as whether the pelvis is too narrow or whether the elbow has moved because of the pose. OCAD's online studio model includes units, assignments, video tutorials and portfolio workspace, with one-to-one or group tuition delivered through Microsoft Teams for Education. Its Level 2 and Level 3 pathways also include dedicated SEND versions, which can support learners who need adjusted pacing or accessible routines.
A useful practice record doesn't need elaborate prose. Date the page, name the pose, circle the largest error and redraw that area. Over time, the record shows which mistakes recur and which checks now happen automatically.
Quick Reference Glossary and Cross Referenced Lookup
Use this glossary beside your drawing, especially when a figure starts to feel wrong but you can't yet identify why. The terms describe different stages of the process, so choose the term that matches the problem rather than applying every rule at once.
Key terms for proportion work
- Head unit: The measured length from the top of the head to the chin, used as a repeatable scale.
- Canon: A structured proportional system used to organise the body. It's a guide, not a fixed description of every person.
- Landmark: A visible or easily estimated point, such as the navel, elbow, wrist, knee or hip, used to check relationships.
- Gesture: The directional flow of a pose, often traced through the spine, shoulders and pelvis.
- Foreshortening: The apparent shortening of a form as it points towards or away from the viewer.
- Construction: The early stage where you use lines and simple masses to organise the figure before refining contours.
- Contour: The outer edge of a form. It should follow the structure underneath, not conceal uncertainty about it.
Human proportion quick lookup
| Landmark | Head Unit Position | Cross Reference |
|---|---|---|
| Eyes | Around halfway down the head | Head and face proportions |
| Ears | Aligned broadly with the eyebrows and nose | Head and face proportions |
| Belly button | Around three heads down on a standing adult scaffold | The head unit and standing figure canon |
| Elbows | Around the level of the navel on the standing scaffold | The head unit and standing figure canon |
| Wrists | Around the top of the legs on the standing scaffold | The head unit and standing figure canon |
| Total standing height | Commonly seven to eight heads for an adult figure | Proportions by age and body type |
| Outstretched arm span | A classical comparison with total height | Adjusting proportions for pose and perspective |
Troubleshoot before you erase
The torso looks elongated. Compare the ribcage and pelvis first. A long-looking torso may come from a misplaced pelvis, a compressed reference pose drawn as standing, or legs that start too low.
The elbows are misplaced. Recheck the arm's bend and the navel relationship. In a raised or foreshortened arm, the elbow's apparent position changes because the limb turns in space.
The head looks too small. Compare it with the age and body type of the reference. Don't enlarge it automatically if the issue is an overly narrow torso or overextended legs.
The pose feels stiff. Return to the gesture line and the tilt of the shoulders and pelvis. Detail won't repair a frozen action line.
The figure looks flat. Add overlapping forms, centre lines and simple planes. Perspective needs depth cues, not just a more carefully drawn outline.
Keep this page beside your sketchbook and mark the relevant cross-reference when you diagnose an error. The fastest progress comes from naming the problem accurately, making one controlled correction and testing the same idea in a new pose.
The Online College of Art & Design (OCAD) offers flexible, tutor-led Level 2, Level 3 and foundation pathways with online assignments, video tutorials, portfolio workspace and feedback that can support focused study of human proportions for drawing. Visit The Online College of Art & Design (OCAD) to explore a route that fits your current level, study needs and university progression plans.