

You've drawn the front view carefully, and the eyes, nose and mouth feel like they belong to the same person. Then you turn the reference sideways and the likeness seems to disappear. In Level 2 and Level 3 coursework, that's a familiar frustration: a profile can look neat and still feel wrong because the head tilt, facial contour or ear placement doesn't match the sitter.
A successful profile isn't a frontal portrait with features removed. It's a study in structure, observation and deliberate choices, and it can become strong evidence of your development in an assessed project or university portfolio. The exercises below connect the practical drawing decisions to what tutors look for, while making space for the variety of faces and learners that profile references should represent.
Table of Contents
- Why Profile Drawings Trip Up Even Strong Students
- Setting Up the Head and Proportion Scaffold
- Mapping the Profile Landmarks That Carry Likeness
- Choosing References That Serve the Work
- A Three-Pass Method That Builds a Convincing Profile
- Five Common Profile Mistakes and How to Fix Them
- Building a Portfolio Around Your Profile Practice
Why Profile Drawings Trip Up Even Strong Students
A Level 3 student brings a profile study to a tutorial. The pencil work is confident, and she's carefully shaded the eye and hair. Her tutor points to the head's tilt: the eye line climbs too steeply, so the nose, mouth and chin appear to slide forward. She revises the features one by one, but they still don't sit convincingly until she corrects the underlying angle.

A frontal view gives you two eyes, two sides of the face and a clear centreline to compare. Turn the head, and many of those cues disappear. The profile asks you to read one continuous contour, from forehead to nose, lips and chin, then connect it to the jaw, ear, neck and shoulder. Because fewer features remain visible, small changes in angle and spacing carry more weight.
Why the structure matters
A frontal drawing can conceal a slight tilt because both sides of the face provide visual checks. In profile, the ear's position, the slope of the forehead and the direction of the jaw become easier to notice. A tutor may quickly see that the ear sits too high or the head leans back, even if each feature looks carefully rendered on its own.
That's why a profile isn't necessarily an easier drawing. It can demand more precise observation, because the artist has fewer visible cues to establish identity. The distinctive line of a brow, nose bridge or chin may carry more likeness than detailed eyelashes or smooth shading.
Tutor's reminder: If the face doesn't read at a small size, extra detail won't repair its structure.
For a Level 2 or Level 3 submission, this matters beyond the finished image. A clear sequence of observation, correction and refinement can show how you respond to feedback and develop a drawing. Start by checking the head's overall direction, then protect the landmarks that make the sitter recognisable. Once the structure holds, you can decide how much detail the piece needs.
Setting Up the Head and Proportion Scaffold
Begin with the whole head, not the eye. The National Portrait Gallery recommends starting with simple three-dimensional forms, drawing lightly and observing the sitter as you work. Its portrait demonstration on starting a drawing encourages learners to establish structure and feature placement before shading. That sequence gives you a scaffold you can adjust instead of a finished-looking feature attached to a misplaced head.
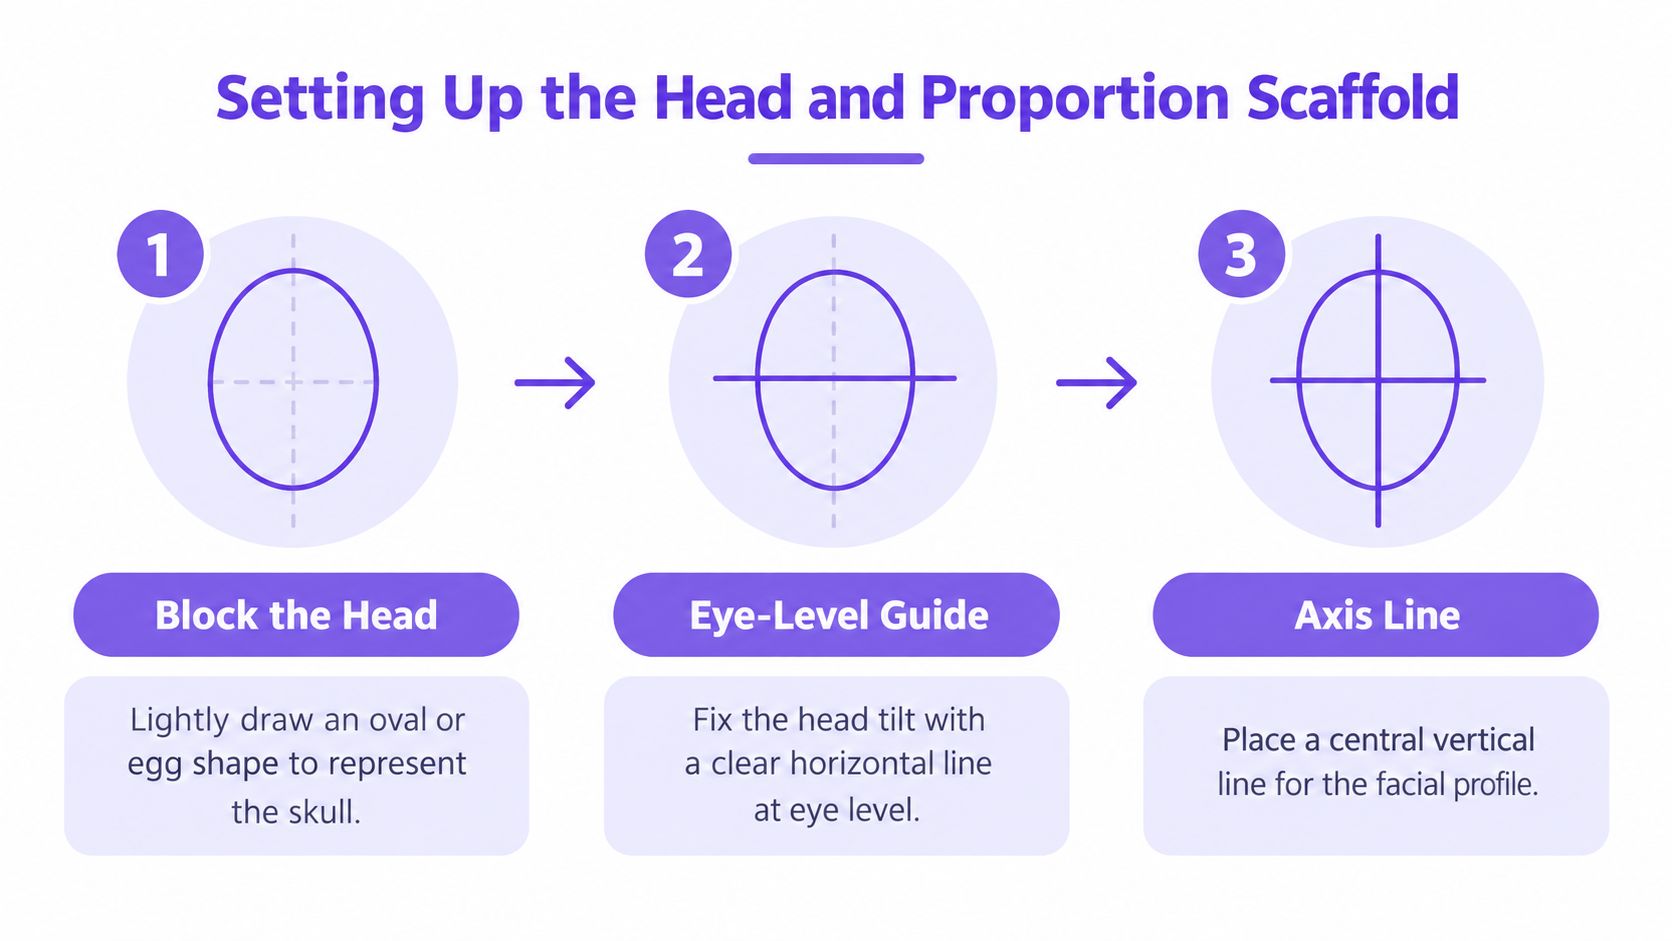
Start with the mass and tilt
Lightly draw an egg or oval for the skull and face. Keep it loose. Check whether the head tips forward, leans back or sits upright before you add the outline of the nose. A useful guide to drawing human proportions can help you practise measuring relationships, but treat any guide as a starting point, not a template for every sitter.
Add a horizontal eye-level guide that follows the tilt of the head. “Horizontal” here means level across the head, not necessarily parallel with the page. If the sitter's head is tilted, your guide should tilt too. This line gives you a reference for the visible eye and helps you judge the brow, forehead and position of the nose.
In a profile, don't draw the usual front-facing centreline down the middle of the face. Instead, map the side contour: forehead, brow, nose, lips and chin. Keep this line simple at first. If the outline looks too long or too short, adjust it before drawing details.
Use proportions as estimates
The National Portrait Gallery's guidance places the nose roughly halfway between the eye line and chin, and the mouth roughly halfway between the nose tip and chin. These estimates give you places to begin, not rules to impose on every face. Age, expression, anatomy and viewing angle change how those distances appear, so compare the scaffold with your reference throughout.
Now connect the features. Read the nose, lips, chin, forehead, ear, neck and shoulder as parts of one form rather than isolated shapes. Before moving on, check that the head tilt, nose-to-chin distance and forehead slope look plausible when you view the drawing from a distance.
For assessed work, this scaffold also gives you a useful process record: a lightly constructed start shows where you made decisions and what you corrected. Keep your first lines visible in a sketchbook study, then note which proportion you changed and why. That makes the drawing's development easier to explain later.
Mapping the Profile Landmarks That Carry Likeness
A profile's landmarks work as a chain. The forehead flows into the brow; the brow leads into the bridge and tip of the nose; the mouth, chin and jaw continue the contour. If one link shifts, the rest can read differently. That's why I ask students to protect the overall silhouette before refining small marks.
A long nose doesn't automatically look wrong, for example. It may look wrong because the brow-to-bridge transition is too abrupt, the lips project too far, or the chin doesn't balance the nose. Work from the whole outline inward, checking the relationship between adjacent shapes rather than correcting each feature in isolation.
| Landmark | Identity cue | Bow/trap to avoid |
|---|---|---|
| Forehead and brow | Their slope and projection shape the upper contour. | Don't flatten the forehead into a generic curve. |
| Nose bridge and tip | Their angle and projection strongly affect the profile. | Don't draw the tip as a separate bump from the bridge. |
| Lips and philtrum | Their forward projection and spacing shape the middle contour. | Don't make the mouth a single symbol or line. |
| Chin and jaw | Their angle and relationship to the mouth anchor the lower face. | Don't round away a distinctive chin or lose the jaw edge. |
| Ear | Its height and position help connect the face to the skull. | Don't place it by habit without checking the reference. |
| Neck and shoulder | Their direction completes the head's silhouette. | Don't let the neck stop abruptly beneath the jaw. |
When students struggle with a nose in profile, the problem often isn't a missing nostril. It's the angle from brow to bridge, or the way the nose meets the upper lip. Practise that transition with a nose sketching guide, then compare it against the full facial contour.
Left-facing and right-facing aren't interchangeable
A University of Southampton study tested facial profiles from 230 subjects. It reported 82% cross-recognition when profiles were compared across sides, 85% recognition when profiles were shown on the same side, and 71% when a person was learned from one side and tested from the opposite side (study of profile-face recognition). The finding supports a practical drawing lesson: a side view carries substantial identity information, but left-facing and right-facing references don't always offer equivalent cues.
For your coursework, don't reverse a reference automatically just to improve the composition. If you do flip it, check whether the brow, nose, lips, jaw and visible ear still match the person. Simplify carefully, but don't replace the sitter's particular contour with a standard profile shape. In a GCSE, A Level or Level 3 project, that distinction helps your study read as observation rather than a generic exercise.
Choosing References That Serve the Work
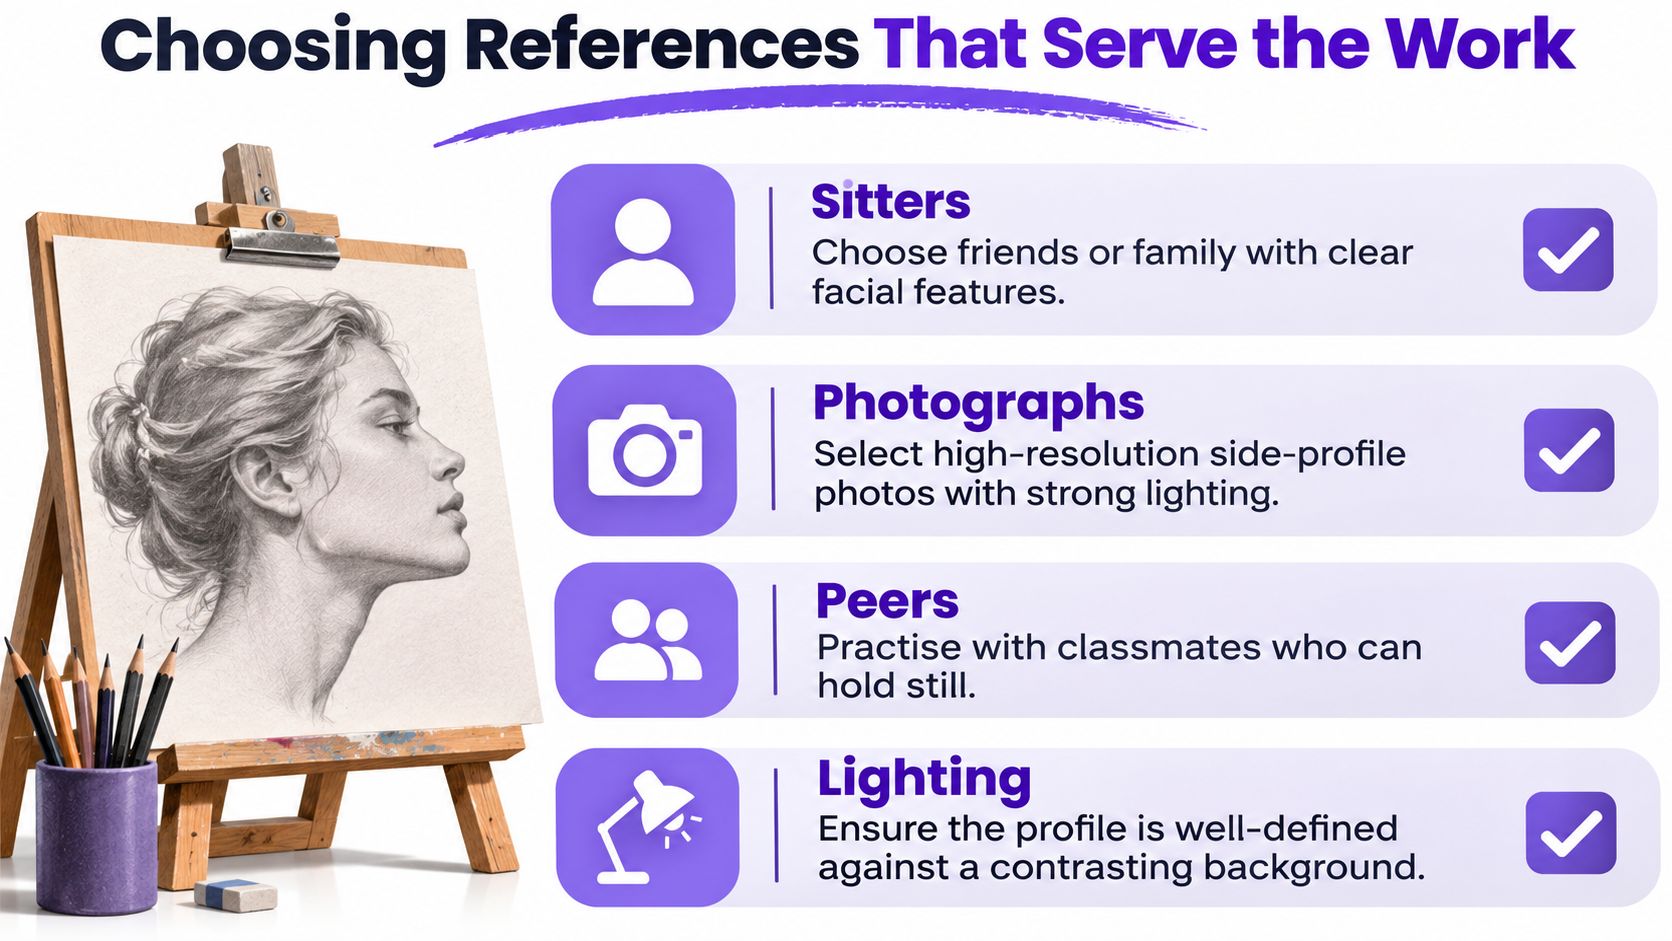
Any face won't do. A reference can make observation harder if the profile is hidden by hair, the nose merges into a similar-toned background, or the image cuts off the neck and removes the context that helps the head feel connected. Choose a reference that lets you see the form you intend to study, then vary your examples so one facial type doesn't become the unspoken standard.
The National Portrait Gallery's archive research examines representations of people from the global majority in historic British portraiture, acknowledging gaps in the record (NPG archive research on British portraits). A Cultural Learning Alliance evidence review reports that pupils with SEND are under-represented in most arts subjects at GCSE, while Art & Design is an exception (review of arts education evidence). Representation and access both deserve attention when you select references and plan how learners will work from them.
Look for variety and clarity
Build a reference set around observable features, not broad racial labels. Include different ages, facial structures, skin tones, hair textures and gender presentations. Consider glasses, facial differences and religious head coverings, too. Ask what the reference lets you observe, and whether you can draw it respectfully without treating one feature as unusual or as a shorthand for someone's identity.
Check the image's practical qualities as well. The face should be distinct from the background, and the lighting should show the brow, nose, lips and chin. If you're working from life, choose a sitter who can rest comfortably in the pose. If a learner needs a different pace or format, offer visual step cards, adjustable demonstrations and an alternative to timed live drawing.
A quick reference check
- Clear contour: Can you follow forehead, nose, lips and chin without guessing?
- Useful contrast: Is the face distinguishable from the background?
- Visible context: Can you see enough of the ear, jaw, neck or shoulder for the study?
- Accessible format: Can the learner enlarge, pause or revisit the image as needed?
The right reference isn't attractive. It gives you something specific to investigate and enough visual information to make that investigation fair.
A Three-Pass Method That Builds a Convincing Profile
Work in three passes, and make each pass earn the next one. A tidy shaded drawing can still be structurally weak, so don't treat rendering as proof that the likeness is working. Keep the marks light until the outline and major relationships hold.
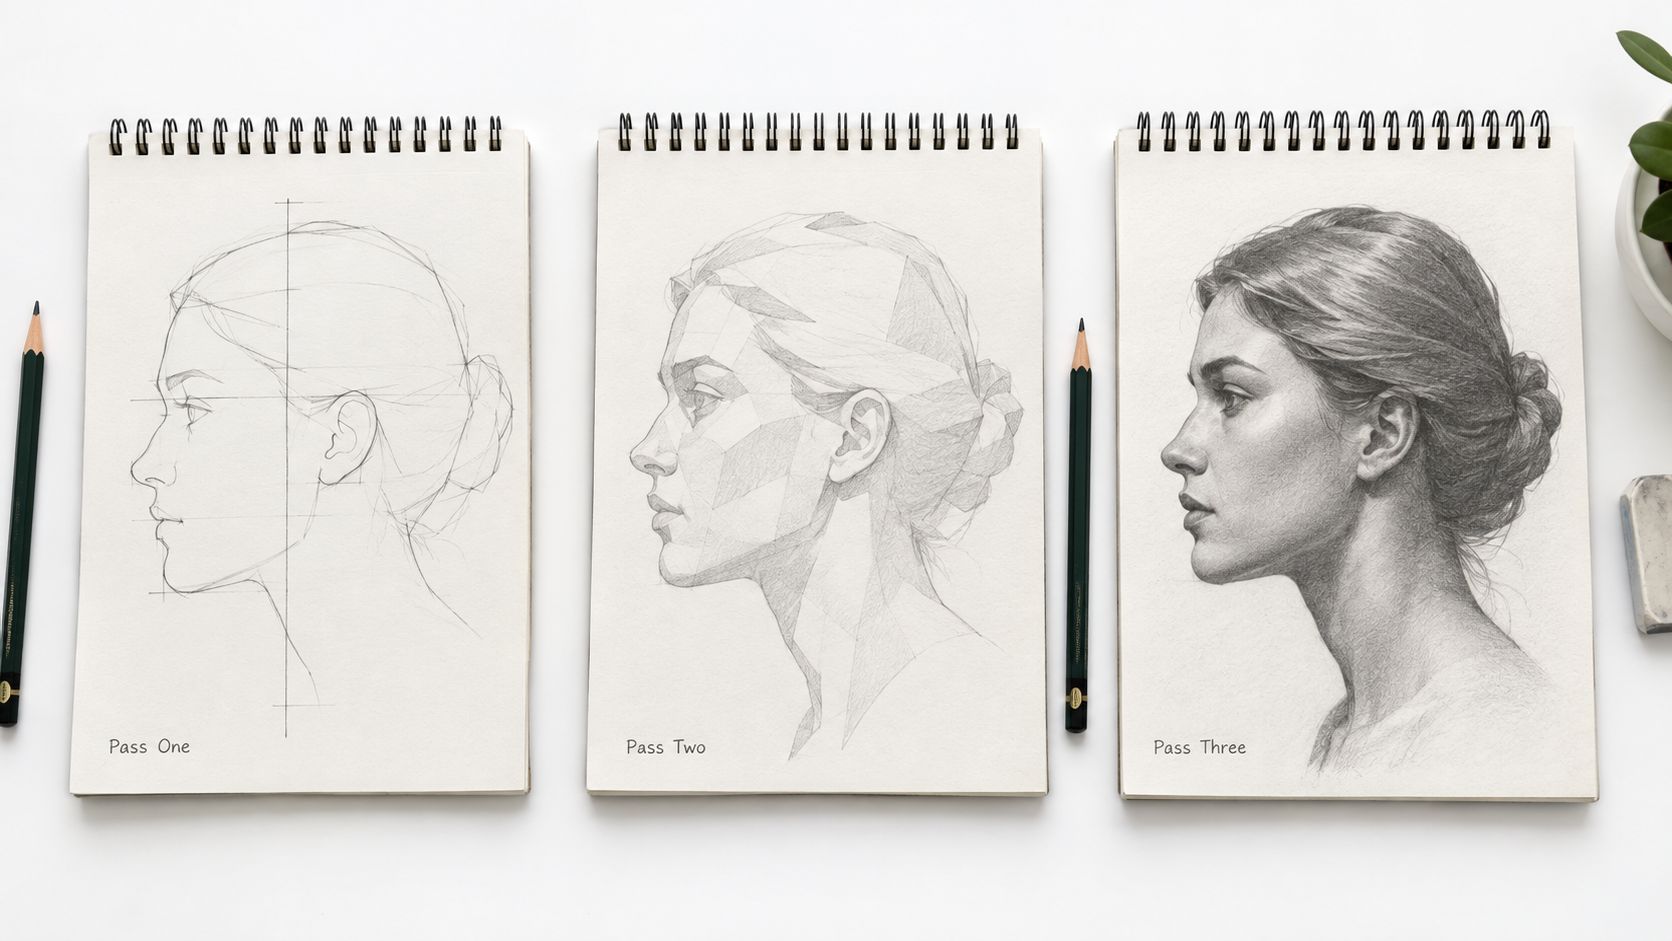
Pass one, contour and axis
Mark the head's tilt, eye-level guide and outer contour. Include the forehead, nose, lips, chin, jaw, ear, neck and shoulder, but leave interior details out. Then make a small thumbnail sketch beside the main drawing. At thumbnail size, ask whether the head's direction and proportions still read clearly.
If something feels off, compare the full outline with the reference. Don't start shading to disguise a misplaced chin or a head that leans too far back. Correct the scaffold while the drawing is easy to change.
Pass two, planes and negative spaces
Add the larger planes of the brow, cheek, nose and jaw. Look at the negative spaces, the shapes around and between forms. For example, the angle between the forehead and nose, or the opening beneath the chin, can reveal a proportion problem more clearly than staring at the feature itself.
For profile work, controlled light helps you see these planes. UK portrait-photography guidance recommends indirect directional daylight rather than direct sun, which can create harsh facial shadows (portrait photography lighting advice). A soft or indirect light placed around 45 degrees to the subject and slightly above eye level can make the brow, nose, lips and chin easier to read.
Pass three, value and edges
Only shade once the contour and major spaces look convincing. Build values gradually, keeping skin highlights under control and leaving enough difference between the nose silhouette and its background. Use harder edges where the form turns sharply, and softer edges where light rolls across a cheek or hair.
When drawing from a photograph, check focus on the near eye or another clear facial landmark. If the near eye is sharp but the nose or lips fall outside focus, adjust your depth of field; keep the camera stable and inspect the test frame before continuing. For a moving sitter, a shutter speed above 1/160 second is a practical starting point, but the right setting depends on movement and light.
The short video below offers another visual demonstration to compare with your own process.
In a timed assessment, you can still use the same order: contour first, planes next, values last. In an extended project, keep the thumbnails and revisions beside the final study so your tutor can see how you tested the drawing rather than only its finish.
Five Common Profile Mistakes and How to Fix Them
A tutor's note such as “check your axis” usually points to a structural issue, not a need for more detail. Use the table to diagnose the drawing before you erase or shade. Choose the pass that needs attention and make one targeted correction.
| Common error | What you may see | One-line fix |
|---|---|---|
| Tilted head axis | The features seem to drift forwards or backwards. | Recheck the head tilt and redraw the eye-level guide to match it. |
| Broken silhouette | The nose, lips or chin look detached from the facial contour. | Redraw the outer contour as one connected line before refining features. |
| Misplaced ear | The ear appears too high, too low or too far back. | Compare its position with the brow, jaw and back of the skull in the reference. |
| Lost jaw | The neck seems to merge into the face or the chin lacks definition. | Clarify the chin-to-jaw turn and reconnect it to the neck. |
| Flat lighting | Brow, nose and chin planes are hard to distinguish. | Use softer directional light and check that the face separates from the background. |
If the reference is a photograph
A photographic reference can mislead you when the skin is overexposed or the nose outline blends into the background. Take a test frame, review the histogram and highlight warnings, and bracket exposure if the background is bright. Focus on the near eye or nose tip rather than trusting autofocus blindly, since it may select hair or the far edge of the face.
Treat these checks as part of drawing preparation, not as a separate technical task. A clear image helps you judge the silhouette, while a stable drawing scaffold helps you decide which marks matter. If the tutor's comment is “silhouette is broken,” return to the contour pass rather than polishing the mouth or adding more tone.
Building a Portfolio Around Your Profile Practice
A profile study can anchor a project about identity, portraiture, observation or representation. Keep the preparation, experiments and revisions, not just the most polished drawing. Those pages can show how you built a scaffold, changed a contour after feedback and tested different materials before selecting a final outcome.
University of the Arts London advises applicants to organise their work by project and explain each project's development or story. Its portfolio advice says a portfolio may include drawings, sketchbook pages, video and three-dimensional work, and recommends presenting approximately 3 to 5 projects rather than a collection of unrelated pieces (UAL portfolio advice). Requirements vary by course, so tailor your selection to the subject and the provider's criteria.
Turn practice into project evidence
A Level 2 or Level 3 student might develop a portraiture project from quick profile observations into a resolved drawing, then compare that drawing with photographs or another medium. Include early contour tests, a page exploring negative shapes, notes on tutor feedback and a short reflection on which change improved the likeness. That gives the portfolio a visible line of enquiry instead of asking the final image to explain everything.
You can photograph or scan physical pages and arrange them into digital pages using InDesign, PowerPoint or Canva. Select the clearest evidence for each project, and organise it so a reviewer can follow your decisions. For more ways to shape the work into a coherent collection, see these tips for building an artistic portfolio.
Check admissions requirements early
Some UK art and design providers may ask for 104 to 120 UCAS Tariff points, while also assessing relevant strengths, creative experience and the portfolio (UCAS course information). Formal qualifications aren't the only consideration, and portfolio stages may follow the initial entry requirements. Check each course's published criteria and confirm whether your qualification is accepted rather than assuming every university uses the same requirements.
A profile drawing earns its place when it contributes to a larger project and demonstrates thoughtful development. Choose work that shows both what you made and how you learned to see more accurately.
The Online College of Art & Design (OCAD) offers flexible, tutor-led creative courses from entry level through Level 3, including art, design, photography and foundation pathways. If you want structured guidance with profile drawing, assessed coursework and portfolio development, visit The Online College of Art & Design (OCAD) to explore its courses.