

You're at a school fete, the face-painting queue is growing, and a child asks for a tiger. Then you notice a cold sore. The right response isn't to paint around it: decline the skin application kindly and offer a decorated card badge instead. A hand design can suit a child who doesn't want their face touched, but it isn't a workaround for a suspected infection.
Learning how to facepaint starts with that judgement, not with drawing whiskers. Once you can decide whether to paint, organise a clean station and explain what you're doing, a small set of repeatable designs will serve you better than a complicated gallery.
Table of Contents
- Check the Kit and the Skin First
- Consent and Choices Before the First Stroke
- How to Facepaint a Simple Design
- Fast Event Designs and Blending
- Fixes for Patchy Smeared or Sore Paint
- Turn Practice into a University Portfolio
Check the Kit and the Skin First
Use only water-based products labelled for cosmetic use for this beginner event workflow in Great Britain. Craft acrylic, poster paint and nail glitter don't belong on the face, even if they're washable or described as non-toxic. Those descriptions don't establish suitability for skin.
Check every pack for ingredients, precautions, batch identification, a use-by date or applicable period-after-opening information, and Responsible Person details. Look for the UK or EU information specified in local guidance, but check that products supplied for Great Britain meet the applicable GB requirements rather than assuming an EU address alone proves compliance.
Read the pack before buying
In a 2025 screen of 198 cosmetic products, East Midlands Trading Standards found 78% non-compliant and 28% containing restricted or banned ingredients, according to the Trading Standards enforcement announcement; it identified face paints containing non-permitted Solvent Yellow 172 and undeclared colourants CI 45160 and CI 45174, with non-compliance affecting 29% of 35 products from national retailers versus 88% of 163 from other traders.
That was a cosmetics enforcement operation, not a failure rate for all UK face paints. It does show why attractive packaging and a familiar shop aren't substitutes for checking the product.
Face-painting kit and pack checks
| Item | Use | Avoid | Pack check |
|---|---|---|---|
| Water-based face paint | Base colour and designs; a split cake or water-activated palette is practical | Craft acrylic, poster paint, unmarked imports | Cosmetic label, ingredients, precautions, batch, use-by, Responsible Person |
| Round brush size 2 | Lines, eyes in painted characters, whiskers | Shared unwashed brushes between children | Synthetic hair; rinse in clean water and clean between children |
| Round brush size 6 | Larger shapes and petals | Loading so much paint it drips towards eyes | Clean ferrule, no loose hairs |
| Dense sponge | Base colour and masks; pack wedge sponges too | One sponge passed between children | New or properly washed sponge per child |
| Cosmetic glitter | Highlights away from eyes | Craft or nail glitter | Labelled cosmetic; keep off the eye surface |
| Two water pots | Rinse colour, then final rinse | One muddy pot for the whole queue | Change when water clouds; rinsing isn't disinfection |
| Remover | Gentle take-off the same day | Scrubbing or leaving paint overnight | Oil or wipe suited to the paint; avoid experimenting on sore skin |
Pack paper towel, cotton buds, a waste bin and enough clean brushes to rotate through proper cleaning. A gentle baby wipe may suit some paints and skin, while others lift better with a little suitable oil on cotton. Check compatibility before the event.
Decide whether skin application is appropriate
Decline painting over cuts, grazes, spots, cold sores, eczema flares, sunburn, conjunctivitis or other apparent skin problems. For this service, don't paint children under two; many manufacturers specify three years, so apply the stricter pack restriction. Don't offer an alternative skin site when infection or a suspected product reaction makes painting inappropriate.
Ask both the child and caregiver about participation and known allergies. Hypoallergenic doesn't mean reaction-free, and a quick patch test can't guarantee there won't be a same-day reaction. ALODERMA's guide to patch testing for a gentler skincare routine provides useful background for planning product checks in advance, not clearance to paint an unsuitable child.
Station layout: paints facing the painter, sponges allocated to a single child, clean and used tools separated, and hands washed between children.
Consent and Choices Before the First Stroke
At a busy UK event, a child may reach the chair, then freeze when a brush comes near. A caregiver's permission does not mean the child has agreed, or that they must carry on. For booked sessions in structured settings, arrange written caregiver consent in advance, then ask the child at the chair. The Eldene Preschool face-painting policy on parental consent and stopping supports this approach.
Show the child a dry sponge and demonstrate a colour on your own hand with a separate tool. A small preview makes the next step easier to understand, while keeping the choice theirs.
Offer choices they can actually refuse
Use a simple picture board to make the options clear:
- Cat: A small cheek-and-nose design.
- Mask: Colour around, not on, the eyelids.
- Flower: A cheek, hand or forearm design, if skin application is suitable.
- No paint: A decorated card badge or washable sticker.
Offer each choice in the same friendly tone. A badge is a valid outcome, not a consolation prize.
Consent rule: “Tell me to stop and I'll stop. You can change your mind.”
If the child flinches, pulls away, dislikes the sensation or cannot sit comfortably, put the tool down. Don't bargain for one more stroke or ask a caregiver to hold the child's head. A still face is not the same as a willing yes.
Make participation accessible
Choose a quieter corner, offer adaptable seating and keep a clear route to the chair. Explain each tool before using it, allow time to process, and offer a shorter design without asking the child to justify their preference.
Adjustments to timing, seating and communication can help disabled children and adults take part. They do not replace skin checks, and a volunteer painter should not give medical advice. Sometimes the right choice is no facial paint.
How to Facepaint a Simple Design
Practise a cheek butterfly before attempting a full-face transformation. Its paired shapes teach placement, layering and line control, and you can change the colours without changing the method.
Westminster's face-painting guidance provides a useful safety foundation for cosmetic product selection, skin screening and hygienic working. Keep the table clear so the child can't knock a loaded brush or reach into the palette.
Build the butterfly in controlled stages
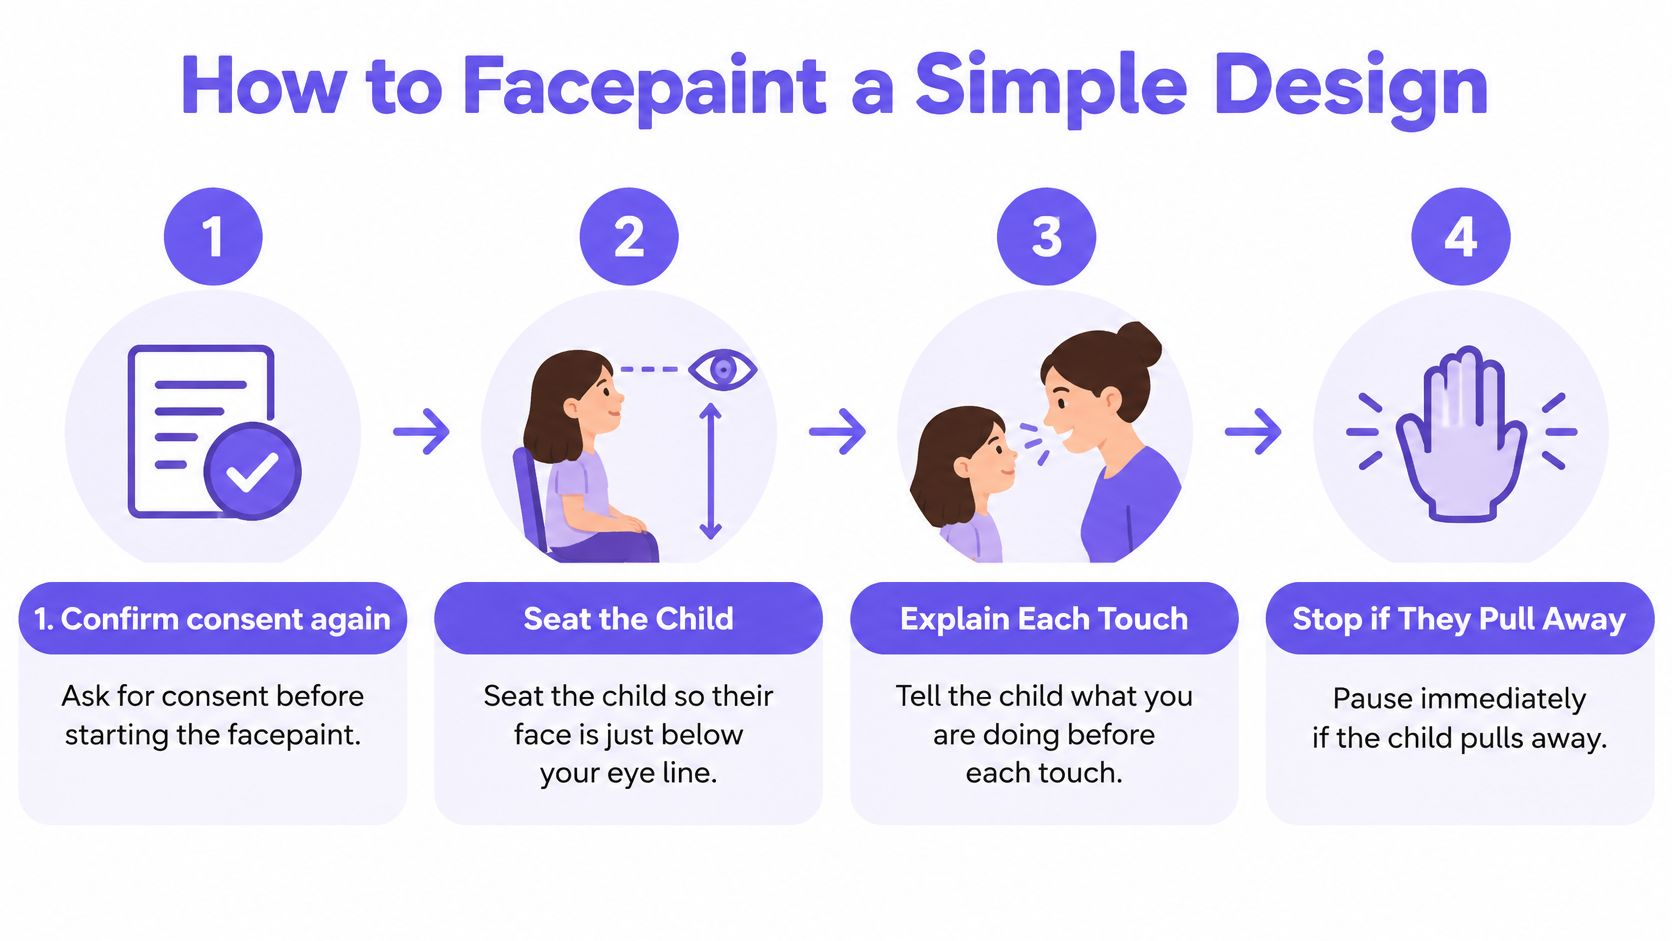
Seat and ask again. Position the child with their face just below your eye line, without asking them to stretch their neck. Confirm that they still want the butterfly and that their skin is clean and dry. Explain each touch and pause immediately if they pull away.
Press in the wing shapes. Dampen a clean sponge, squeeze it out thoroughly and load white or your lightest colour. Press paired wing shapes onto the cheeks, leaving roughly a finger-width of bare skin from the eyes. Dragging the sponge makes streaks and encourages you to compensate with too much paint.
Let the base settle. Wait until the surface looks matte before adding another thin layer where coverage needs improving. A heavy wet coat stays mobile, transfers easily and can crack when the child smiles. Aim for even colour, not a raised layer.
Outline with the larger round brush. Use a size 6 brush and a darker colour. The side gives a softer, broader edge; the tip gives a narrower, crisper one. Turn the brush rather than repeatedly scrubbing the same patch.
Add the small details. Switch to size 2 for a short central body, antennae and three dots on each wing. With permission, lightly brace your little finger on a clean, dry area of cheek, well away from the eye. Don't brace on wet paint or continue if the child starts moving.
Place a highlight. Add a small white mark on the upper outside of each wing, away from lashes. Leave some coloured space around it so it reads as reflected light rather than another base coat.
Make glitter optional. If the product permits this use, apply cosmetic glitter to the outer wing only, using its compatible application method. Don't blow loose glitter towards the face or improvise with craft glitter.
Check in the mirror. Ask whether the child likes the result rather than adding details automatically. Lift stray specks with a fresh cotton bud, working away from the eyes.
Time the practice, then give removal advice. As a rehearsal target, try completing this version in about four minutes once your station is ready. That's a practice goal, not a promise to a waiting family. Explain how to remove it that day with a damp cloth or compatible oil, followed by mild soap where appropriate, without scrubbing.
Keep the difficult areas out of the design
For a first-time volunteer's service, leave eyelids, waterlines and lips unpainted. A child can blink or turn unexpectedly, so a neat-looking gap is safer than trying to fill every space.
If you struggle to make friendly curves, practise the simple shapes in this smiley-face drawing exercise on paper first. Transfer the relaxed curve, not every detail, to the butterfly's antennae.
Put the used sponge straight into its designated container. Prepare a fresh one before inviting the next child to sit down.
Fast Event Designs and Blending
Offer a small menu you can reproduce comfortably. For a hypothetical fete with twenty children waiting, rehearse designs with a three-to-five-minute painting target, while allowing separate time for consent, cleaning and changeovers. Don't promise that throughput until you've tested your own routine.
These are practice timings, not professional speed standards. If the painter needs longer, simplify the menu rather than rushing near a child's eyes.
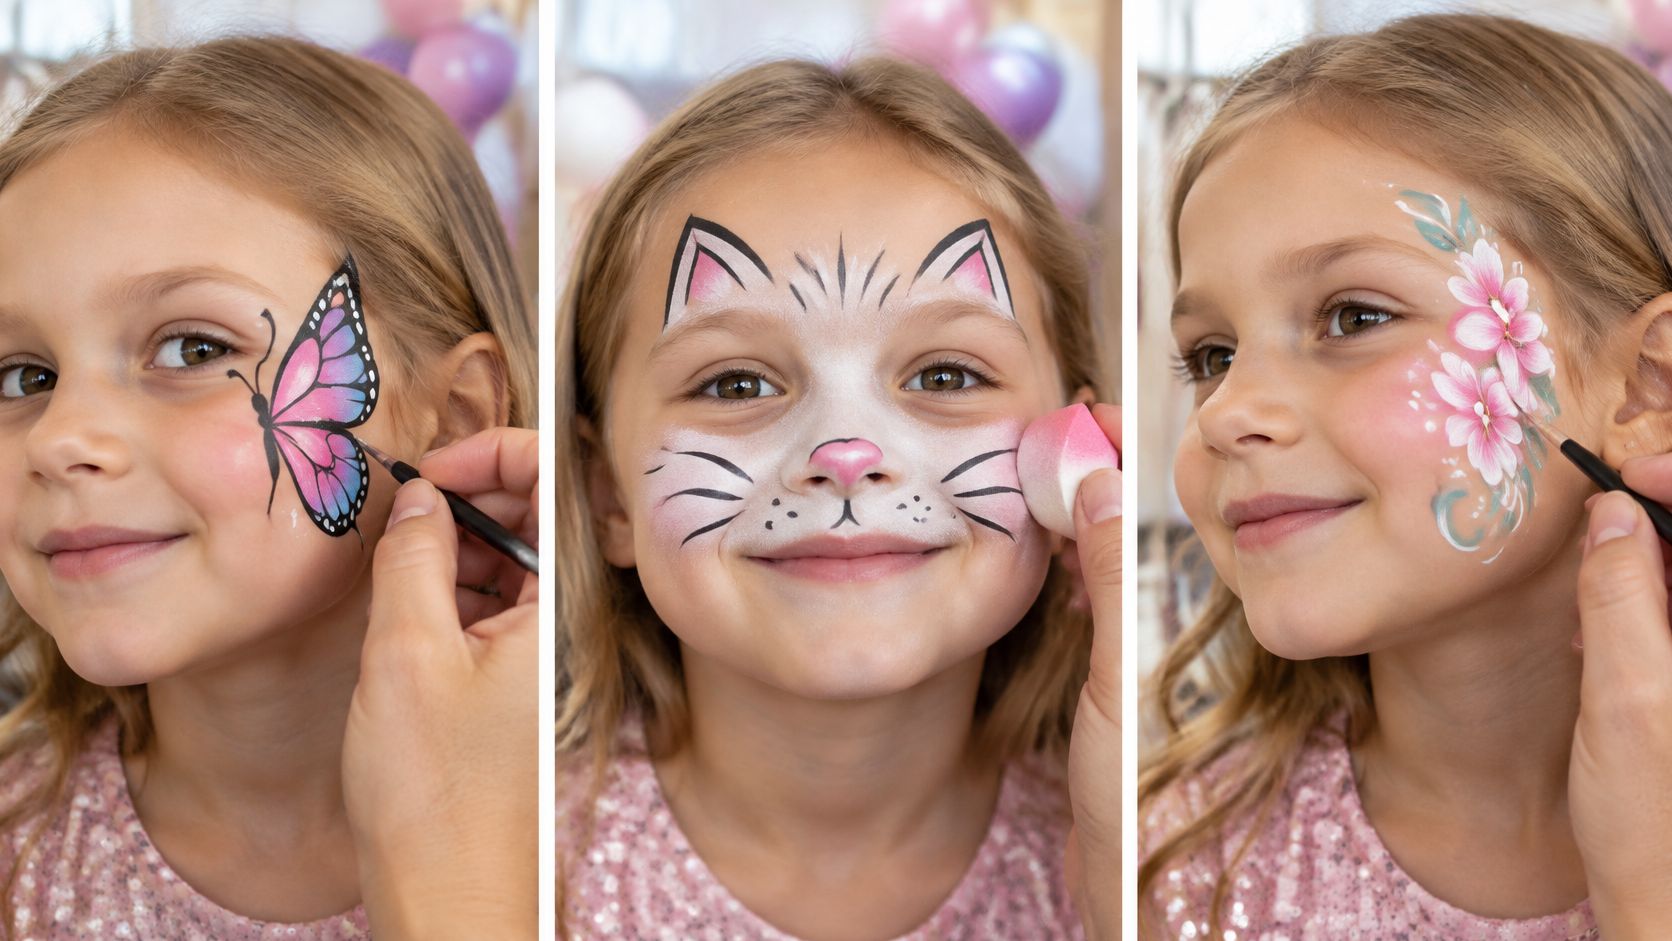
Cat with a three-minute rehearsal target
Think in three groups of marks: pale muzzle, ear shapes, dark details.
Press a pale base over the upper cheeks and nose bridge, keeping clear of the eyes and nostrils. Stipple darker triangular ear shapes near the hairline if the hairstyle leaves room; don't force paint into hair to complete the outline.
Once the base is matte, add a small nose triangle and three outward whisker strokes on each cheek. A dark brown or grey can give a softer result than a large area of black. Leave the mouth bare.
Superhero mask with a three-minute rehearsal target
Use colour band, softened edges, highlight dots as the sequence.
Sponge a single-colour band across the upper cheeks and bridge of the nose, leaving generous unpainted openings around the eyes. The mask should suggest an eye mask without coating the lids.
Soften the outside edges with a clean, barely damp sponge. Practise an upper-edge wipe and a lower-edge wipe, each on a fresh part of the sponge, rather than repeatedly rubbing the same boundary. Finish with a pair of white dots towards the temples.
Flower with a four-minute rehearsal target
Build petal cluster, centre dot, finishing accent.
Use the larger round brush to press rounded petals into a cluster on the cheek. Keep their bases close together so the flower reads clearly without a heavy outline.
Wait for the base to turn matte before placing the centre dot and a small highlight or leaf. If the child becomes restless, the petal cluster and centre already make a complete design.
Speed comes from fewer colours and a repeated shape, not from thicker paint.
Blend without erasing the colour
Blending is a different movement from outlining. Load less paint than you expect, press the colour into place, then feather its outside edge with a clean, barely damp sponge. A further sweep over the same spot may lift the colour instead of softening it.
Choose a light base, a dark line colour and a single accent to reduce tool changes. White over dry bright paint reads as a highlight; white beneath a translucent colour makes it look brighter. The principles in this guide to painting skin colours also help you judge warm and cool colour relationships, though studio paints must never enter your face-painting kit.
Work outwards from the centre with a lightly loaded brush. If paint can drip, the brush is too wet. Drop the linework when necessary, and photograph only with caregiver permission and the child's agreement; clean and dry your hands before handling a phone.
Fixes for Patchy Smeared or Sore Paint
For a patchy base on sweaty or oily skin, blot rather than rub. On comfortable, intact skin, press on the thinnest compatible white base, let it settle, then rebuild the design colour lightly. Don't keep adding paint to skin that remains wet with sweat.
A visible mistake needs a diagnosis before another brushstroke. More water won't fix every rough edge, and more coverage won't fix irritation.
Match the remedy to what you see
Face paint problems and what to do
| What you see | Likely cause | Fix now |
|---|---|---|
| Patchy base | Oil, sweat or one thin pass | Blot, thin white layer, two light presses |
| Muddy blend | Paint still wet | Wait until matte, then one clean-sponge wipe |
| Cracks when smiling | Coat too thick | Lift and repaint thinly |
| Bleeding lines | Brush overloaded | Wipe brush, redraw with less paint |
| Sting or redness | Irritation or sensitivity | Stop, remove gently, do not repaint |
| Glitter near the eye | Wrong product or placement | Lift outward with a cotton bud; no craft glitter |
For bleeding lines, draw the brush along the palette edge until it leaves a controlled, ink-like mark on a practice surface. Remove the blurred section before redrawing, or the darker paint will spread through the wet area again.
If glitter is on the surrounding skin, lift it outwards with a dry cotton bud, then use a damp one if needed. Don't drag particles towards the eye. If material enters the eye, stop painting and seek the event first aider's help rather than trying to retrieve it with a tool.
Treat discomfort differently from a smudge
A child saying it stings is enough reason to stop. Remove the product gently, tell the caregiver what was used and retain the packaging so they can check ingredients. Don't try another colour or move the same product to the arm that day.
The UK government's cosmetics guidance explains the importance of ingredient and precaution information on cosmetic packaging. Record the product name, shade and batch details when reporting a suspected reaction, rather than writing only “blue paint”.
For preparation before an event, Finding Favourites can help you find gentle removers for sensitive eyes. A remover still needs to suit the paint and its intended application area; a product roundup isn't a reason to experiment on irritated skin.
Stop signal: A smudge is a design problem. Stinging, redness or swelling is a reason to end painting, not improve the coverage.
Keep wipes, a bin and a product record within reach. Separate used tools immediately, change cloudy rinse water and clean brushes properly between children; dipping them in water alone doesn't make them ready to share.
If paint is removed because the child dislikes the design, an appropriate hand or arm flower may be an option. After discomfort or a suspected reaction, offer a non-skin decoration instead. Seek urgent medical help for breathing difficulty or rapidly developing facial swelling.
Turn Practice into a University Portfolio
Face painting can become a useful creative project when you document the decisions behind it. University tutors need to understand how you develop an idea, not just see a photograph of a finished butterfly.
Does face painting count as art?
Yes. It can demonstrate colour, composition, mark-making, audience awareness and responsible material choices. It doesn't replace a required qualification, and its value depends on how well it supports the course you're applying for.
Show a colour test beside the final design. Explain why you removed a crowded outline, changed the contrast or offered a non-face outcome. Those decisions reveal more than a page of nearly identical finished looks.
Can a Level 2 student prepare for a creative degree?
Yes, by developing skills and planning an appropriate progression route. Level 2 study is a starting point for building drawing, painting and project-development habits, not a guarantee of direct degree entry.
Keep sketchbook experiments, feedback and revised outcomes together. Compare your next qualification with the entry requirements of degrees that interest you, rather than choosing solely by the qualification's level.
Will any Level 3 qualification get me into any creative degree?
No. The Department for Education's university admissions guidance makes clear that acceptance is provider- and course-specific, rather than universal across qualifications and degrees.
Check the exact qualification title, UCAS tariff position, subject requirements, required GCSEs and portfolio instructions. Contact the university admissions office when a listing doesn't clearly cover your qualification, including if you're home-educated or applying as an adult.
Do creative universities require a portfolio?
Many do, but check each course. The University for the Creative Arts listing on UCAS says it uses UCAS points and that the majority of its courses require a portfolio, with creativity considered alongside grades.
Use a guide to making an online art portfolio to organise your selection. Follow the university's submission format and deadline rather than assuming a general-purpose portfolio suits every application.
Is a T Level equivalent to A levels?
For progression purposes, a T Level is worth the same as three A levels, and is available to learners aged 16 to 19 living in England, with institutions setting their own entry requirements, according to Skills for Careers. That doesn't mean every university course accepts every T Level.
What should my face-painting project show?
Build a compact project with evidence of development:
- Brief and audience: State the event, practical constraints and accessible options.
- Visual development: Include drawings, colour plans and timed rehearsals.
- Responsible practice: Record product choices and consent arrangements without exposing children's personal information.
- Reflection: Show a problem, your correction and the finished outcome, alongside wider drawing and painting work.
At The Online College of Art & Design (OCAD), we offer online study in drawing, oil painting, watercolour, acrylic painting, mixed media, colour theory, composition, perspective drawing, tonal and light studies, observational painting, and art history and visual analysis, including an Online Foundation Diploma in Fine Art Course. Students upload photographs of completed work and assignments throughout their course to receive feedback and build an art portfolio.
Start by rehearsing the cat, mask and flower on paper, then on a willing adult after suitable checks. Save the process images and compare your developing work with a specific university course listing before applying.
Develop your colour, drawing and composition skills through tutor-led online study with The Online College of Art & Design (OCAD), including its Online Foundation Diploma in Fine Art Course. Visit The Online College of Art & Design (OCAD) to explore study options that can help you turn practical experiments into a considered art portfolio.