

“Only include your best photographs” is incomplete advice. A university photography portfolio needs strong images, but it also needs evidence that you can investigate an idea, make choices and learn from experiments. A beautiful collection of unrelated photographs can tell an admissions reviewer less than a modest project with a clear purpose.
If you're learning how to build a photography portfolio for college, start with the submission rules, not a new camera. For Level 2 and Level 3 creative students preparing for university, the task is to build a documented argument: this is what interests you, this is how you explored it, and this is why the finished work looks the way it does.
Table of Contents
- How Many Images and What File Size Each College Accepts
- Building Credible Work on a Phone or Borrowed Camera
- How to Select and Sequence Images Into Projects
- What Process Evidence to Show and How to Disclose AI
- Writing Captions and an Artist Statement That Fit
- Using Tutor Feedback Rounds to Revise Your Work
- Export, Check and Submit Two Weeks Early
How Many Images and What File Size Each College Accepts
Applicants often assemble a large selection before checking what their chosen course accepts. That creates avoidable work: cutting finished layouts, compressing files again and trying to squeeze process evidence into the remaining space.
Image counts and file limits by UK institution
| Institution | Images or pieces | Format | Size limit |
|---|---|---|---|
| University for the Creative Arts (Photography BA) | 12–20 examples | Check the course submission instructions | Not stated in this guidance |
| Staffordshire University | 10–15 images | Check the course submission instructions | Not stated in the available guidance |
| University of Nottingham | 12–16 images | One PDF | 10 MB |
| London Metropolitan University | Count not stated in the available guidance | One PDF or PowerPoint | 10 MB for general portfolios |
| University of West London | About 15 images | PDF or website link | 15 MB for PDF |
| University of Chester | About 15–20 photographs | Check the course submission instructions | Not stated in the available guidance |
| University of Edinburgh | Up to 20 pages, across four assessment criteria | One PDF | 50 MB |
| Loughborough University | About 20 individual pieces | Portfolio file | 20 MB; images at maximum 150 ppi |
| Sheffield Hallam University | Selective examples; no count stated | Not stated in this guidance |
These are starting benchmarks, not permission to ignore a current course invitation. Nottingham's linked guidance concerns its engineering department's portfolio requirements, while London Metropolitan's limit concerns general portfolios. Don't assume either automatically describes a Photography BA application.
Read the unit being counted
Images, pieces and pages aren't interchangeable. A page containing a contact sheet might count as a page, but its individual frames may be treated differently under an image limit. If the instructions don't explain how supporting work is counted, ask admissions before designing the submission.
For example, an applicant targeting courses requesting 12–16, about 15 and 10–15 images could prepare a shared selection of 12–15 images, then tailor the supporting material. That overlap saves editing time without making every application identical.
Keep full-resolution originals outside the submission file. To understand why camera originals can overwhelm an application upload, compare RAW and JPEG file sizes using RevelRaw's explanation.
Build the shared application copy to the strictest compatible limit, but retain a master archive. A bigger portfolio isn't automatically a stronger one.
Building Credible Work on a Phone or Borrowed Camera
Yes, you can build credible work without owning a specialist camera. The University of Brighton's portfolio advice prioritises projects exploring ideas rather than technical skill alone. Equipment matters when it enables a particular photograph, not as proof that you're serious.
A practical low-cost route
- Control the phone. Use manual or pro mode where available. Otherwise, lock focus and exposure so the phone doesn't change your comparison shots automatically. Capture RAW or DNG if supported, but don't treat that option as essential.
- Borrow with a purpose. Ask school, a library lending service or a friend about camera access. Learn the controls before the planned shoot and record settings so you can explain your decisions afterwards.
- Make a home-based investigation. Photograph a room or object while changing the window direction, background or camera position separately. Changing everything together makes it difficult to identify what improved the photograph.
- Save editing experiments. Use Lightroom, darktable, Photoshop or GIMP to compare exposure, crop and colour decisions. Keep dated versions rather than repeatedly overwriting the same file.
- Research what you can access. Use library books, exhibition postcards and gallery websites. Credit reproduced images and annotate what you learned about framing, lighting or representation.
What could a home project look like?
Suppose a home-educated applicant photographs her kitchen window across six weeks, making four captioned test frames for each light condition. Dated notes explain why she changes her viewpoint and when reflections become part of the subject rather than a distraction.
That hypothetical project demonstrates control without studio equipment. Keep original files, readable contact sheets and notes to the same standard expected from classroom-based work.
For portraits, explain the intended use and obtain permission where appropriate. Don't turn access to family members or neighbours into an assumption that they're comfortable appearing in an application.
How to Select and Sequence Images Into Projects
Most weak portfolios need tougher selection before they need another shoot. Begin with thumbnails, not full-screen favourites: thumbnails expose repetition and help you judge the collection rather than admire individual details.
The University of East London's photography portfolio guidance assesses visual thinking, technical ability, research, editing and coherent presentation. Those are connected skills. Your selection should reveal how you think, not just which photographs received the most likes.
Make the edit in a deliberate order
- Choose projects with distinct questions. Begin with two to four projects rather than genre folders labelled portraits, scenery and street photography. A question about how a workplace changes after closing gives you something to investigate.
- Gather before judging. Bring together finished photographs, tests and overlooked frames. For a hypothetical first edit, a shortlist of 30–40 images provides room to compare without committing to a final layout.
- Remove near-duplicates. Where frames communicate the same idea, compare gesture, light, background and composition. Keep both only if the difference matters to the project.
- Sequence context, variation and resolution. Establish the subject, develop it through meaningful changes, then finish with an image that feels considered rather than merely last.
- Apply the institution's allowance. Count the resolved work and supporting evidence separately while planning. Don't assume research pages sit outside the stated limit.
- Give every image a job. Identify what it adds that its neighbour doesn't: information, contrast, tension, scale or a change of pace.
- Read without your explanation. Hide the statement and inspect the sequence as a stranger. If the subject remains unclear after the opening images, try another order before writing a longer introduction.
A corner-shop editing example
Suppose a Year 13 student in Leeds photographs her family's corner shop over three weekends. She cuts 90 frames to 14, mainly by dropping repeated views of the counter, and places the exterior first so the interior has a location and context.
The remaining photographs might move from the shopfront to deliveries, working hands, customer interactions and the quiet space after closing. A detail of handwritten stock notes contributes more than another technically impressive counter photograph because it adds something about how the business operates.
This is a worked scenario, not a formula for documentary photography. An abstract project may establish visual rules rather than a physical location, but viewers still need a way into it.
A weaker image that carries the theme can earn its place over a stronger image that breaks it. It still needs to be good enough to sustain attention.
Separate self-initiated projects from school exercises through clear project labels. That lets reviewers recognise independent interests without dismissing useful coursework.
Use the Level 2 and Level 3 photography graduate exhibition to examine how student projects are presented. Compare openings, changes of scale and endings rather than borrowing subjects.
Should every project look different? No. Forced variety often produces disconnected work. Show range where it helps the idea: a portrait, an environmental view and an object study can demonstrate different skills within a coherent investigation.
What Process Evidence to Show and How to Disclose AI
A finished image proves that an image exists. It doesn't, by itself, explain who made it, what changed during development or why the applicant selected it.
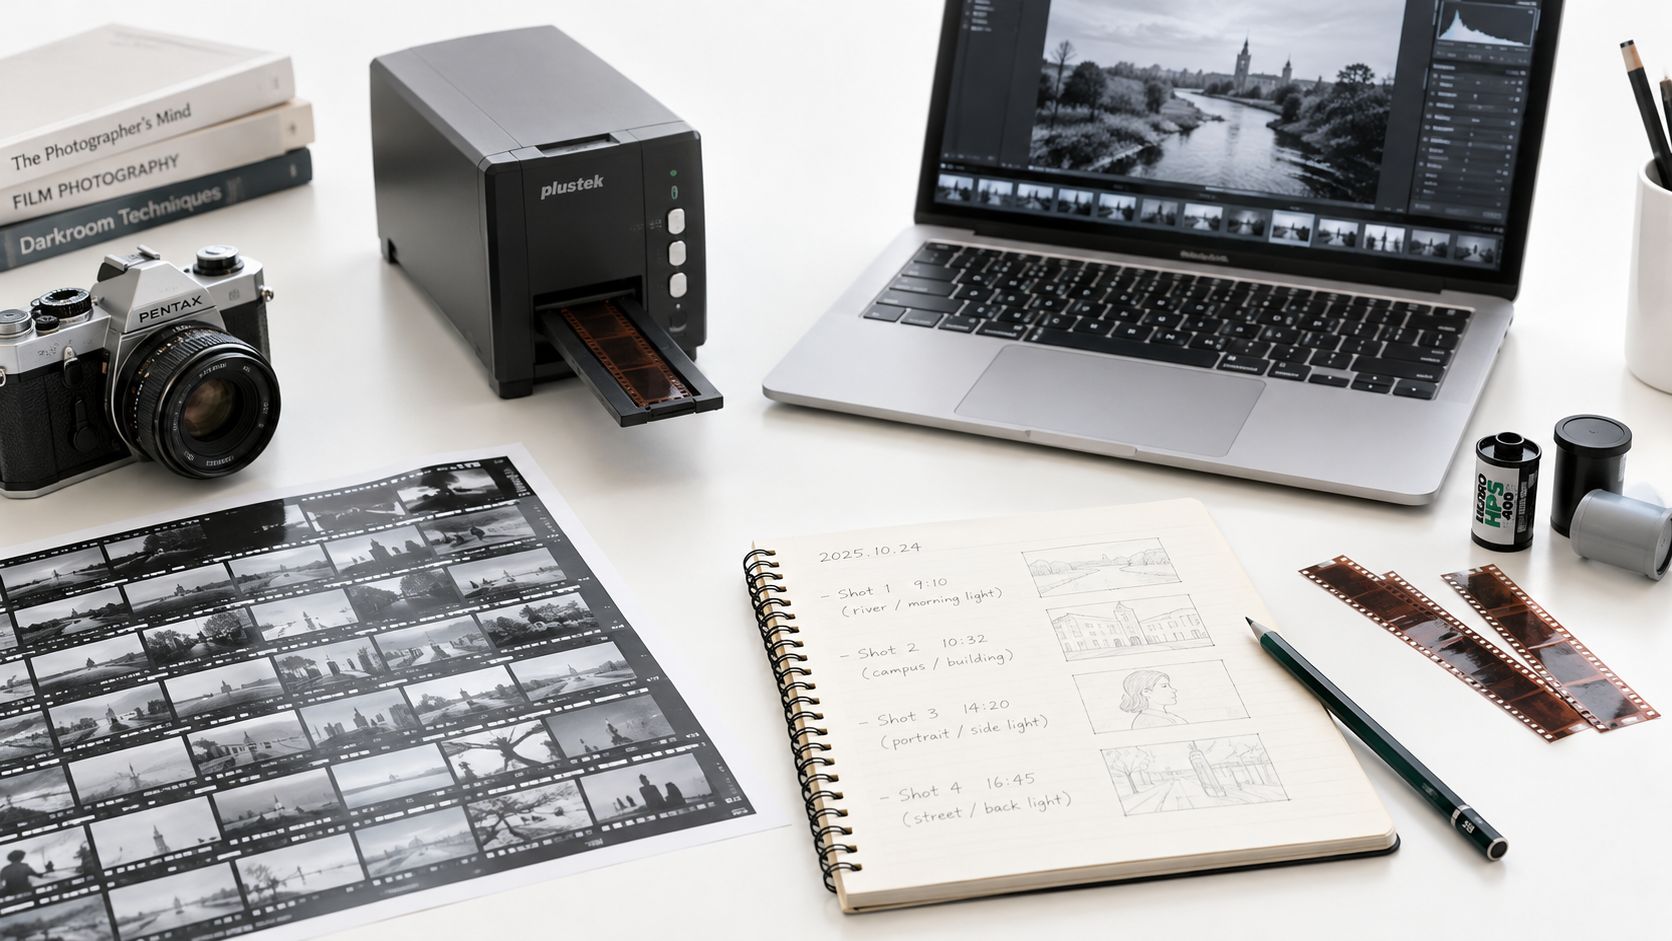
Process evidence should answer those questions without burying the photographs beneath screenshots. A useful workspace brings originals, tests and written decisions together.
Keep evidence that explains a decision
The quantities below are working suggestions for gathering evidence, not an instruction to insert every page into the application.
Process evidence to keep and what it proves
| Evidence | What it proves | How to present it |
|---|---|---|
| Contact sheets | Editing judgement | One page per project, rejected frames marked |
| Sketchbook pages | Research and idea development | Three to five photographed pages per project, one annotated decision each |
| Visual research on photographers | Analysis of other practice | One page per photographer, explaining what you took from their approach |
| Test shots and experiments | Technical range | Four to six captioned frames showing one variable changed at a time |
| Dated development notes | Progression over time | A short dated line beneath key images |
| RAW files and edit histories | Authorship | Kept in the master archive and offered on request |
An annotation should explain the consequence of a choice. Saying that you increased exposure is less useful than explaining that the brighter background distracted from the subject, so you returned to the earlier version.
Separate photographic authorship from generated content
Don't put every form of digital work under the same label.
- Camera-made photographs originate in a camera, including a phone or film camera.
- Edited photographs retain a photographic source but use adjustments such as colour correction, cropping or retouching.
- Composites combine separate elements. Identify their sources and your contribution.
- Generative images contain synthetic content produced through a generative system.
- AI-assisted research uses AI during planning or investigation rather than necessarily within the finished image.
The University for the Creative Arts' photography guidance requires relevant work to be labelled “AI generated”, with an explanation of its use and a link to the original image and creation date where possible.
For generative work, retain the prompt and version history alongside that disclosure. Explain the actual role, such as generating a background texture for a composite, rather than writing a vague acknowledgement of assistance.
Disclosed use in a mood board is easier to explain than presenting synthetic imagery as camera work, but acceptance remains course-specific. Disclosure doesn't override a prohibition.
Authorship check: If you can't substantiate how an image was made, leave it out until you can explain its origin.
RAW isn't compulsory proof. Original JPEGs, negatives, scans, contact sheets and dated working files can also support authentic authorship.
Writing Captions and an Artist Statement That Fit
Captions handle identification; the artist statement explains intention. When both repeat the same information, you use valuable space without helping the reviewer understand the work.
The wider visual culture described in Arts Council England's visual arts profile is useful context for thinking about audiences. Your writing should make your particular subject and viewpoint clear, rather than claiming that photography matters in general.
Use a repeatable caption format
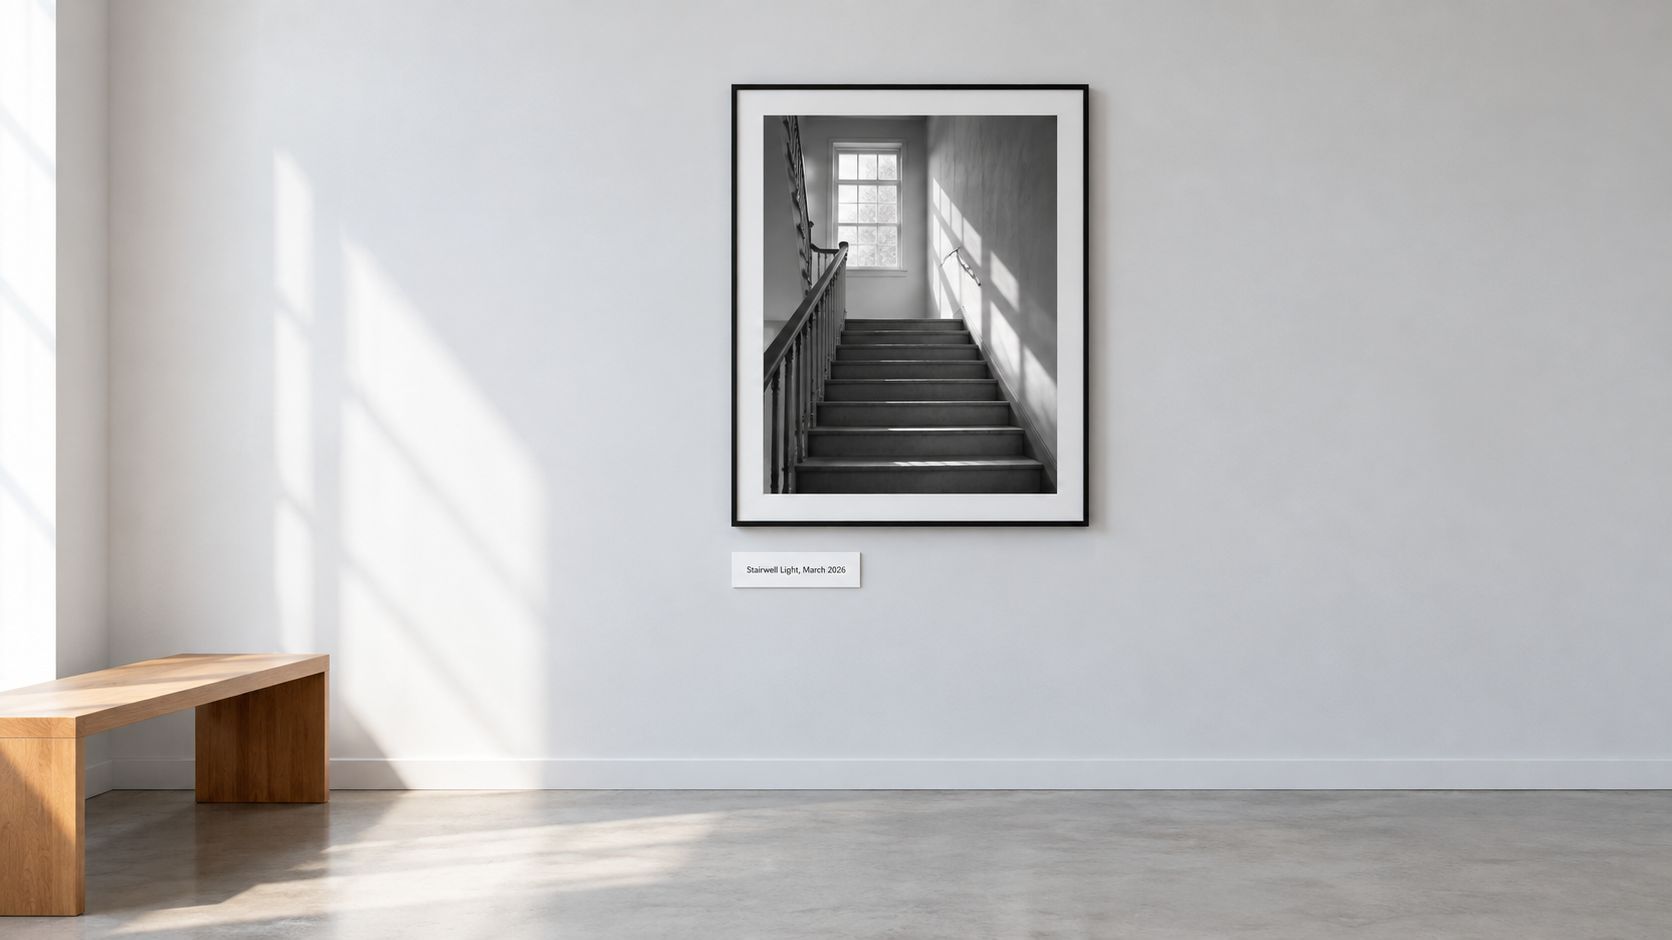
Use title, date, process and purpose, keeping the format consistent. A hypothetical caption could read:
Stairwell Light. Captured during the window-light project. Phone photograph, exposure locked; cropped and converted to black and white. Testing how reflected light separates the handrail from the wall.
In the actual submission, replace the project timing with the capture date. Include technical details only when they explain the work; a complete list of camera settings isn't automatically useful.
Keep labels visually subordinate to images, but readable at normal viewing size. Tiny grey type might look elegant on your own monitor and become effectively invisible in the exported PDF.
Build the statement around decisions
Unless the college specifies otherwise, I would draft a statement of 150–250 words as a working exercise, then edit it to the actual allowance. Organise it around these questions:
- What are you investigating? Identify a question, not merely a genre.
- How did you approach it? Explain the relationship between your method and subject.
- What failed or changed? Describe a specific attempt that altered your thinking.
- What would you investigate next? Show a plausible direction rather than promising to improve everything.
Name a photographer whose approach genuinely affected a decision. Explain what you adapted and how your purpose differs; a list of famous names doesn't demonstrate analysis.
Can a local subject be strong enough? Yes. A bus station you use daily can offer access, observation and a personal stake that an unfamiliar landmark doesn't. Explain who uses the space and what you want viewers to notice.
Write in plain first person. Cut stock declarations of passion and read the statement aloud to catch language you wouldn't naturally use.
A portfolio statement isn't the same document as an application personal statement. The guidance on writing a personal statement for a foundation art course can help you distinguish motivation for study from commentary on a particular body of work.
Using Tutor Feedback Rounds to Revise Your Work
Useful feedback produces a decision. A general request for opinions usually produces preferences, which can leave you rearranging photographs without knowing whether the project has improved.
Schedule reviews around different problems rather than showing the same unfinished file repeatedly. Ask each reviewer a specific question and record what you change afterwards.
Give each review a separate purpose
The direction review belongs after the broad shortlist. Ask which project has the clearest idea and which photographs merely repeat it. A tutor should be able to identify the investigation without reconstructing it from a long verbal explanation.
The sequence review belongs after you've arranged the images. Ask where the viewer loses track of the subject or feels a sudden, unexplained change. Sometimes the answer is a missing contextual image; sometimes it's removing an attractive photograph that interrupts the sequence.
The writing review belongs after the statement draft. Ask whether the text explains decisions that aren't already obvious from the captions. A reviewer should flag unsupported claims as readily as spelling errors.
For more useful wording when exchanging comments, Humantext's guide to peer review offers examples of specific, actionable feedback. Apply that principle to photographs by asking reviewers to identify the frame or transition behind their comment.
Keep control of the revision
Don't accept every suggestion. If a peer wants brighter shadows but darkness is central to the project, test the alternative and compare it against your intention.
Keep a simple revision log:
- Comment received: Record the actual problem the reviewer identified.
- Change tested: Note what you removed, reordered, reshot or rewrote.
- Decision retained: Explain why the tested version worked better, or why you rejected it.
If you're studying independently, ask a teacher and a peer the same question before comparing their responses. Agreement can reveal an unclear passage; disagreement may expose different readings worth considering.
A tutor-led pathway provides another route to regular review. When comparing an online photography course for beginners with independent study or local classes, check how feedback is delivered and whether you can retain successive portfolio versions.
For Level 2 students, use reviews to strengthen investigation and basic control. For Level 3 students, press harder on independent choices, coherence and the reasons behind the final edit.
Export, Check and Submit Two Weeks Early
A portfolio that won't open cannot communicate your ability. Choose the delivery format from the course instructions before adjusting layout or compression.
The University of Nottingham's portfolio guidance specifies a single PDF and a maximum file size of 10 MB for the submission it describes. That illustrates why a polished website isn't a substitute when an institution requests a file.
Choose a format you can test
Portfolio formats compared
| Format | Works best when | Main risk | Check before sending |
|---|---|---|---|
| Single PDF | The college asks for one file, such as Nottingham or Edinburgh | Oversized file or fonts failing on other devices | Under the stated cap; opened on a phone and a slow connection |
| Public website or link | Motion, interactive or large work is better shown on screen, and links are accepted | Broken link, password protection or sign-in requirement | Opened in an incognito browser with no login |
| Printed portfolio | An interview or open day asks for physical work | Colour shift, transit damage and print cost | One A3 proof print checked against the screen |
| PowerPoint or slide deck | The college accepts it, such as London Metropolitan | Compression and unreadable annotations | A PDF copy exported as a backup |
Make an application copy from your archive rather than reducing your originals. Convert display images to sRGB, resize to suitable pixel dimensions and inspect compression at the size reviewers will see.
Where an institution specifies a ppi limit, follow it, but remember that changing ppi metadata alone doesn't necessarily reduce file size. Pixel dimensions and JPEG compression have a more direct effect on a digital submission.
Use consistent page dimensions, restrained typography and generous margins. Give detailed photographs a dominant position; don't shrink them to make room for decorative layouts. Remove unnecessary metadata from application copies, but retain useful authorship records in the archive.
Run a final submission check
- Count the content. Confirm images, pieces and pages against the actual course wording.
- Inspect the exported file. Verify format and size, then open it on a phone, laptop and slow connection. Check annotations at normal viewing size.
- Test public access. Open every submitted link in an incognito browser without logging in or installing software.
- Match text to images. Check captions, project labels and ordering in the exported version, not just the working document.
- Audit AI disclosures. Confirm the relevant labels, explanations and original-file references are present.
- Check the statement. Apply the institution's word allowance and read the final text aloud.
- Save the submission set. Keep the final file, compressed backup and tested share link together with a clear filename.
Aim to finish at least two weeks before the deadline as a planning buffer, not as a universal admissions rule. A short turnaround after a portfolio request may require a different schedule, so have your material ready before applying.
Use that buffer for missing evidence and submission problems, not endless cosmetic changes. If a key project has no explanation of its development, repair that gap before adding another polished photograph.
The Online College of Art & Design (OCAD) offers flexible, tutor-led photography study, including Level 2 and Level 3 pathways, with project feedback and an online portfolio workspace. Visit The Online College of Art & Design (OCAD) to explore a study route that supports developing, reviewing and presenting your work for university applications.