

You arrive at your first life class with a sketchbook, a few pencils and the uncomfortable feeling that everyone else knows exactly what they're doing. The model takes a pose, the room becomes quiet, and your first line lands nowhere near the shoulder. That experience is normal. Life class drawing isn't a test of whether you can produce a perfect figure immediately. It's structured practice in looking, measuring, editing and learning from what you see.
For Level 2 and Level 3 creative students, that practice can become valuable university portfolio evidence. Admissions tutors aren't only looking for polished final images. They want to see observation, experimentation, development and reflective thinking. This guide connects the studio experience to those expectations, from your first warm-up and respectful classroom behaviour to pose selection, affordable repetition and portfolio presentation.
Table of Contents
- Introduction to Life Class Drawing and Why It Still Matters
- What to Expect at Your First Life Drawing Class
- Warm Up Exercises That Build Confidence Quickly
- Understanding Pose Types and How to Draw Them
- Turning Life Drawings Into a University Ready Portfolio
- Your Next Steps for Confident Life Drawing Practice
Introduction to Life Class Drawing and Why It Still Matters
A life class usually involves drawing a clothed or unclothed model who holds a sequence of timed poses while students work from direct observation. The model remains still for the agreed duration, and the tutor may demonstrate ways to analyse proportion, gesture, structure and tone. Unlike drawing from a photograph, you're responding to a real body in a real space, with changing light, depth and viewpoint.
That difference matters. A photograph gives you a fixed image, but a studio asks you to interpret a three-dimensional subject. You need to judge the angle of the ribcage, the weight carried by the legs, the distance between forms and the way light turns across the body. You're not copying a symbol for an arm or torso. You're building an image from relationships.
Life drawing has a long, contested place in British art education. The Royal Academy of Arts was founded in London in 1768, and its Schools opened in January 1769 with a curriculum that included practical tuition such as drawing from life. The Academy's later historical account also describes a 250-year tradition of life drawing in its 2018 exhibition, while noting that the practice continued in teaching and public classes. The Royal Academy's history of life drawing places the subject within that broader educational tradition.
What you're actually learning
A single drawing can reveal several kinds of thinking:
- Observation: You learn to look closely before committing to a mark.
- Proportion: You compare the size and position of one form against another.
- Gesture: You capture movement, balance and weight rather than drawing a stiff outline.
- Tone: You notice where planes turn into light, half-tone and shadow.
- Critical thinking: You decide what to simplify, emphasise, remove or develop.
These skills are useful whether you want to study fine art, illustration, animation, computer arts, fashion or another visual subject. Abertay University's Computer Arts portfolio guidance explicitly identifies life drawing, alongside still life and environmental drawing or painting, as evidence assessors look for. Abertay's e-portfolio guidance also treats traditional media work drawn from life as a concrete submission item.
Nudity, nerves and beginner expectations
Some students feel anxious about drawing a nude model. The model's body is the subject of study, not an invitation to comment on appearance. A professional class treats the model as a working participant, and students are expected to behave respectfully and attentively.
You might also worry that your work looks clumsy. Keep it. A page showing an early gesture beside a more considered drawing can communicate development more than a single overworked image. Universities often value the decisions behind a piece, including failed starts, alternative materials and changes in direction.
Access to life drawing has also been tied to wider questions of status and inclusion. Women were admitted to the Royal Academy Schools' life drawing class in 1893, after decades of campaigning and earlier restrictions that focused their studies mainly on casts, portrait work and drapery. Art UK's history of drawing at the Royal Academy Schools also records later changes, including the replacement of traditional practical teaching with a more theoretical Diploma in Art and Design and the removal of compulsory life drawing, although it remained available as an option.
The important point for a first-time drawer is simple. You don't need to arrive confident. You need to arrive ready to look, practise and reflect.
What to Expect at Your First Life Drawing Class
A well-run class removes much of the uncertainty before the first pose begins. You'll usually find an open working area, a model's platform or chair, easels or drawing boards and seats arranged at different distances. The tutor explains the pose length, when the model will rest and whether students should work in a particular medium.
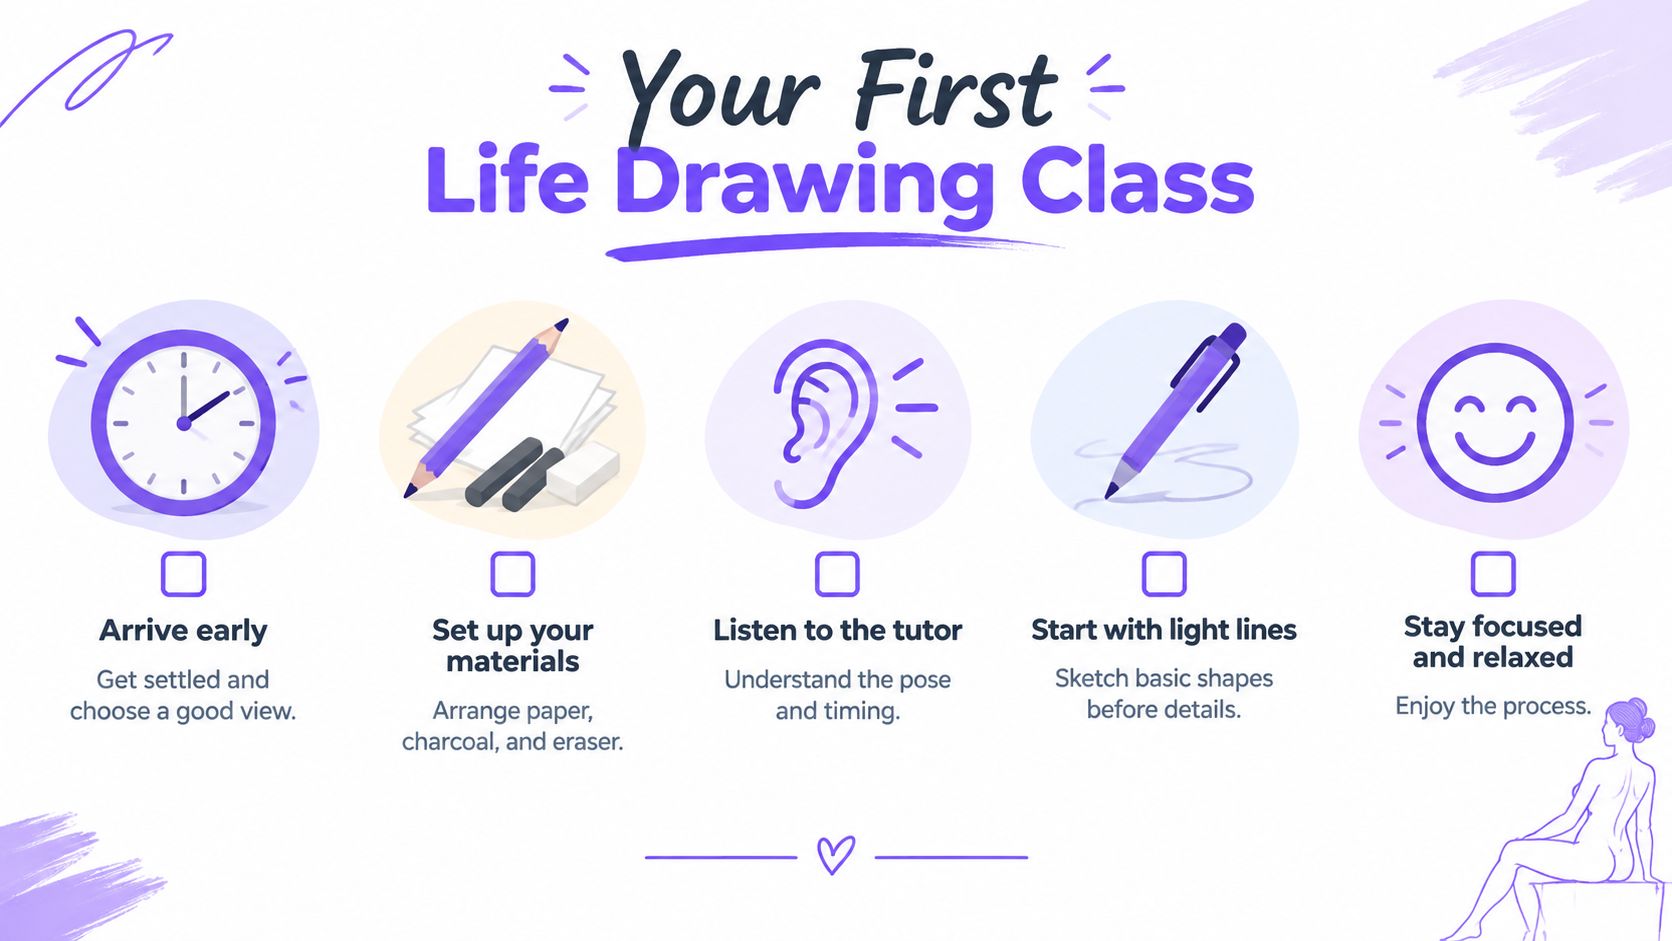
Arrive early enough to choose a comfortable position and settle your materials. A slightly angled view may help you see the whole pose without twisting your body. If you use a wheelchair, need reduced glare or require more space, contact the organiser beforehand rather than waiting until the room is full.
Set up for concentration
You don't need an expensive kit. Bring paper suitable for your chosen medium, a soft pencil or charcoal, a putty eraser, a sharpener and something firm to support the paper. Masking tape can secure loose sheets, while a drawing board or portfolio case gives you a stable surface.
Keep the floor around your chair clear. Place charcoal, pencils and eraser where you can reach them without repeatedly looking away from the model. If you're working digitally, check your battery, stylus and screen brightness before the pose starts.
Follow the studio agreement
The tutor should explain photography rules, model consent and feedback arrangements. Don't photograph or record the model unless the organiser has clearly permitted it and the model has consented. Never share a model's image online without explicit permission.
Conversation should stay low while the model is holding a pose. Avoid comments about the model's body, and don't touch another student's work without asking. If you need to leave, do so and avoid blocking other people's view.
Feedback may happen during the pose, after a demonstration or during a group review. Ask specific questions, such as “Is the pelvis too high?” or “Does the shadow structure read clearly?” You'll receive more useful guidance than asking whether the drawing is good or bad.
Make the environment workable for you
Home-educated learners may be used to working alone and find the shared room distracting. Adult learners may be fitting practice around work or caring responsibilities. SEND learners may need predictable timings, quieter seating, adapted communication or permission to take breaks. These aren't unreasonable requests. They're practical conditions that help you work safely and consistently.
If attending a local class is difficult, online tuition can offer a different route into guided practice. The Online College of Art & Design (OCAD) provides an online studio with units, assignments, video tutorials and portfolio workspace, alongside one-to-one or group tuition through Microsoft Teams for Education. That format can help students who need flexible scheduling, a home-based environment or additional support, although it doesn't replace the specific experience of drawing a live model in the same room.
Before the first mark, use this short checklist:
- Look first: Find the head, ribcage, pelvis and main weight-bearing direction.
- Work lightly: Your opening lines are measurements, not commitments.
- Respect the agreement: Follow the tutor's timing and the model's privacy rules.
- Stay curious: A wrong proportion gives you information for the next attempt.
- Review calmly: Compare what you intended with what appears on the page.
Studio rule: Treat the class as a shared workplace. Your concentration should support the model and the other artists.
Warm Up Exercises That Build Confidence Quickly
Warm-ups prevent the common mistake of beginning with an eye, a hand or a carefully shaded face before the whole figure has been placed. They loosen your hand, sharpen your visual attention and make early errors less precious. The aim isn't to create a finished drawing. It's to train the sequence of looking, deciding and marking.
National Museums Liverpool recommends spending most of a short pose observing rather than marking, analysing the pose before the first line, blocking in the basic pose lightly, stepping back to check proportion and placement, and building tone from the centre outward rather than relying on outline alone. Its life drawing guidance gives a useful process-led foundation.
Begin with movement
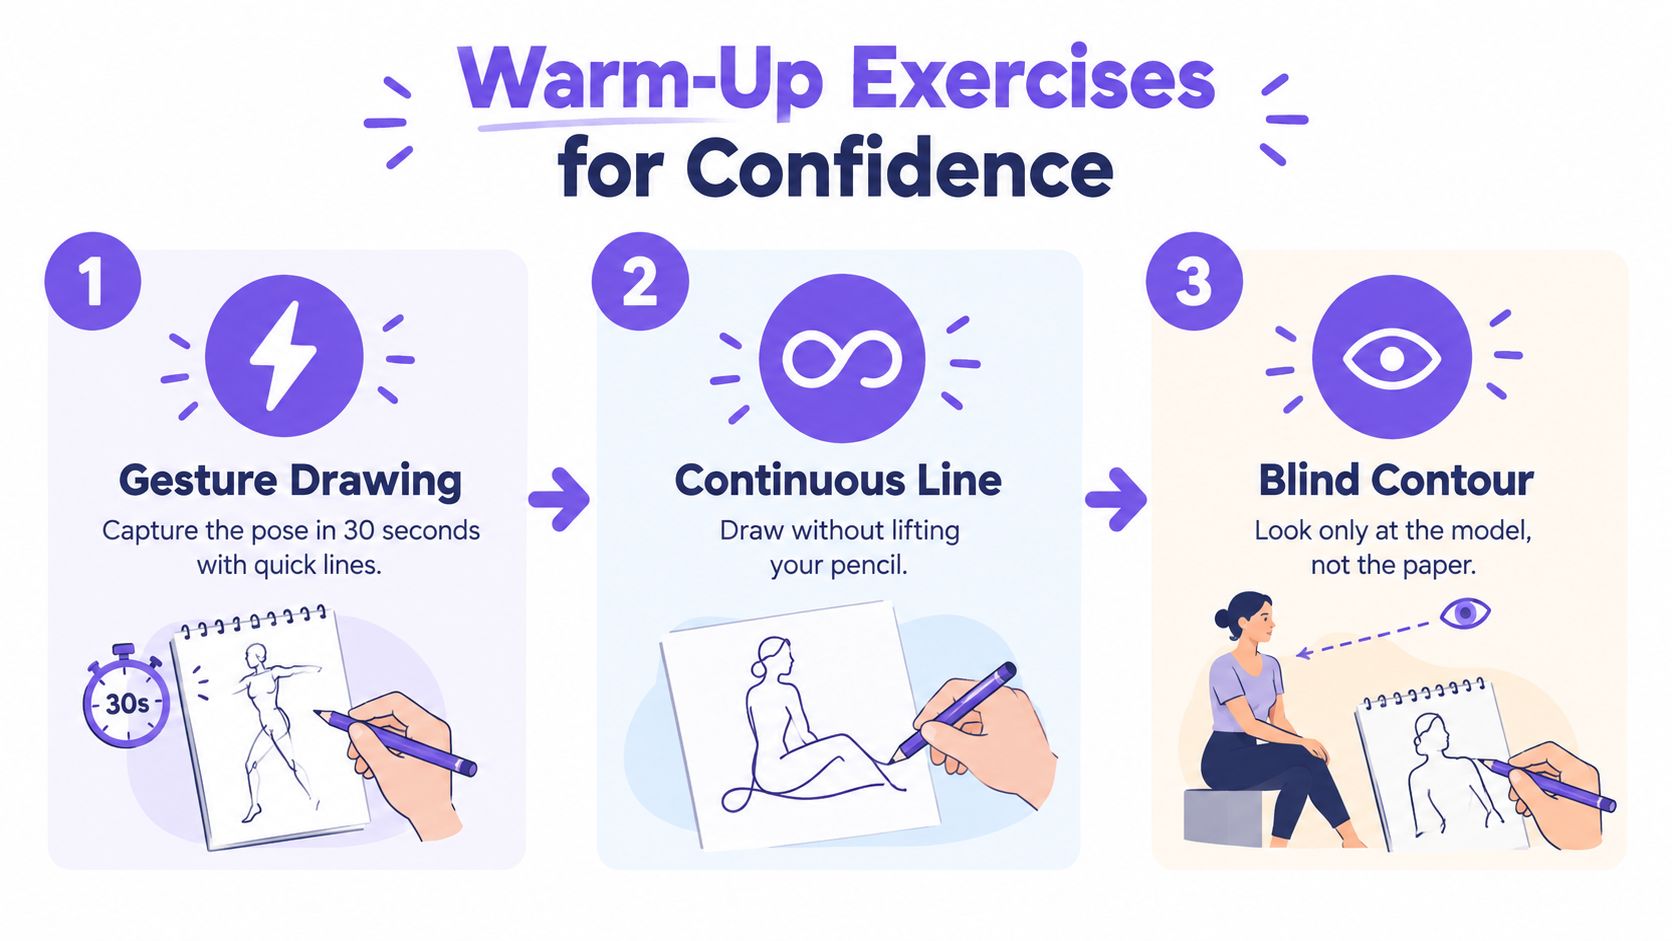
For a 30-second gesture, use a soft pencil, graphite stick or charcoal. Look for the line of action, the direction of the shoulders, the tilt of the pelvis and the main angles of the limbs. Use quick, economical marks, and stop when the time ends even if the drawing feels incomplete.
Self-assess with three questions:
- Does the figure show a clear direction or weight?
- Are the head, ribcage and pelvis connected?
- Do the limbs appear to belong to the same body?
Next, try a continuous-line drawing. Keep your pencil on the paper and let your eye travel slowly around the model's major forms. The result may look awkward, but that awkwardness is useful. It discourages automatic symbols and encourages you to follow actual contours and changes in direction.
Look away from the paper
In a blind contour exercise, look only at the model while your hand records the edge of the form. Don't try to make a presentable image. Notice where the contour changes sharply, where one shape overlaps another and where the body disappears behind itself.
You can practise this exercise with a doll for drawing when a live model isn't available. A poseable figure lets you study joint angles and overlapping forms, but remember that a doll has different proportions and surface qualities from a human model.
For negative space blocking, lightly shade the shapes around the body instead of drawing the body itself. Look at the triangular gap between an arm and torso, the space beneath a bent knee or the shape beside the head. If the negative spaces are positioned accurately, the figure will usually become more convincing without detailed anatomy.
Build tone from the centre outward
Use a broad side of charcoal or a soft pencil to place the main shadow mass. Start near the centre of the form, where the body turns away from the light, then expand gradually towards the edges. This keeps the drawing connected to volume instead of turning every dark patch into a separate outline.
A useful progression is:
- First pass: Place the figure and the largest shadow family.
- Second pass: Compare the torso, limbs and head for proportion.
- Third pass: Strengthen selected edges and soften others.
- Final check: Remove distracting marks and preserve active areas.
The following video can help you observe how a tutor breaks down figure drawing decisions before you try the exercises yourself.
Spend more time asking “What am I seeing?” than asking “How do I draw a body?”
Understanding Pose Types and How to Draw Them
Pose length changes the job of the drawing. A short pose asks you to identify the essential movement before time runs out. A medium pose gives you room to clarify structure and proportion. A long pose supports sustained observation, tonal development and deliberate material choices.
| Pose Type | Purpose and Focus | How to Approach It |
|---|---|---|
| Short pose | Gesture, balance, rhythm and overall proportion | Use broad, light marks. Find the line of action, major masses and weight-bearing limbs before adding any detail. |
| Medium pose | Structure, anatomy, overlap and measured proportion | Begin with a light construction. Check the relationship between the ribcage, pelvis, joints and extremities, then develop selected tonal areas. |
| Long pose | Sustained tone, composition, surface and material exploration | Establish placement carefully, revisit proportions and build the drawing in stages. Test charcoal, graphite, ink or mixed media without losing the underlying structure. |
A common beginner error is treating every pose as a small finished illustration. That approach makes short poses stressful and long poses underdeveloped. Match your materials to the available time. Newsprint or inexpensive cartridge paper suits energetic studies, while heavier paper gives you more control for charcoal, ink washes or pastel.
Read the sequence as a curriculum
Tutors may begin with clothed modelling before progressing to nude modelling. The UK intervention study described by AccessArt used three two-hour sessions over seven weeks, beginning with a staged progression from clothed to nude modelling in the first session. It then introduced mixed-material exercises, fast-drawing drills and longer poses. The AccessArt research account reports that 71% of participants said increasing session frequency to at least fortnightly or weekly would improve outcomes.
That finding offers a practical lesson for students building a portfolio. A single event can produce interesting drawings, but regular repetition gives you comparable pages. You can see whether your proportion, placement and tonal decisions are changing.
Choose a different question for each pose
For a short pose, ask, “Where is the energy going?” For a medium pose, ask, “How are the large forms connected?” For a long pose, ask, “How can my material and composition communicate the structure and atmosphere of this body?”
Keep your construction lines visible when they show thinking. If you need a clearer guide to checking relationships across the figure, use this resource on drawing proportions of the body. Don't measure mechanically at the expense of observation. Proportion is a relationship between parts, not a formula that guarantees a living pose.
Turning Life Drawings Into a University Ready Portfolio
A portfolio becomes stronger when it shows decisions, not just outcomes. Photograph a life drawing before it gets damaged, record the medium and date, and keep preparatory studies beside more resolved work. A page of gestures can explain how you searched for movement, while a longer drawing can show how you developed structure and tone.
Edinburgh requires a digital portfolio for every Art and Design degree application, and says an application is unsuccessful if no portfolio is submitted. Its guidance specifies one PDF of up to 20 pages, with a maximum file size of 50MB, and asks applicants to include initial research, investigative work, idea development, finished pieces and short reflective text about process and critical thinking. Edinburgh's digital portfolio requirements show why process-led life class pages deserve careful organisation.
Select evidence rather than filling pages
Abertay's Computer Arts guidance sets a maximum of 10 pieces and identifies life drawing as assessable evidence. Dundee's Fine Art guidance allows one PDF of up to 15 pages, with a maximum file size of 50MB, and requires a contents page. Each page should include high-quality images and a brief description stating the medium, size and date. Dundee's Fine Art portfolio guidance gives you a clear model for labelling work.
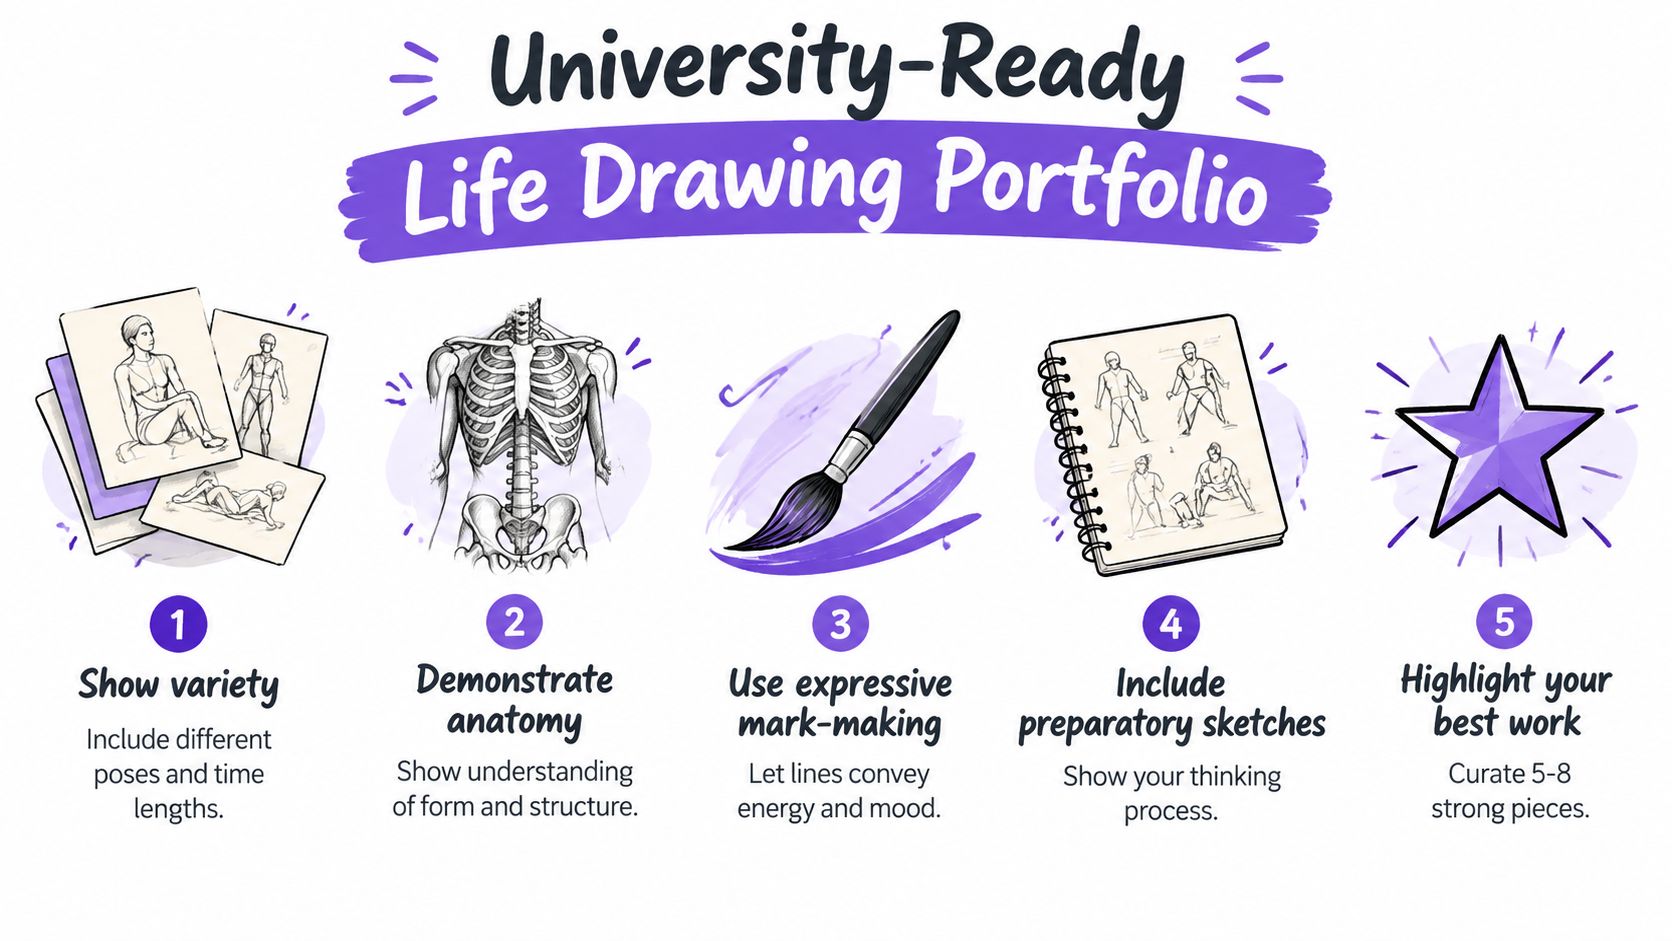
These requirements differ, so always check the course you're applying for. A strong selection might include:
- Fast investigations: Gesture drawings that show movement and immediate observation.
- Material experiments: Charcoal, graphite, ink, pastel or combined media used with a clear purpose.
- A developed study: One longer drawing where you've considered composition, tone and edge control.
- Reflection: Short notes explaining what changed, what failed and what you'd test next.
Don't include every page from every class. Curate work that demonstrates range and shows that you can identify your own priorities. A rough study can earn its place if it reveals an important decision, but repetitive pages usually weaken the sequence.
Make the PDF easy to assess
Photograph work in even light, keep the camera parallel to the paper and avoid strong shadows across the surface. Crop out unnecessary background, but don't alter the drawing's colour or contrast so heavily that the original marks become misleading. Add consistent labels such as “charcoal on cartridge paper, paper size, date”.
For editing and checking a portfolio PDF, browser-based PDF tools can help students combine pages, review file size and make basic document adjustments without installing specialist software. Use those tools for presentation, not to disguise weak documentation.
If you're developing dry-media work, soft pastel drawing can broaden your portfolio's material range. Explain why the medium suits the pose, whether you wanted a powdery tonal field, sharper linear accents or a contrast between controlled and expressive marks.
Build consistency without overspending
Access remains a real barrier for students who need regular practice. Current UK listings report paid drop-in sessions averaging £261.13 and block courses averaging £473, while only 2 of 87 upcoming sessions were free. Meetup Art's UK life drawing statistics highlights an affordability problem that occasional class listings often fail to address.
You can reduce the pressure by combining occasional in-person sessions with inexpensive home studies. Use a poseable doll, your own clothed poses, household objects arranged as figure studies, online demonstrations and timed drawing prompts. These alternatives don't reproduce every quality of a live model, but they can help you maintain the habit between classes.
For Level 2 and Level 3 students, sustained practice is also linked to progression planning. A parliamentary evidence paper reports a 72.4% Higher Education acceptance rate for Extended Diploma learners in 2020, while another college progression study reported an average immediate progression rate of 39% across nine Level 3 cohorts. The parliamentary evidence paper supports a practical conclusion: portfolio planning shouldn't be left until the application deadline.
Your Next Steps for Confident Life Drawing Practice
Turn life drawing into a repeatable routine rather than an occasional burst of enthusiasm. Your practice doesn't need to depend entirely on finding a full studio session every week. It needs a clear cycle of drawing, reviewing, recording and trying again.
Use this simple weekly pattern:
- One observation session: Attend a life class if you can, or work from a poseable doll, a permitted reference or your own arranged pose.
- One short-drill session: Make gesture, continuous-line and negative-space studies using inexpensive paper.
- One review session: Compare placement, proportion, structure and tone. Write a few sentences about the decision you'd change next time.
- One portfolio action: Photograph a drawing, label it accurately or place it into a working PDF folder.
Keep a progress log with the date, pose length, medium and one specific observation. “Improve anatomy” is too broad. “The pelvis drifted left because I placed the feet before checking the torso” gives you a useful target.
Ask a tutor for feedback on one problem at a time. You might submit a gesture page and a longer study together, then ask whether the second drawing preserves the movement found in the first. That comparison creates a stronger conversation than asking for a general judgement.
Home-educated students, adult returners and international learners can all use this approach. Flexible online study, live Microsoft Teams tuition and portfolio feedback can provide structure when local classes, travel or fixed timetables don't work. Students who need adapted pacing can also look for SEND-specific support rather than forcing themselves into a format that makes regular practice harder.
Start tomorrow with a short pose and one sheet of paper. Mark the time, keep the first lines light and write down what you noticed. That small record is the beginning of a portfolio that shows not only what you can draw, but how you learn.
The Online College of Art & Design (OCAD) offers flexible, tutor-led art and design courses, online studio assignments, portfolio workspace and one-to-one or group tuition through Microsoft Teams for Education. Visit The Online College of Art & Design (OCAD) to explore Level 2, Level 3 and foundation pathways that can help you develop life class drawing practice into university-ready portfolio evidence.